Overview
CaseGuard’s Redaction Pool feature is a place for you and your team to work together to complete any video, audio, document, and image project. This feature is especially useful for agencies with large redaction teams who all need to work together at the same time. Users can also assign file priority to ensure the important files are done first.
One use case for this feature would be a team needing to work on a large confidential FIOA request together in one secure location. With the Redaction Pool, the file will never leave the security of CaseGuard and each user can work together on all the files. If a specific user needs to work on a certain file you can also leave names in the notes of the job to assign work.
Follow these steps to use the Redaction Pool!
- Follow the steps to Setup the Redaction Pool
- To access the Redaction Pool, click the
 “Redaction Pool” Icon at the top of the screen in the Shortcut bar.
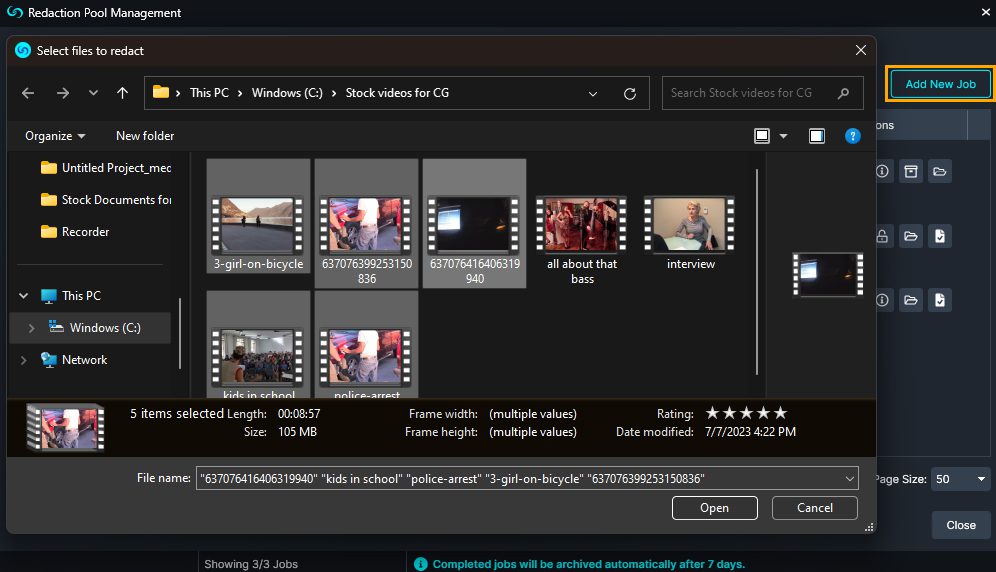
- To start, click “Add New Job” and the Windows File Explorer will open.

- Select files to add to your Redaction Pool.
- You can add any type of file to the Redaction Pool as long as it is supported by CaseGuard. To see supported file types please see our Supported Media Formats.
- After selecting your file(s), the Job Information window will pop up. Add File Information.
- Add the ID/Case Number of the file. If you have multiple files for one case, add the same case number to easily search every file related to the case.
- Assign your file a priority, other users can see this priority and decide which files need to be worked on first.
- Add any notes about the file, one great use for the notes is to write the name of the user that needs to review or finish this file.
- All of the Job information can be edited later.
- Click “Save,” your file will appear in the Redaction Pool Management window.

- The Redaction Pool Management window will show the Case number, Priority, status, and any notes related to the added job.

- Click the “Pick Up”
 Icon to begin working on the job.
- You can also click the “View/Edit”
 icon to edit the Job information.
- Click the “Open Project Folder”
 Icon to open the folder containing the job.
- Click the “Mark Job as complete”
 Icon to complete the job.

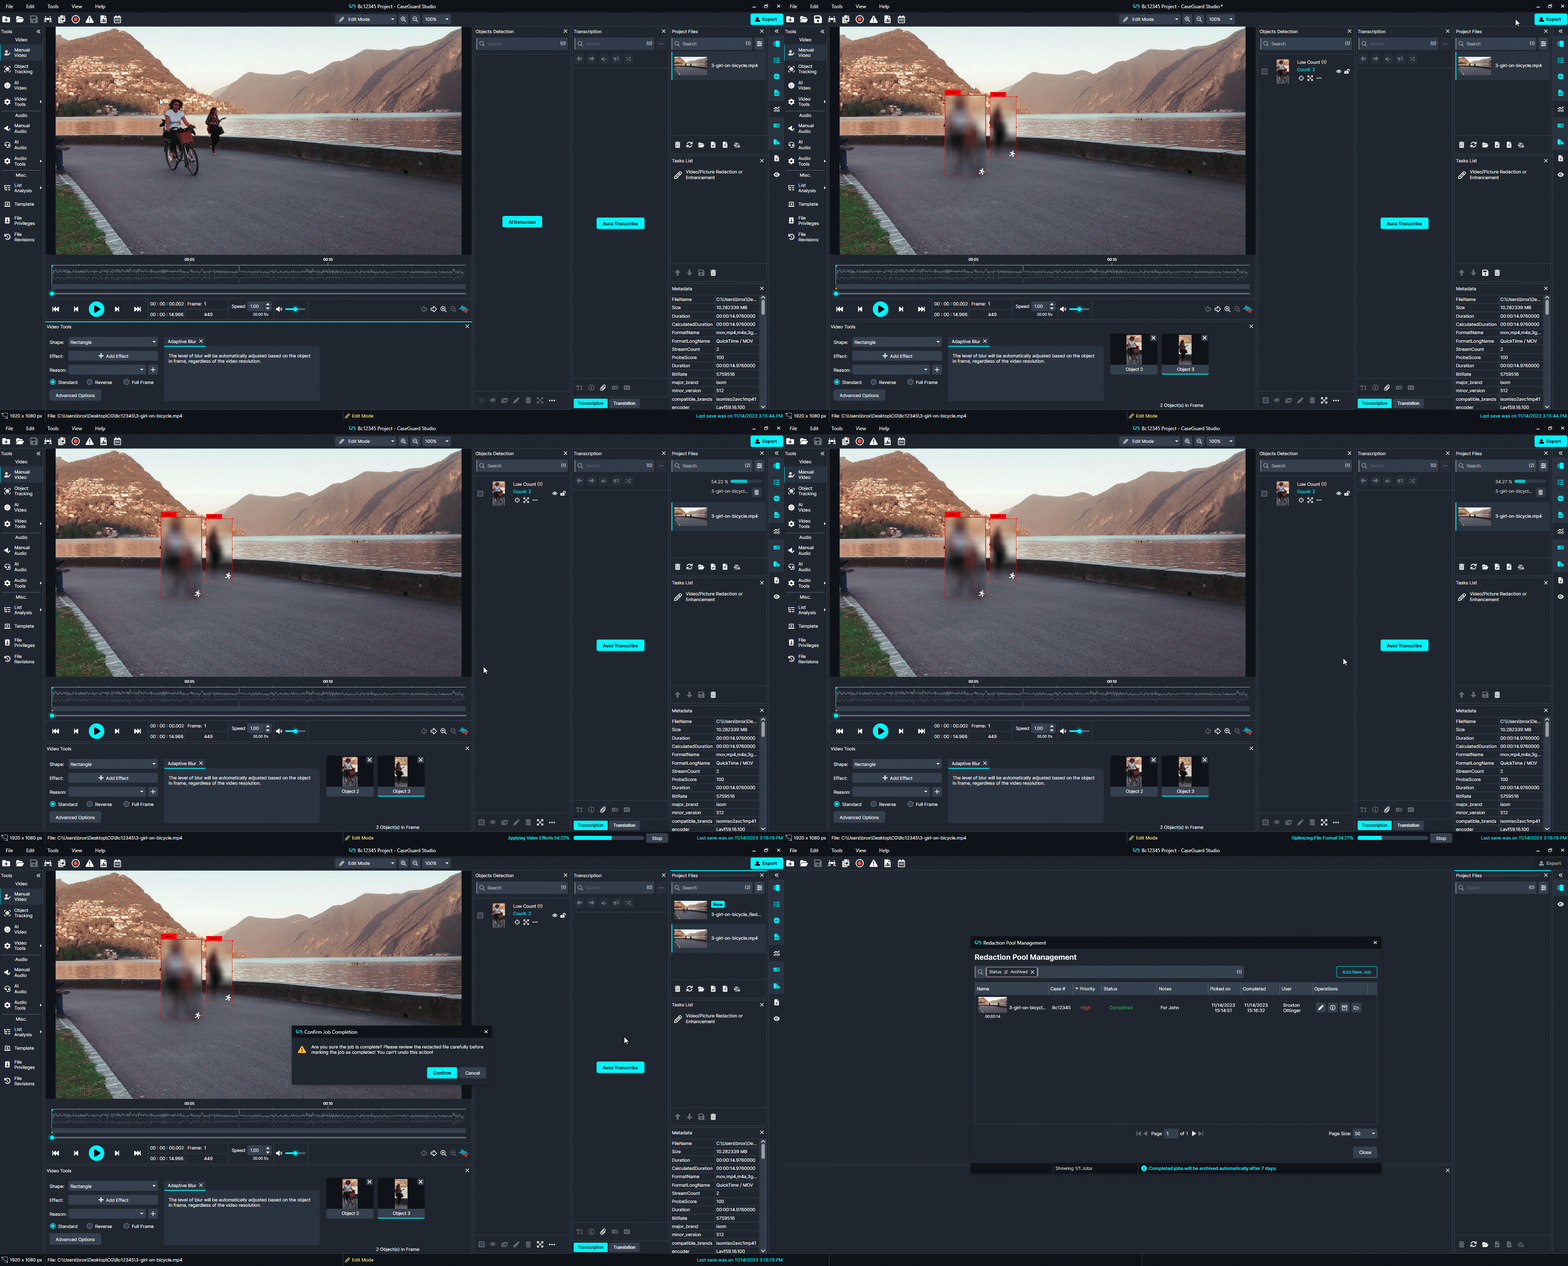
- The job you picked up will open within CaseGuard Studio, you can now edit or redact the file.
- Upon completing your redactions or pausing work, you can check your work back into the Redaction Pool.
- Click the “Mark Job as complete”
 icon in the project file panel to complete the job you working on. You must export the file with your redactions before marking the job complete.
- Click the “Check in file”

 icon in the project file panel to mark the job as partially complete letting you or anyone else know the job still needs edits.
- The job will now be checked back into the Redaction Pool. You or any other user can pick the job back up by clicking the “Pick up”

 Icon.
Icon.
- If you click the “Check in file”

 icon, the job status will now be “Partially completed” in the Redaction Pool.
- If you click the “Mark Job as complete”


 icon, the status will be “Completed” and the job will automatically be archived after 7 days. You can change the amount of days it takes before a job is archived in the Redaction Pool settings.
- You can also archive the files right away by clicking the “Archive”

 Icon. If a file is archived on accident you can always recover it by removing the Archive status in the search bar and clicking “Restore” on the file you would like un-archive.
- Search for any current or previous jobs by searching for the name in the Redaction Pool Management search bar.
- The redaction pool will also display when the file was picked up, and completed and the last User that worked on it.


The Redacted version of the file will be located in the Redaction Pool Output folder. From the Redaction Pool Output folder, the files can be copied and sent to any of the needed requestors.