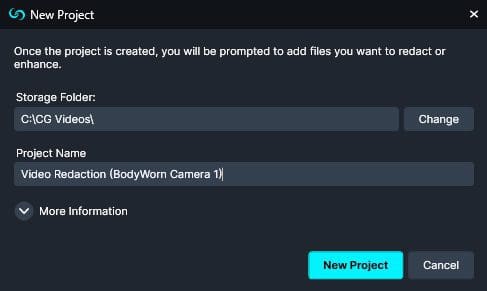
Create a Project:
Within CaseGuard Studio, Create a new project in three different ways:
or,
- Click “File,” then “New Project” within the Menu Bar.
or,
- Click anywhere on the CaseGuard Studio screen and then press (Ctrl + N) on your keyboard. This shortcut will initiate the process of setting up a new project.

How to Add Files to your Project:
Once you have created a project in CaseGuard, you can begin selecting the media or document files you wish to import. Depending on their original format, CaseGuard may automatically convert your media to a standard format for compatibility and ease of editing. There are several methods to add your files to CaseGuard, allowing for flexibility and convenience in managing your project’s content:
- Add Files by selecting them within the File Explorer, and then clicking “Open”
or,
- Click on the files and then drag them directly into CaseGuard using your mouse.
or,

Before uploading files to CaseGuard, it’s important to note that your original files cannot be renamed once they are uploaded. Therefore, it is recommended that you name your files appropriately before uploading them to ensure easy identification and organization. However, you do have the flexibility to rename any files that you redact or enhance within the system. For guidance on file naming best practices, you can refer to the section titled ‘Prepare Files for Import,’ which provides detailed instructions on how to effectively organize and name your files for optimal use in CaseGuard.
- Files may be automatically converted to a standard format. When this process is done, the converted file will appear in the Project Files list.
- If you have uploaded multiple files within your project, you can switch between these files by clicking on the appropriate thumbnail within the Project Files panel.
- Moreover, you can click Save
 within the Task List to ensure that you do not lose any work when working on multiple files in the system.
- If you want to delete a particular file from your project, click Delete
 within the Project Files panel.
- Learn how to change CaseGuard’s settings to add uncommon file types.
- Learn practical tips on how to configure your Export Settings using CaseGuard’s setting
Where Can I access my added Files?