Overview
The Find & Redact feature allows users to Search and Redact specific words, phrases, patterns, and PII (personally identifiable information) from any number of documents.
Users can create a list of targeted words based on their redaction needs using the “Analytics” feature in CaseGuard Studio. Once the list is created, they can apply it to any document in the future.
The Bulk Find & Redact will let you apply your saved list of Analytics on unlimited documents- all at once!
This feature is particularly useful for organizations that handle sensitive information such as healthcare, law enforcement, and legal firms. If your Organization has 300 medical forms, and 500 applications to redact PII from, you can apply an “Analytics list” which includes “Emails, Phone Numbers”, and “Names” within the Bulk Find & Redact feature. The system will automatically search and redact these three types of PII within all 800 forms- without any manual work.
This feature is a great asset for anyone seeking to redact a large volume of documents at once, as it significantly streamlines the entire redaction process.
Follow the steps to Redact Documents using the Find & Redact feature!
- Open CaseGuard Studio on your machine. You can create a new project, open an existing project, or select “Bulk Redaction” from the Get Started Window to begin.
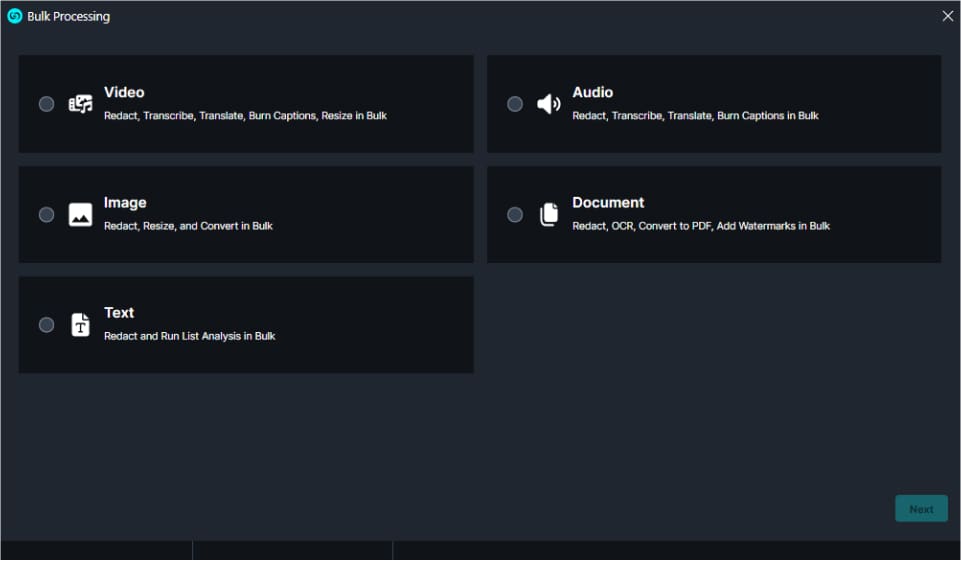
- Select the Bulk Processing
 icon from the Shortcuts Bar.
- Select “Documents” from the menu.

- Select “Next,” and you will be presented with various processes that can be performed on documents in bulk, including optical character recognition (OCR), AI image analysis, and template redaction.
- Select “List analytics.”

- Select a previously made Analytics list or click the “create a new one” button to create a new list.
- Click “Next

- Click “Next” and begin to add your files to CaseGuard Studio. There is no limit to the number of files that can be added to Bulk Processing, making it the perfect tool for efficiently accomplishing large tasks.

- Click “Next” one last time then in the bottom-right corner of the Bulk Processing “Summary” window select “Start” to begin processing files.
- The CaseGuard Scheduled Tasks window will appear. Each document added to the Bulk Redaction window will be processed, and their progress will be displayed.
- Files processed will then be added to the Project Files panel in the upper-right corner of the screen.