Overview
Redacting sensitive information from a large number of images can be a tedious and time-consuming task. CaseGuard Studio’s “Copy Effects to” manual feature is a game-changer for users who require consistent redactions across standardized images.
With this feature, you can easily replicate redactions from one image to all other images in your Album. Without the use of any Artificial Intelligence, “Copy Effects to” saves users repeated efforts from manually recreating the same redaction box over images with consistent redaction needs. After applying your first manual redaction box, you can copy it onto the entire Album with just a few clicks.
For example, if you need to redact Personal Identifiable Information (PII) such as a Name, Address, or a company logo from a set of 100 images, you can apply a redaction box over that information in one image, then apply “Copy Effect to” on all other images in the Album. This ensures the same effect, shape, color, and/or redaction reason is applied to all redactions in the following images. If you are aiming for professional redactions without effort, this feature is a great start!
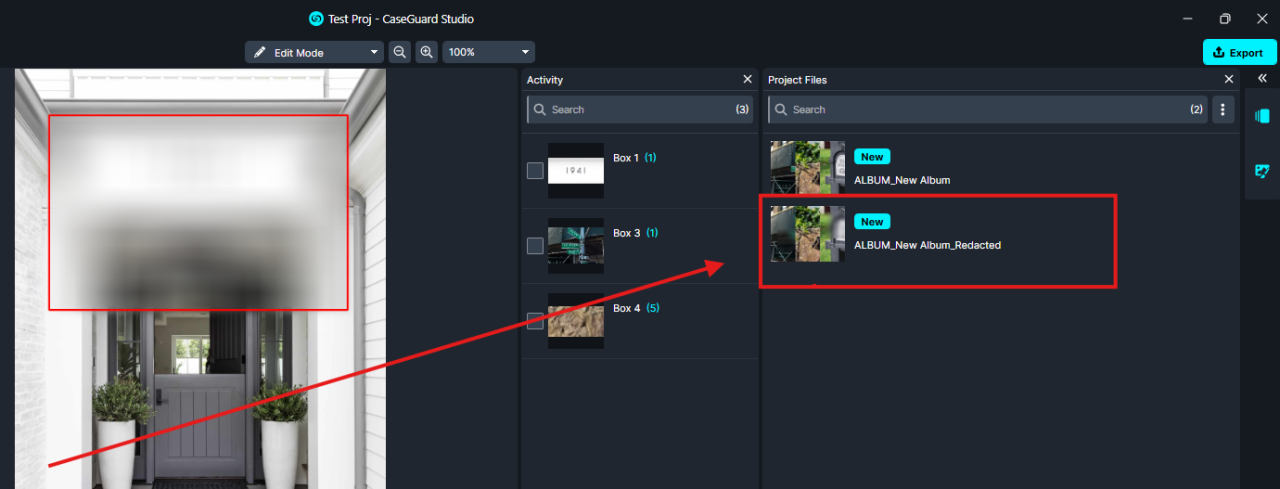
After applying all redactions, you can export the Album. The exported file appears as a slideshow in the Project Files Panel. Additionally, you can locate images as individual files on your computer within the “Redacted Album” folder in your projects directory. This added convenience ensures a quick review and post-redaction process for the user.
Follow the Steps to Apply “Copy Effects to” on all Images in an Album!
- Open or create your project in CaseGuard Studio.
- Add your images to the project. (Note: Adding more than three images at once will automatically create an album.)
- Click the Manual Image button on the left toolbar. Draw a redaction box over the object you want to redact.
- Right-click on the redaction box and select “Copy Effects to… “
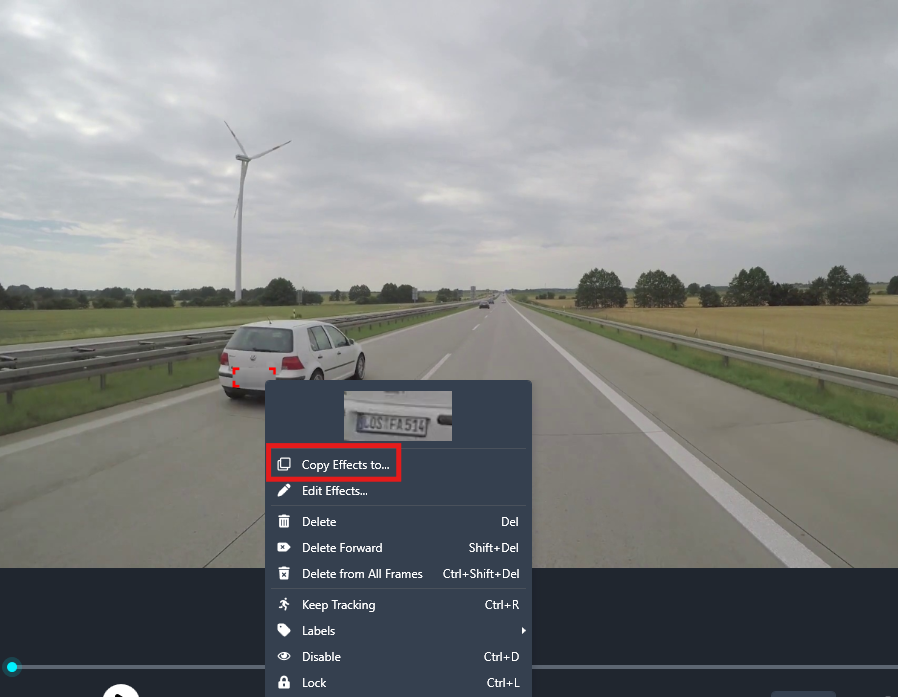
- The “Copy Effects” window will appear. You can apply the effect to the entire file or to a part of it.
If you don’t want to apply the effect to the whole file, you can use the “Selected Range” option.
- Through this option, you can select the “Metric” as Frame or Time, and then enter the appropriate “Start” and “End” fields.
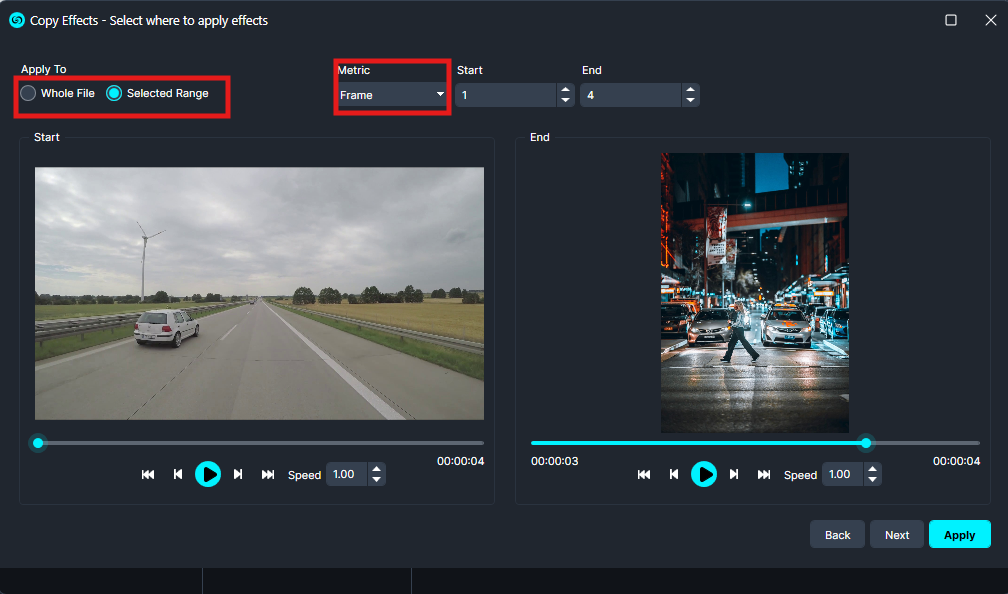
- Click “Apply” and the redaction box will be copied to the selected range of images in the Album.
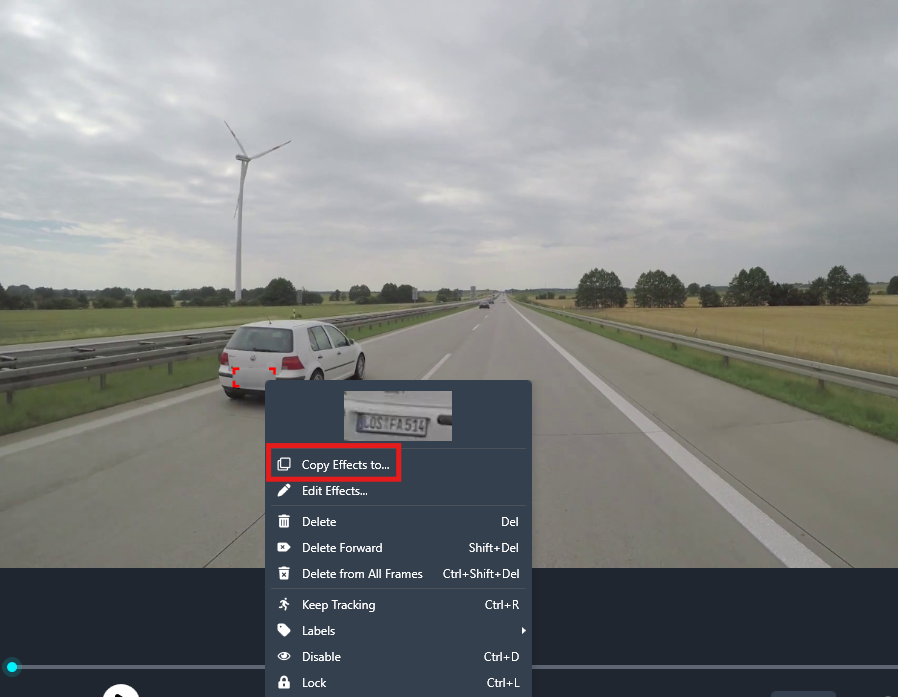
- Use the Left Arrow Key on your keyboard or
 icon from the player to browse your images one by one. Adjust the redaction box on any image if needed.
- Once you have applied redaction to the entire Album, click
 “Export” to process the file.
Conclusion
CaseGuard Studio’s “Copy Effects to” feature simplifies large-scale manual redaction projects by allowing consistent redactions across multiple images with minimal effort. It ensures precise, uniform results while saving time, and keeps all images organized within a single album. Once complete, users can export their redacted Album for review or final use, streamlining the post-redaction workflow.
Was this article helpful to you?
No
Yes
2