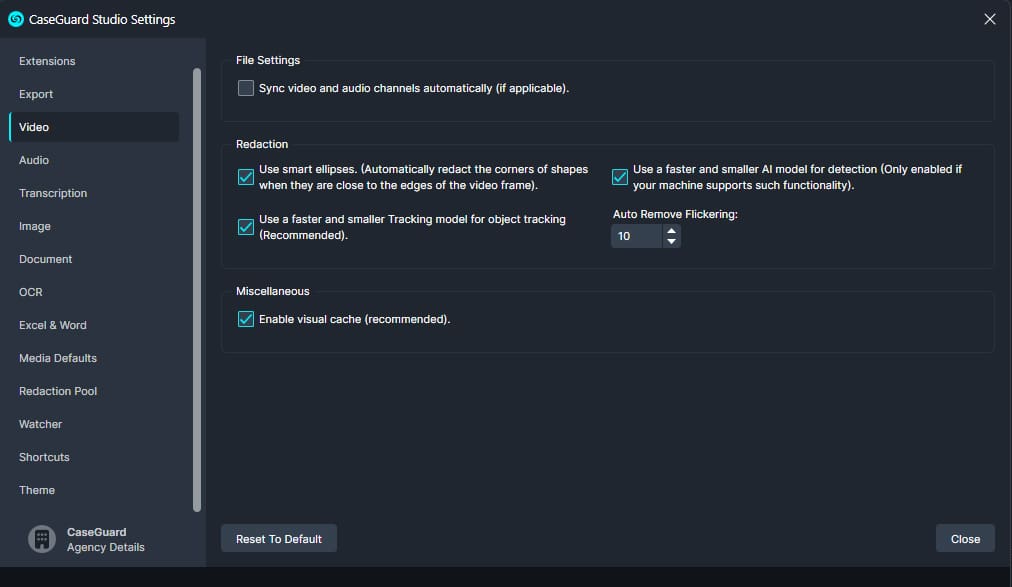
To access CaseGuard Studio’s Video Settings, select “Tools” from the top of CaseGuard then click “Settings.” The CaseGuard Studio Settings popup contains 14 tabs, one of which is the “Video” tab.
These video settings allow you to fine-tune the software to match the unique needs of you or your agency.

Enable Visual Cache
Sync Video and Audio Channels automatically
- Enable this option to automatically sync video and audio channels.
Use Smart Ellipses
- Activate the “Use smart ellipses” option to automatically redact shapes near the video edges.
Use a faster and smaller AI Model for detection
- Accelerate your AI video redacting process with the “Use a faster and smaller AI model” option.
Use a faster and smaller Tracking model for object tracking
- Accelerate your Obect Tracking video redacting process with the “Use a faster and smaller Tracking model” option.
Auto Remove Flickering
- Select this option to have CaseGuard auto-fill any missed frames when using the Video AI Detection.
Select a graphics card to use for AI Detection
- From the dropdown menu, select the graphics card you want to use for AI Detection, ensuring optimal performance for your video recordings. CaseGuard recommends using a dedicated graphics card.