Overview
Do you have documents with file names you need to make anonymous? Try using the Anonymize Documents feature in CaseGuard!
The Anonymize Documents function creates a random filename to replace a file’s current name. Additionally, you can add a prefix to each, making it easier to organize the randomized filenames.
When used within the Bulk Processing, the Anonymize Documents function allows the user to Anonymize unlimited documents easily in one operation.
The Bulk Anonymize Documents is particularly useful in situations where you need to eliminate any potential unconscious bias when dealing with a large number of documents. For example, for recruiters this feature could be useful to randomize the names of incoming resumes by replacing them with a number. Additionally, you can use the Bulk Anonymize Documents to add a prefix to organize resumes for different jobs! Each document would have a randomized name and easily be identified as a resume.
Follow the steps to Anonymize file names with the Bulk Anonymization feature!
- Open CaseGuard Studio on your machine. You can create a new project, open an existing project, or select “Bulk Redaction” from the Get Started Window to begin.
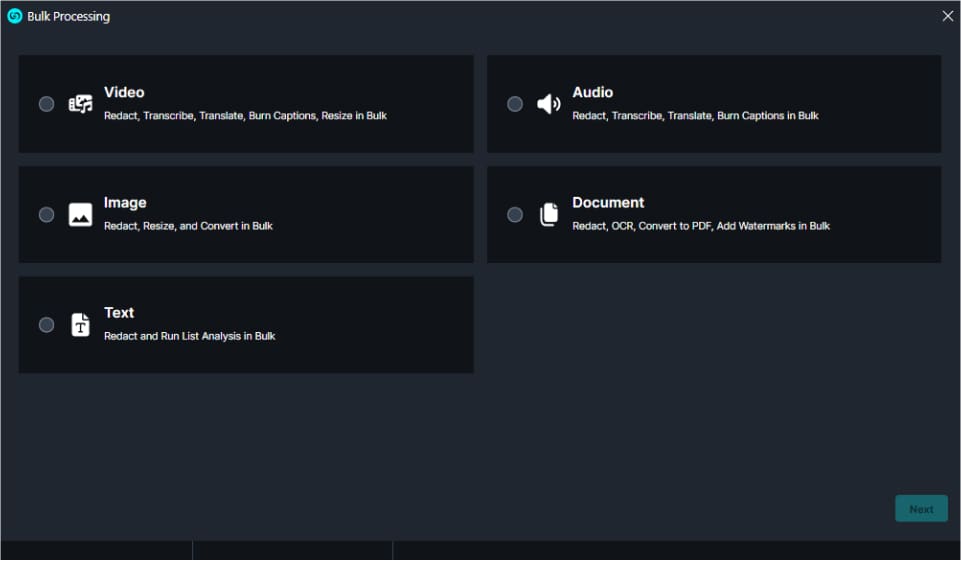
- Select the Bulk Processing
 icon from the Shortcuts Bar.
- Select “Documents” from the menu.

- Select “Next,” and you will be presented with various processes that can be performed on documents in bulk, including optical character recognition (OCR), AI image analysis, and template redaction.
- Select “Anonymize Documents.”

- Click “Next” and the Anonymize Documents window will open, choose a prefix that will be added to your anonymized file names. The prefix allows you to differentiate between sets of anonymized files, for example, one set of resumes could be “secretary-resumes-July-2023” and another could be “front-end-developer-resumes-August-2023.”
- Check the box to add anonymized file names to the top of each document for easier recognition.

- Click “Next” and begin to add your files to CaseGuard Studio. There is no limit to the number of files that can be added to Bulk Processing, making it the perfect tool for efficiently accomplishing large tasks.

- Then select “Next” and then “Start” to begin the redaction process.
- As your files are redacted, they will appear in the Project Files Panel in the top right of your workspace.
- The Anonymization Report can be found by clicking the reports icon
 in the Shortcuts Bar. This report will match the original file name with the anonymized file name, allowing you to match the resume versions correctly.
Let’s See it in Action!
![Video Thumbnail]()
Play Video