Overview
CaseGuard’s Redaction Pool is a collaborative feature where you and your team can collaborate and review each other’s work. This article covers the steps to quickly set up your Redaction Pool so you and your team can begin Redacting together!
The Redaction Pool feature creates two folders, one folder that can be used to supply files for your staff or team to automatically pull from for work, and another folder where completed work resides for review and distribution. The Redaction Pool feature gets rid of the concept of having to create individual projects for all of your redaction work. Now, everyone has a pool of files they can collectively work on.
Follow these steps to set up the redaction pool!
To begin working in the Redaction Pool you must first set up the pool location and export location.
- Click “Tools” at the top of CaseGuard ->then click “Settings” -> Then, from the Settings window click “Redaction Pool.”
- In the settings, you can also choose to have your pool include an Export Log of all edits made to the file that will be located in the Print Reports.
- Add a time to archive completed jobs from the Redaction Pool.
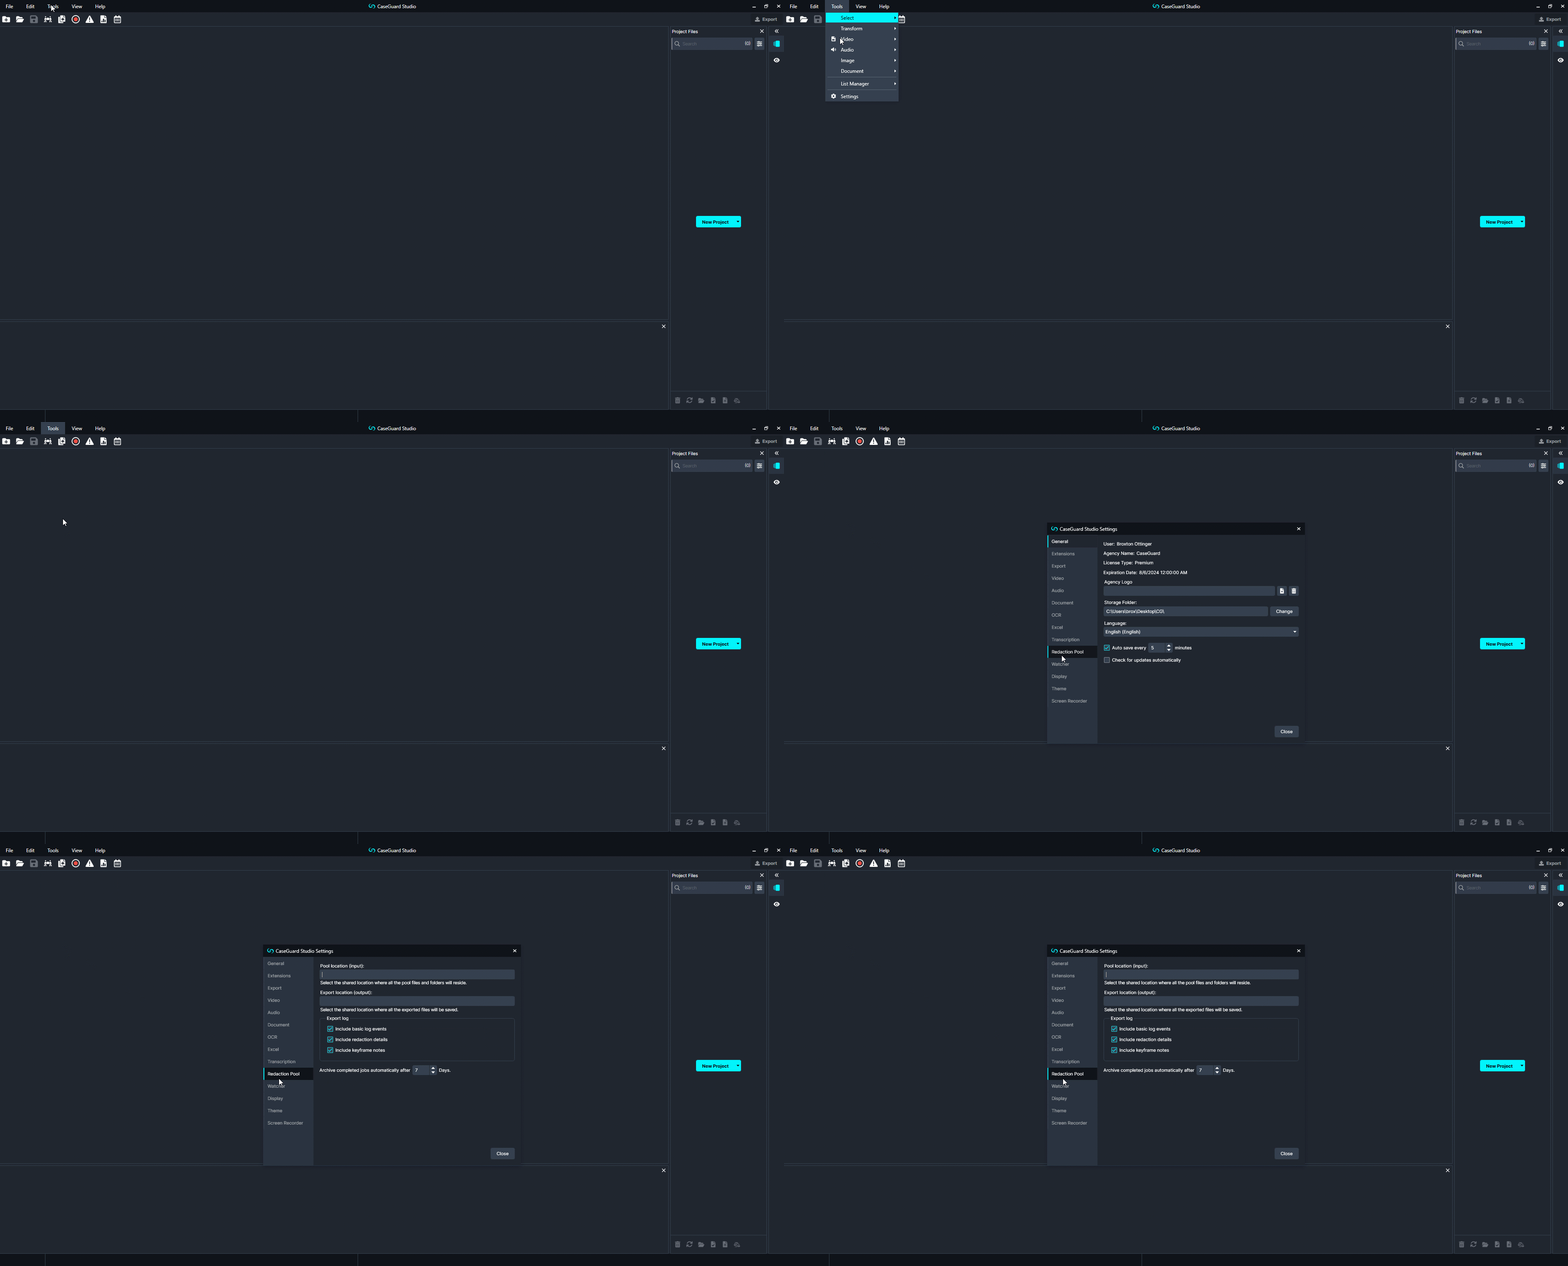
- Leave the CaseGuard Settings open and then open the Windows File Explorer.
- To open the Windows File Explorer you can search for it in the Windows search bar or open it from your Windows toolbar.
- Next, decide where you would like your Pool Location (Input) and Export Location (output) to be saved.
- Pool Location Input is the folder where the files that need redaction will exist. Once created, it is important not to add files directly into this folder. All files should be added inside CaseGuard.
- Pool Location Output is the folder that will contain the redacted files upon export. Once redacted, you can copy the files from this folder and move them anywhere on your machine.
- Pool Input and Export locations can be saved anywhere as long as your User account has access to the saved locations.
- When file location is selected, right-click in the Windows Files Explorer and click “New” -> “Folder.” Create two folders, name the first folder Redaction Pool Input and the second Redaction Pool Output.
- Saving the redaction Pool Location (Input) and Export Location (Output) folders to a network drive will allow you to share them without having to be on the same network as the other redaction pool users.
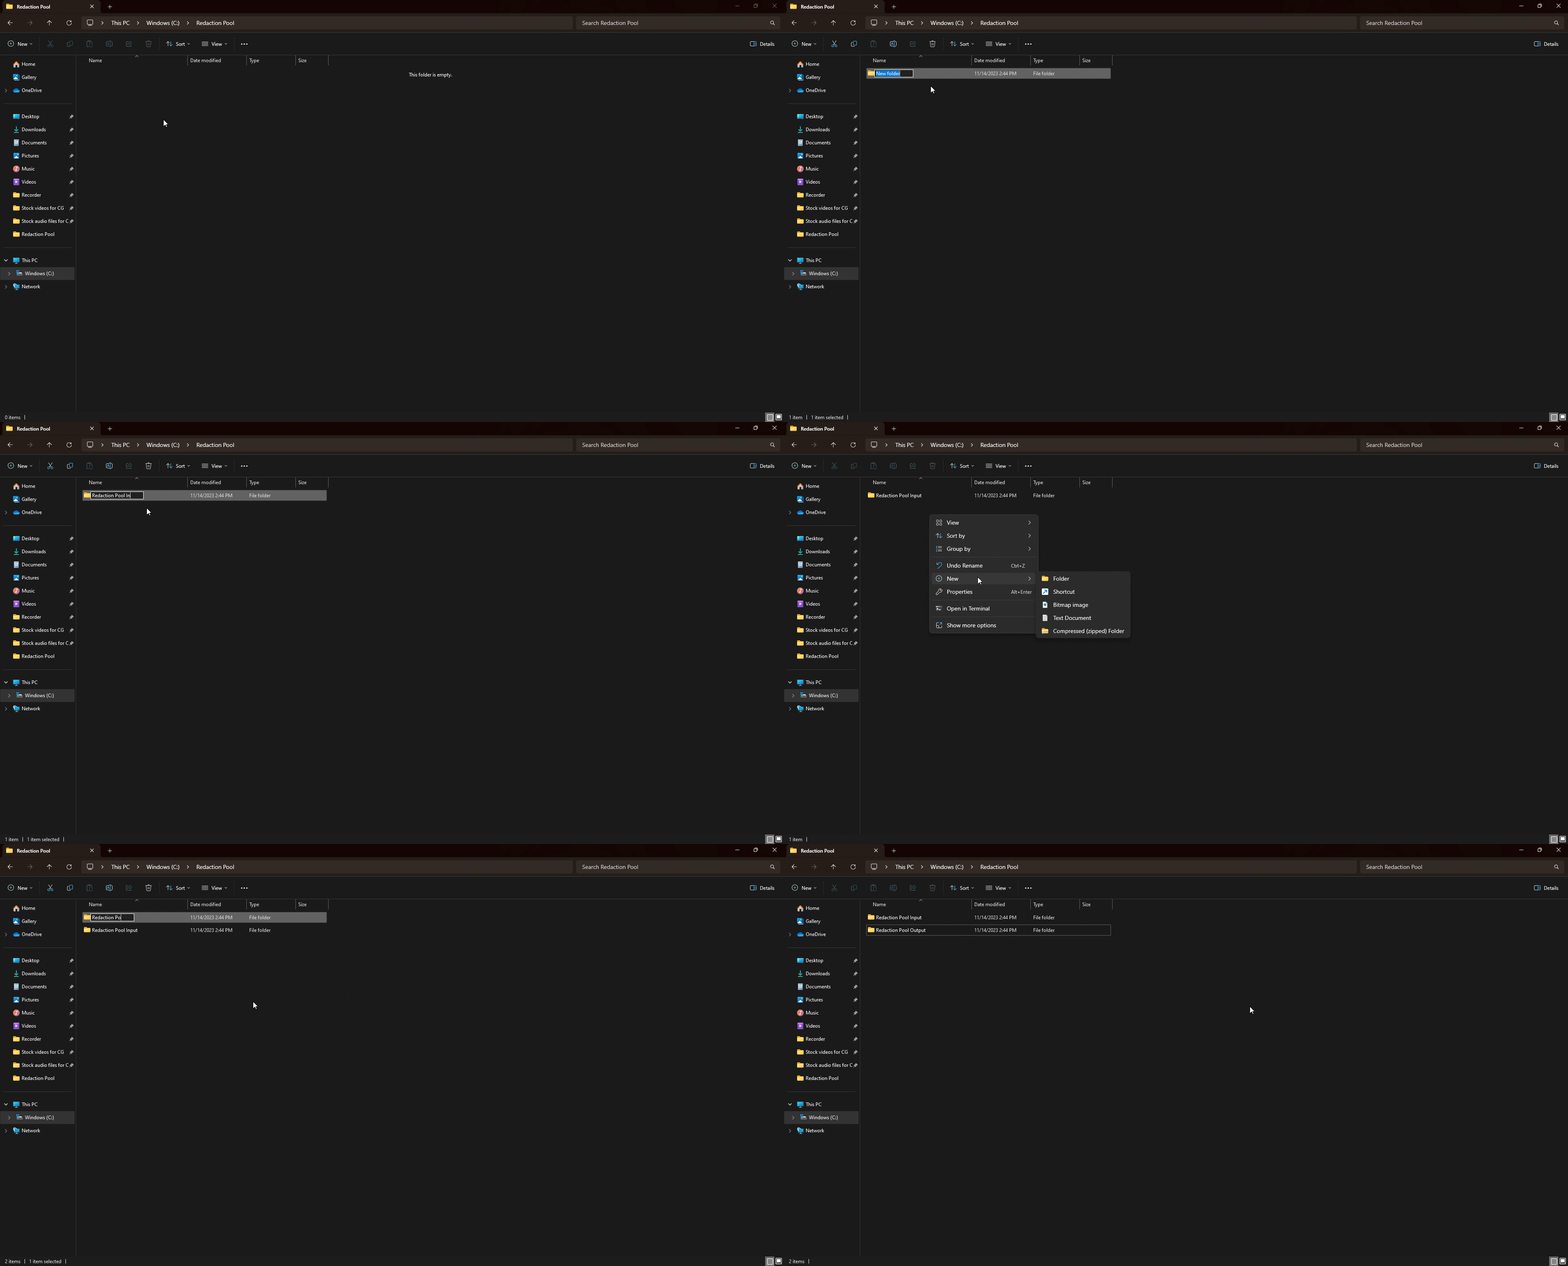
- Right-click your Redaction Pool Location (Input) folder and click “Properties.”
- Click the “Sharing” tab at the top of the Properties window.
- From the Network File and Sharing Folder tab, click “Share” and type the name of every user you would like to share the Redaction pool with.
- The Name will be the name of their User account on their computer.
- Be sure to set the “Permission Level” to “Read/Write.”
- For their name to appear they need to have Network Share turned on in their Network Settings and also be connected to the same Network.
- If you are having issues finding the Network settings, please see this Windows article for troubleshooting.
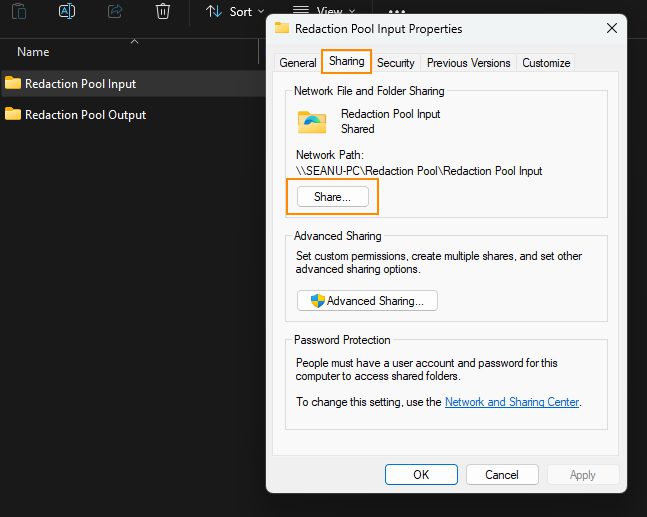
- After adding members to the pool, click “Share.” Your folder is shared.
- Click “Done.”
- From the Network File and Sharing Folder tab, copy the Network Path and open up the CaseGuard Redaction Pool settings once again.
- Paste the Network Path into the Pool Location (Input) box.
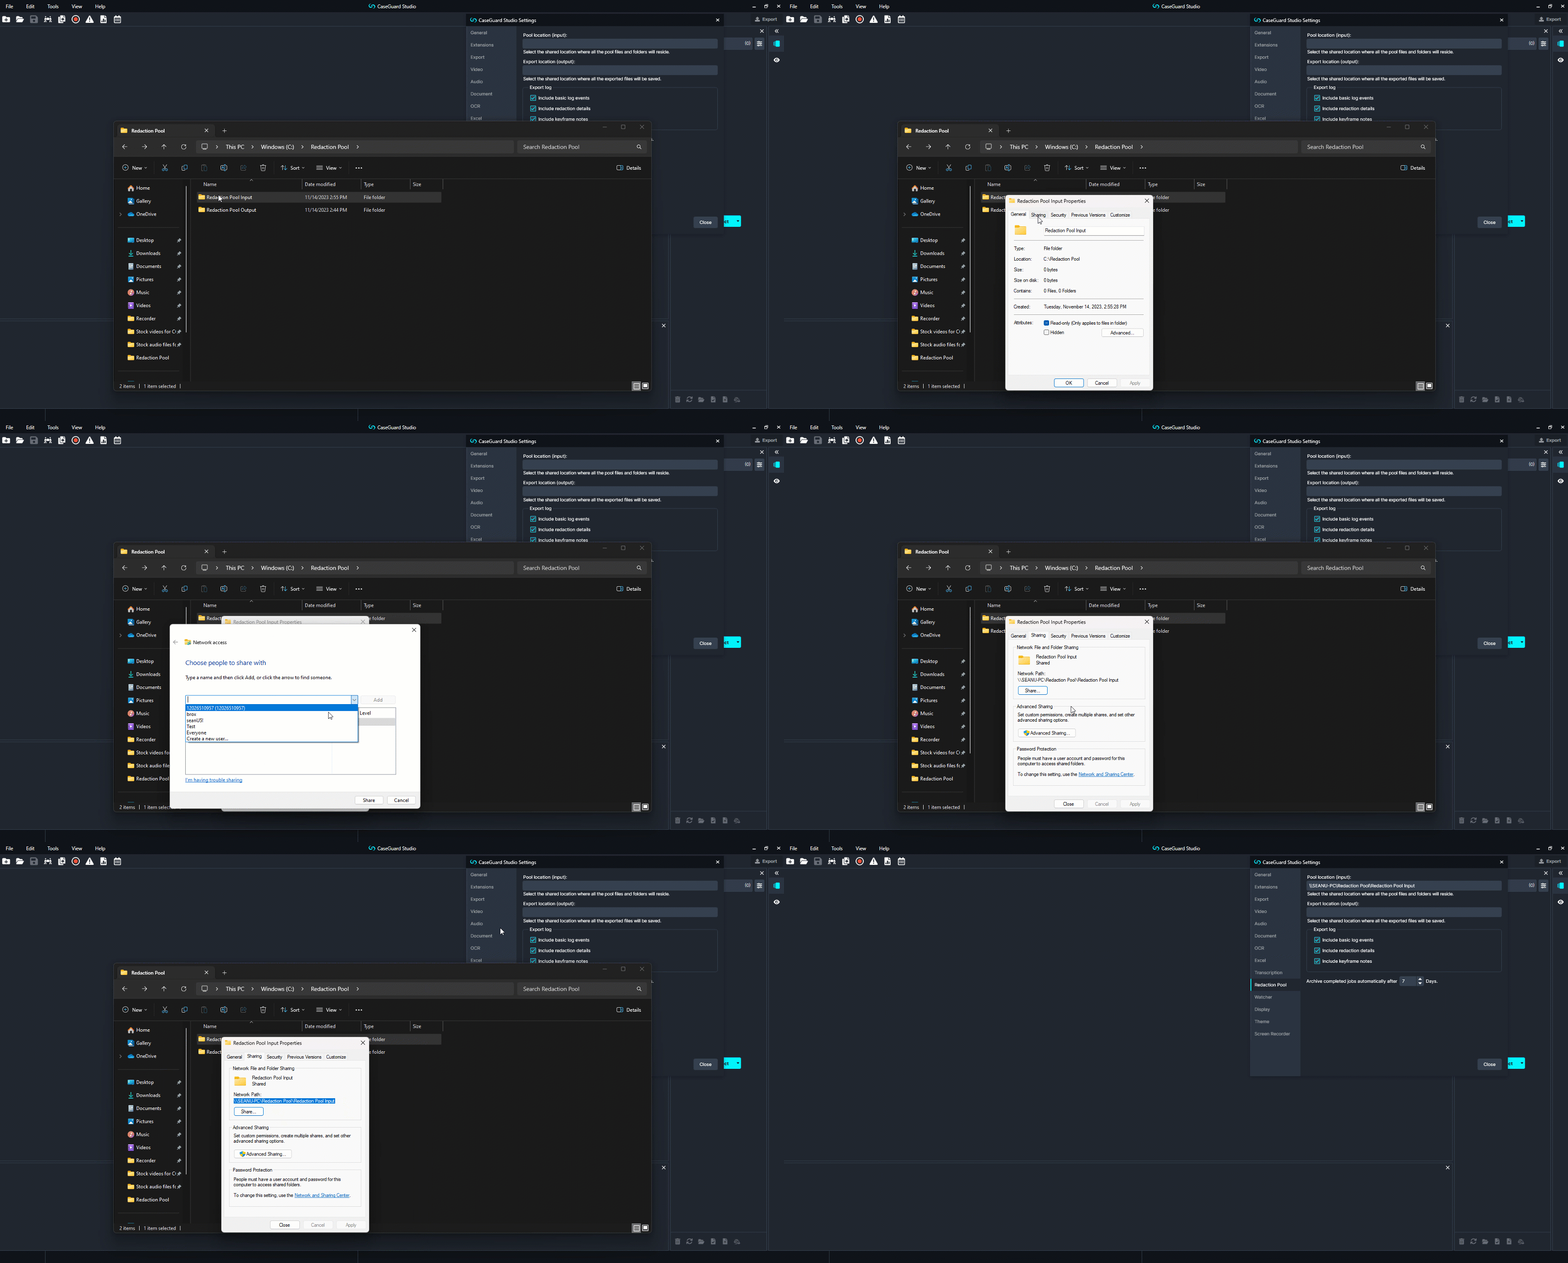
- Repeat the steps above to share the Export Location (Output) and then copy and paste its Network Path to the Export location (Output) within the CaseGuard Studio Settings pop-up.
- After adding the input and output folders, the Redaction Pool Settings should look like this:
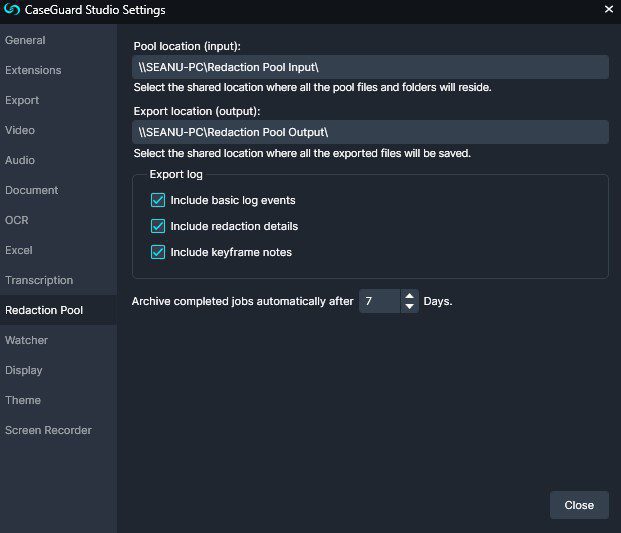
Your Redaction Pool should now be set up! To access it, click the “Redaction Pool” Icon at the shortcut bar at the top of the Studio screen.