Use Case
If your organization installs all applications to a dedicated folder on your machines, you may need to adjust the installation location for CaseGuard Studio to align with your setup. This guide will walk you through the steps to customize the installation path for CaseGuard Studio.
Follow these steps!
- First, install the CaseGuard installer from our website and launch it, you will be prompted with a CaseGuard Studio Setup window.
- For a more in-depth guide to install CaseGuard please see this article.
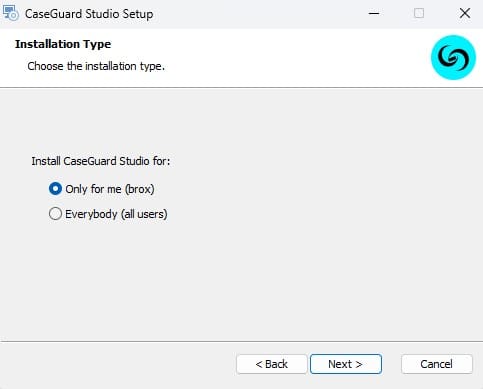
- Select Next in the window then you will see the installation type window. You can select either per user or all users.
- If multiple users are going to be using the same machine and will have the same CaseGuard login, we recommend selecting all users. Please see this article to see the differences between the Install Type.

- Once your installation type is selected click Next.
- The Choose setup window will open, and from here select Custom to change the CaseGuard settings install path.

- Once the custom option is selected the Custom Setup window will open.
Custom Setup window
- From this window, select the Use Custom settings path checkbox and select Browse to change the location.
- Once you have selected your location select Next.
- The File Location window will open, and from here select the Change.
Change highlighted image
- Windows File Explorer will open, from here select the location you would like to save your CaseGuard Studio to.
- Please note: if installed for all users, you may need admin permissions/privileges.
- Once selected click Install and your CaseGuard will begin installing.
If you need to install CaseGuard Studio on another device, please refer to our comprehensive guide: [How to Install CaseGuard Studio on Your Device]. This guide provides detailed instructions to help you through the installation process step by step.
Should you have any questions or require further assistance, don’t hesitate to reach out to us at [email protected]. Our support team is always available and ready to help you resolve any issues or provide additional guidance.