Overview
When redacting audio, AI Audio is the fastest way to detect and remove any personally Identifiable Information (PII), such as Names, Social Security Numbers (SSNs), phone numbers, and addresses from audio recordings.
CaseGuard Studio’s AI Audio process involves automatically transcribing audio within a file. This will convert speech from audio or video recordings to text. This approach eliminates the need for manually listening and identifying Personally Identifiable Information (PII) from the audio recording. Users can generate the transcription of their audio with a click of a button and choose what specific categories of PII they want to redact.
For example, investigators using body-worn camera videos with multiple speakers in a busy setting will find the transcription useful. CaseGuard Studio goes as far as identifying each speaker, detecting their spoken language, and translating the audio into 30+ languages.
Follow the steps to Redact and Transcribe Audio Automatically!
- Add your audio or video file containing audio to CaseGuard Studio.
- Click the “AI Audio” tool from the left-hand Toolbar.
- Select the language of your file, or select the “Detect & Transcribe Multiple Languages” option if the file language is unknown.
- If you know the language spoken in the audio, it’s best if you select the language for transcription.
- If you don’t know the language and there is only one language spoken in the audio, you should select “Detect Language.”
- If there are multiple languages, then you should select Detect & Transcribe Multiple Languages.
- Select the number of speakers.
- Click “Transcribe.”

- Once the transcription has loaded in the Transcription Panel, you can play the audio and follow along within the transcription panel.
- To redact individual instances of words or phrases, “Highlight” the word or phrase and “Right-click” then click Edit to replace the word or phrase.
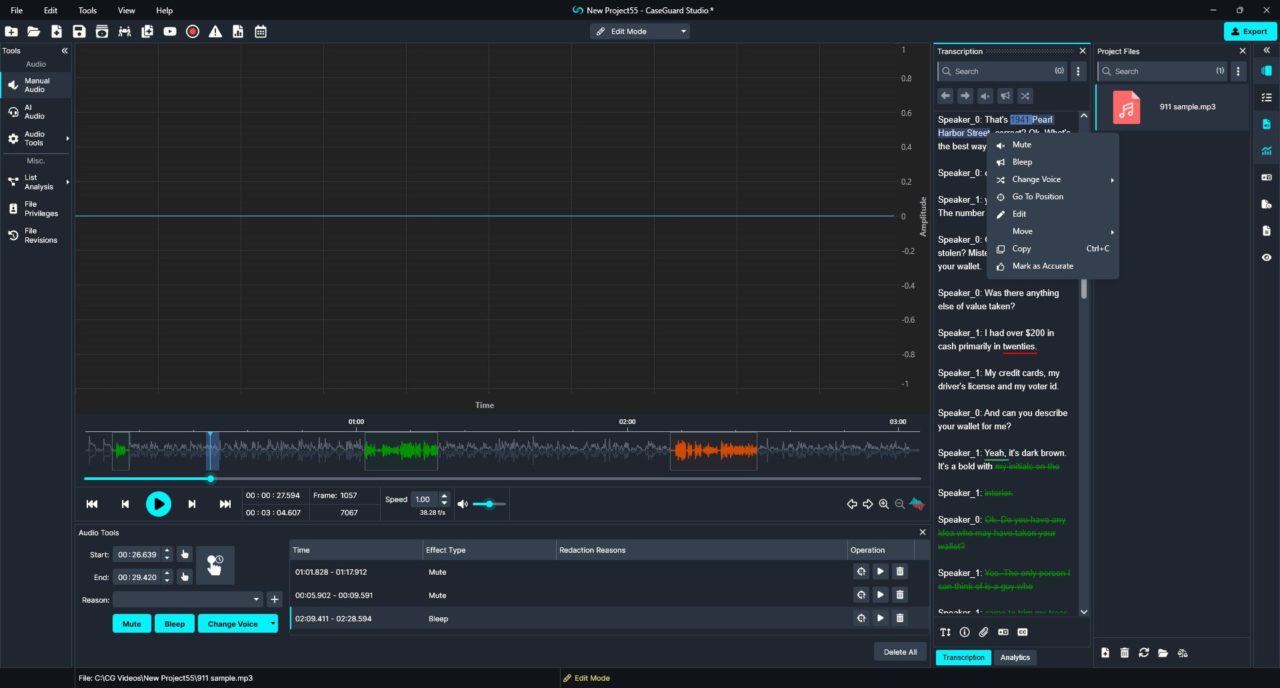
- Edit options for Audio include:
- Add a “Mute”

- Add “Bleep”
- Anonymize through “Change Voice”
- Use the transcription to find the exact audio point when a specific word is spoken by selecting “Go to Position”
- Change the spelling or entire word by selecting “Edit”
- Select “Move” to change the position of a word or sentence.
- “Copy” a word from the transcription and “Paste” it after selecting “Edit” another word
- “Mark as Accurate” when the software is not 100% confident that it caught the correct word
- Add a “Mute”
- You can also use the search bar in the Transcription Panel to search for the word or phrase you would like to “Redact” or “Edit” and press enter. All instances of the word/phrase in the audio will be highlighted in the Transcription panel.
- To redact all instances of the searched word/phrase at once, click the Mute, Bleep , or Change Voice icon at the top of the panel.
- Once you have reviewed the redactions, click Export from the Task List Panel or the Export button from the Shortcuts Bar to export your redactions.
Let’s See it in Action!
