Handling audio recordings that contain sensitive information like names, addresses, social security numbers, and more can create an added layer of stress to your job. Hundreds of these files are safely stored on your computer, guarded by firewalls and anti-malware detection software. When dealing with Freedom of Information Act requests by the media, special investigators, and members of the public, muting or bleeping personally identifiable information (PII) is crucial. However, a new request comes across your desk that requires not only the PII to be redacted but also the identity of the speaker. How can you protect the identity of a person without a face to obscure? CaseGuard Studio makes it easy with a tool specifically designed for this purpose; a way to make any person anonymous by disguising their voice.
Getting started
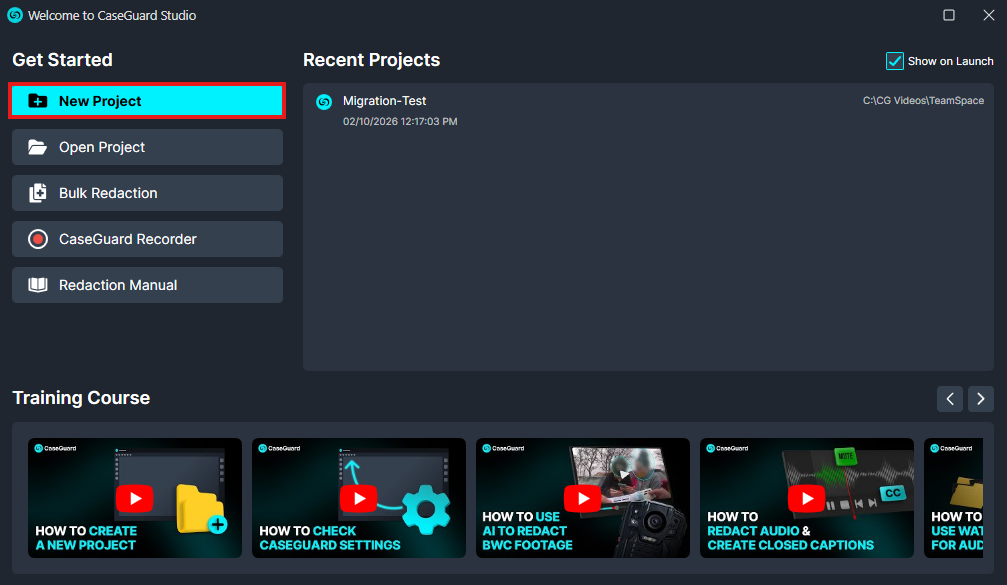
- In the New Project pop-up, select the Storage Folder for your project and give the project a Name.
- Best Practice: Choose a descriptive name to make it easier to identify projects when reopening them in the future.
- Click More Information to add details of the requestor, otherwise click New Project.
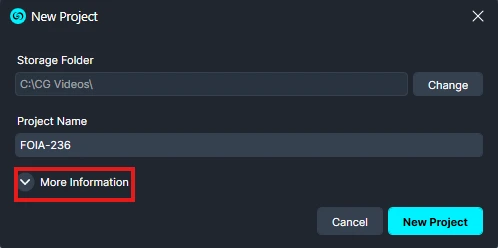
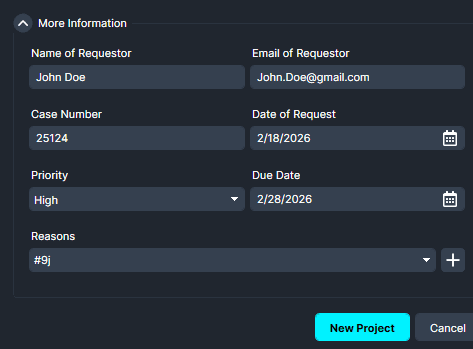
- Once you are done, click New Project to finish creating the project.
- The Import wizard will open automatically, prompting you to choose your method of importing files.
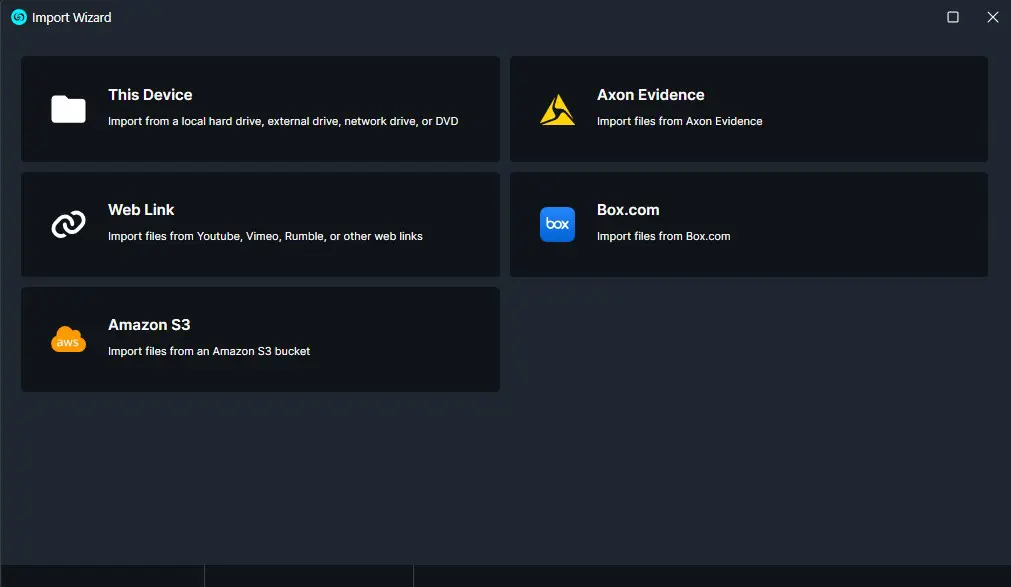
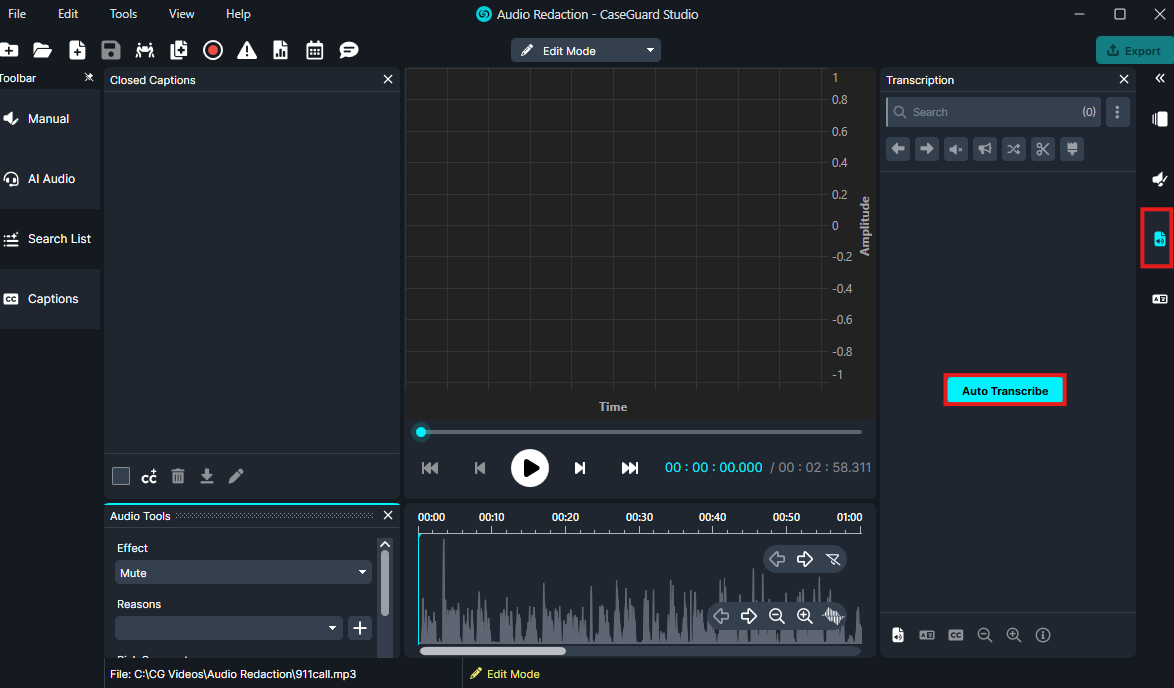
- Once you have clicked on an option and imported your files, Next, pin the Transcription Panel from the right side of your workspace.
- Best Practice: To declutter your workspace when performing multiple operations on a file, such as video and audio redaction, unpin any unnecessary panels.
- Click Auto Transcribe from within the Transcription panel. The system will begin transcribing the audio with CaseGuard’s state-of-the-art technology. CaseGuard can transcribe audio in over 50 languages and dialects.
Disguise voice with ease
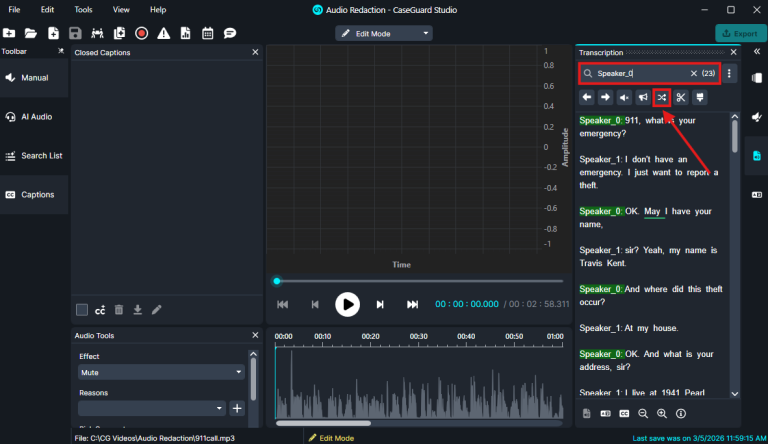
- In the search bar at the top of the Transcription Panel, search for the speaker whose voice you want to alter.
- CaseGuard will detect each instance of this speaker talking with the audio and highlight it in Green.
- Select the Change Voice For All Search Results icon
 at the top of the Transcription Panel.
- From the dropdown menu, choose one of the ten pitches available, ranging from -5 low to 5 high.
- Did you know? Once the “Change Voice” effect has been applied, it cannot be reversed on the exported file. This ensures complete anonymity.
- The change in pitch will disguise the voice of the speaker. This effect will be visible on the audio wave and within the Transcription Panel, highlighted in purple.
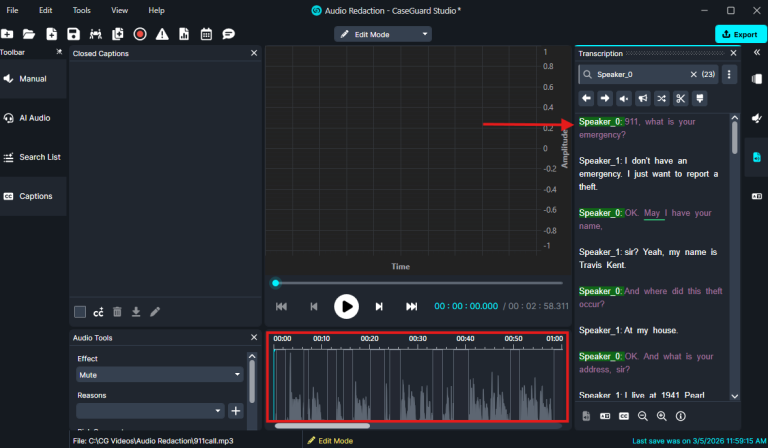
- Now you can apply any additional redactions to the audio, such as muting any PII that must be removed before public release.
- To remove the Change Voice effect from a word or phrase, highlight the text in the Transcription Panel, click Go To Position
 , and manually edit the redaction from the audio wave.
- 1. Right-click the highlighted effect within the audio wave, then select Delete from the dropdown menu.
- 2. Manually drag the effect with your mouse to shorten or delete it entirely.
- Once the effect is removed, the changes will be reflected in the Transcription Panel and the text will no longer be highlighted in purple.
- Once you have reviewed your redaction, click Export
 from the Shortcuts Bar to process the file. The redacted file will appear in the Project Files Panel.
What else can you do with transcribed audio?
Audio transcription is a versatile tool that can be used in many ways in CaseGuard Studio. Once your audio is transcribed, you can resample voices as shown above or redact by highlighting words within the panel and right-clicking. However, you can also translate the transcription and burn captions on the audio file, making it accessible for the hearing impaired under ADA compliance.
Conclusion
Protecting sensitive information goes beyond removing names and personal details, it can also mean safeguarding a person’s identity. With CaseGuard Studio’s Change Voice feature, you can quickly disguise a speaker’s voice while maintaining the clarity and integrity of the recording. Combined with transcription, audio redaction, translation, and captioning tools, CaseGuard Studio provides a complete solution for preparing audio files for public release, legal disclosure, and investigative workflows with confidence.
Was this article helpful to you?
No
Yes
2