Overview
The Automatic Audio Redaction feature identifies 32 categories of Personally Identifiable Information (PII) which can be redacted within a few clicks. Applying AI Audio within the Watcher effectively streamlines the redaction workflow for users interested in detecting and redacting the same PII from hundreds of audio files.
For example, a call center with thousands of hours of recorded customer service calls that need to be used for training purposes. Once the Watcher is set up to redact the specific PII (names, emails, phone numbers etc.), the recordings can be added to the input folder and they will be automatically processed. The fully redacted audio will be added to a new folder, free of any manual work or revision!
Follow the steps to Redact using Automatic Audio Redaction in The Watcher!
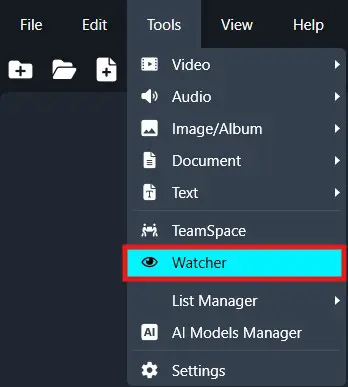
On the left-side menu, click the Tools tab. Then, open the drop-down menu and select Watcher.
Then click the Add Watcher icon to set up the Watcher
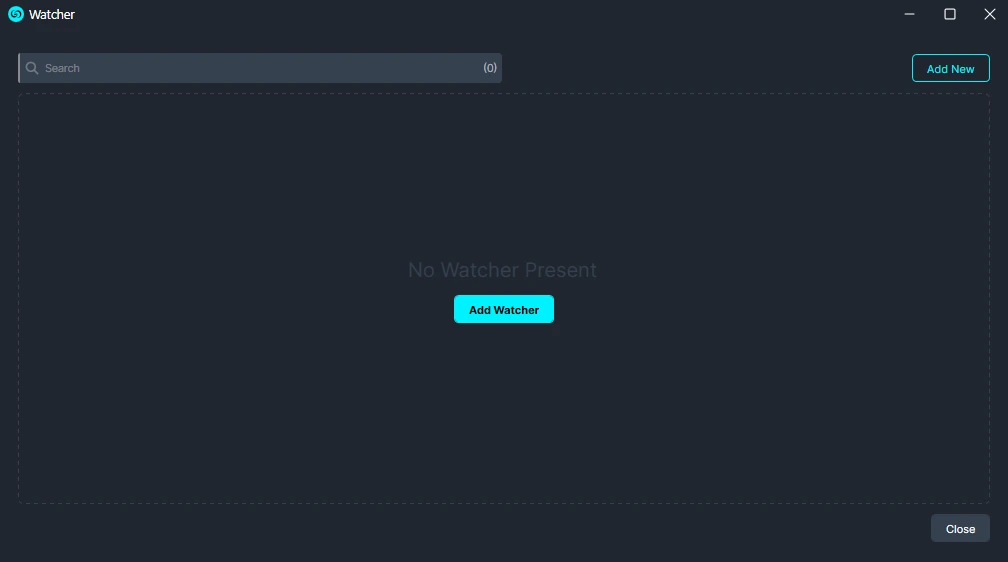
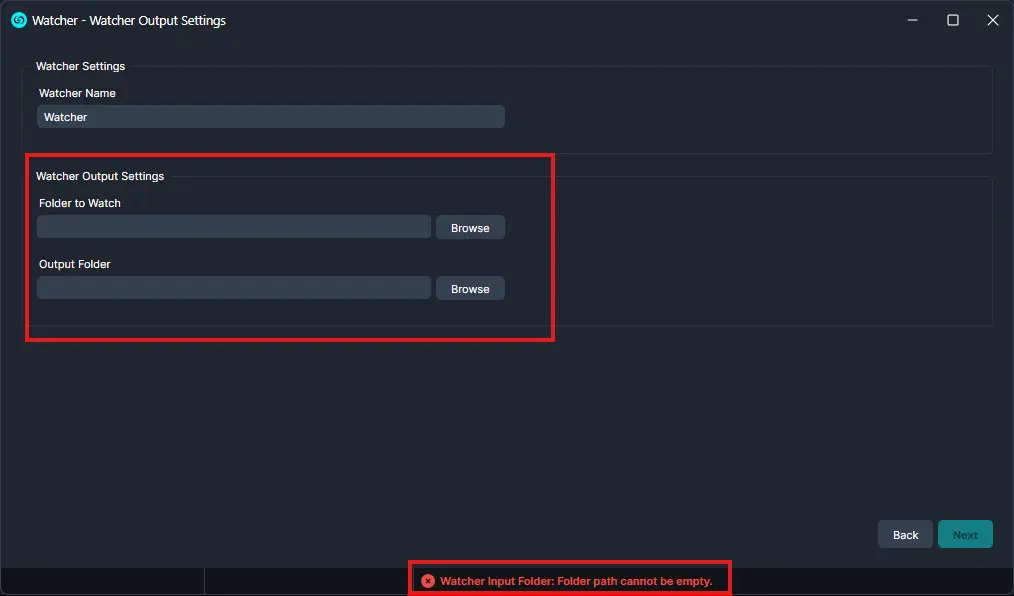
When the CaseGuard Watcher window appears, enter a Watcher name.
Click “Browse” to add a folder to watch. This is the folder where all documents that need to be redacted will be input.
Click “Browse” to add an Output folder. This folder will contain all exported files after the Watcher processes and redacts the documents from the Watch folder.
Click “Next.“
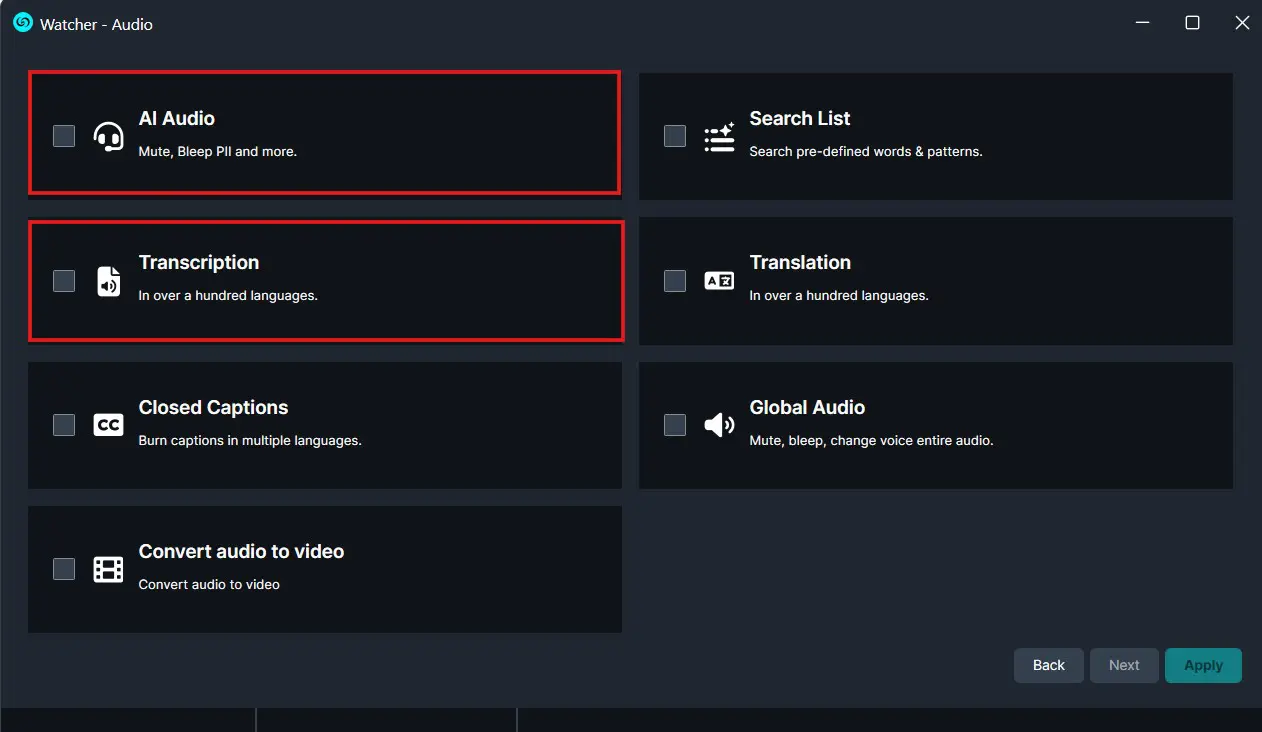
A Watcher window will appear. Select Audio as the operation you want your Watcher to perform.
Select “AI Audio” and “Transcription” to apply to your Watcher and click “Next.”
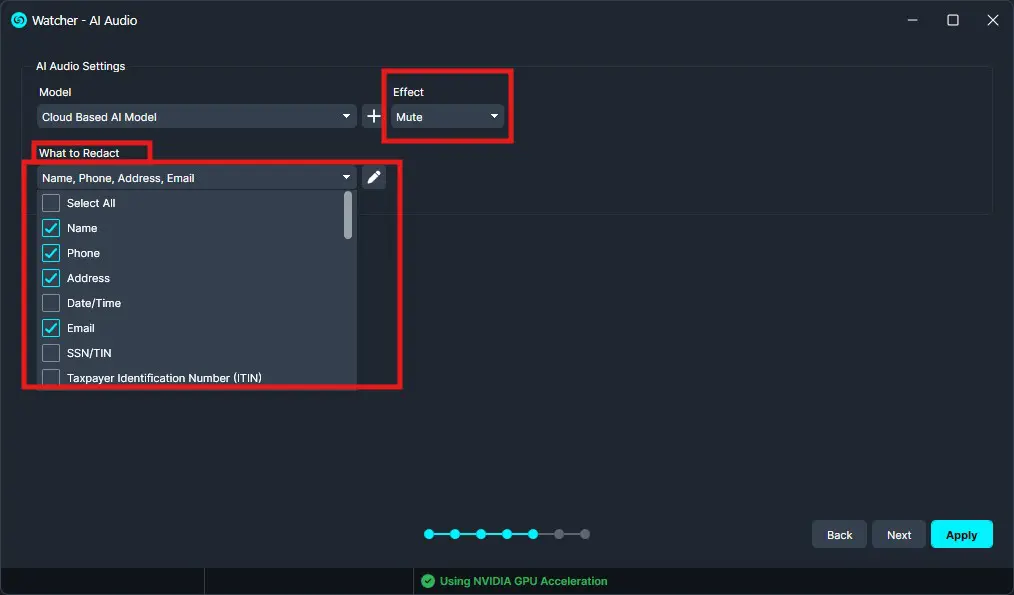
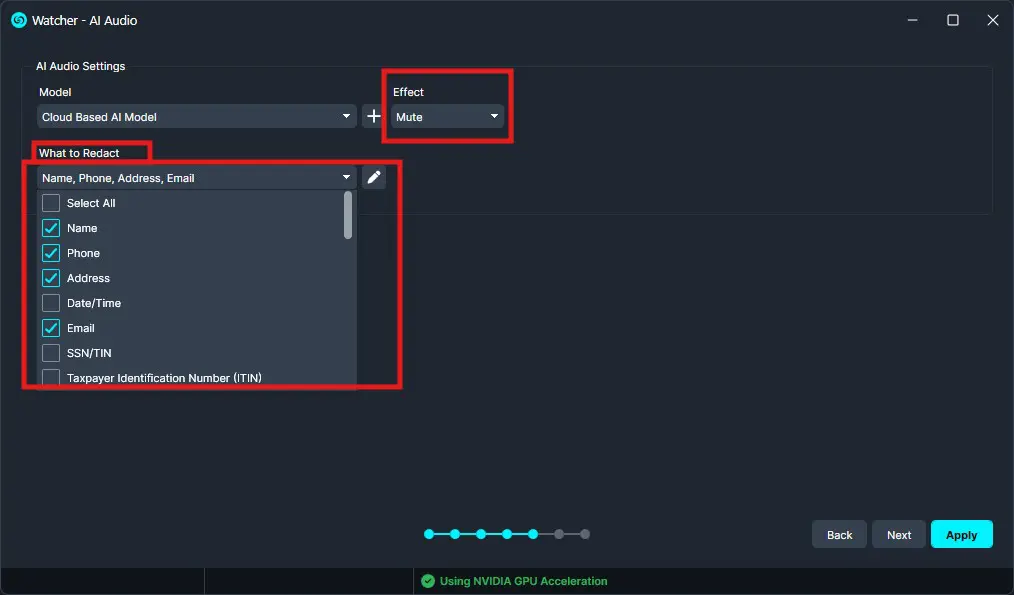
Click “Next” and then the “Audio Redaction.” window will appear. Select what options you would like to apply to your file.
- Within the “What to Detect” dropdown, choose from the 31 categories of Personally Identifiable Information (PII) you want the system to find and extract from the audio recording. Select one, two, or All!
- Apply an Effect: Mute, Bleep, or None.
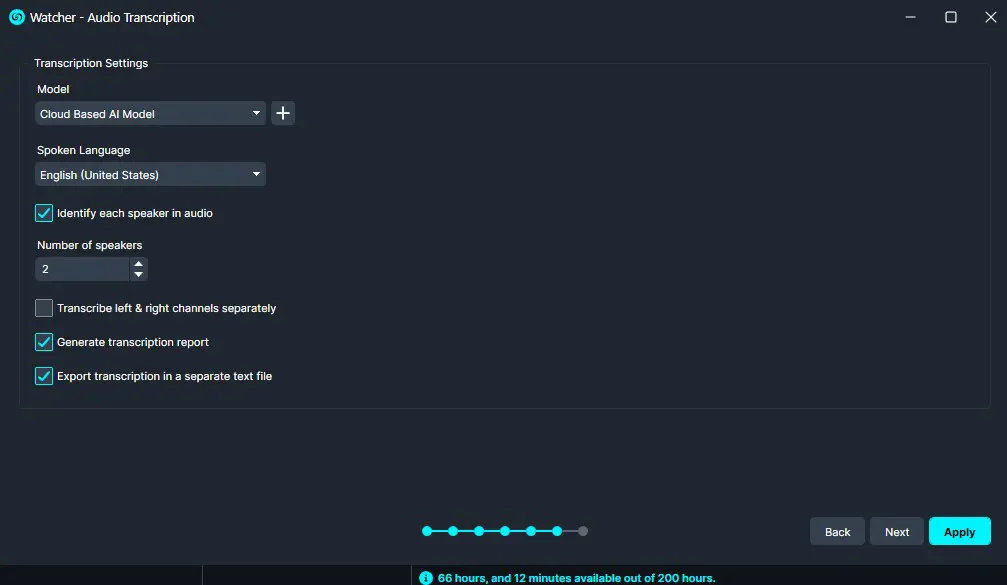
Click “Next” once you have selected your audio settings. The “Audio Transcription” window will appear. Select the settings for your transcription of your audio files.
- Choose the AI model you want to use, either Local or Cloud.
- Select the Spoken Language of your file and pick the available options according to your needs.
Click “Next” and a Summary window will appear, here you can edit your selection and decide if you would like to keep history files for manual review.
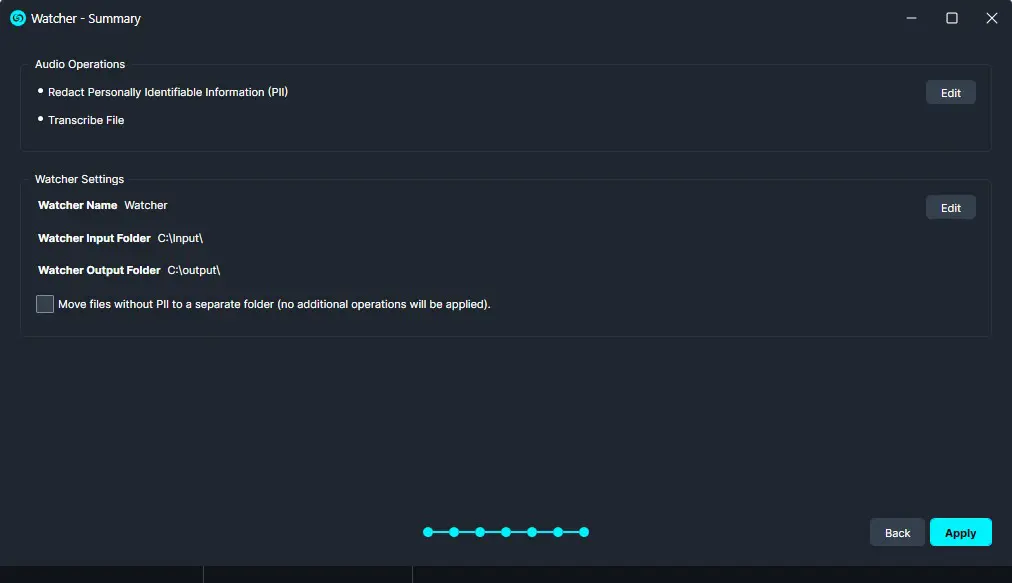
Once satisfied with your Watcher click “Apply” and your Watcher will appear in the Watcher Panel.
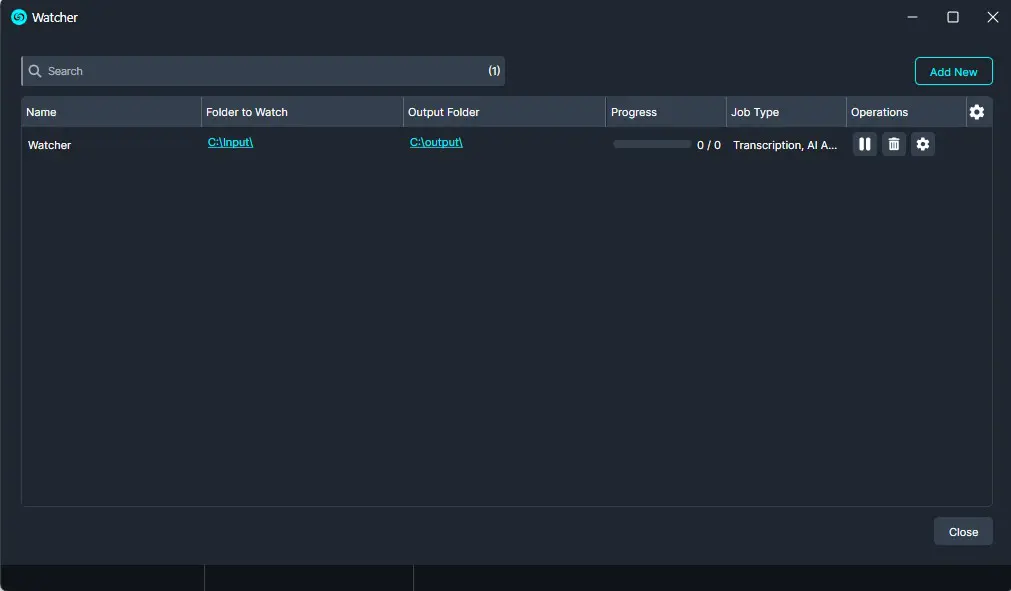
- Under the Watcher progress bar, you have the option to open the settings, delete
 , or pause
  the Watcher.
- The settings icon will open up the Watcher window.
- Delete will completely delete the selected Watcher.
- Pause will pause the Watcher operation.
- Once complete, your files will have the desired PII redacted and they will be exported to your output folder.
- When you need to use The Watcher again, there is no need to open CaseGuard. Just add new files to the Input Folder and the operations applied to that Watcher will begin. The completed audio files will then appear in the Output Folder.
Conclusion
The Automatic Audio Redaction feature in the Watcher streamlines the detection and removal of PII from audio files, saving time and eliminating manual effort. By setting up the Watcher once, users can continuously process new recordings, ensuring sensitive information is redacted accurately and consistently. For any questions or additional assistance, contact CaseGuard Support at [email protected].
Was this article helpful to you?
No
Yes
1