Have you ever experienced the panic of realizing sensitive information was not properly redacted just moments before an important review? In many organizations, redaction responsibilities are shared among multiple people, which increases the chance of mistakes.
For example, while preparing a report containing hundreds of names, phone numbers, addresses, and Social Security numbers, a colleague may accidentally leave sensitive information visible after assuming they had used the “Redact All” feature. Mistakes like these are more common than you might think and can result in compliance issues, legal consequences, or unintended data exposure.
Before submitting a redacted document, it is important to have a second person review the work. However, exporting the final redacted version prevents reviewers from seeing what information was removed. CaseGuard’s Marked Copy feature provides a solution by allowing reviewers to see the original information behind the redaction boxes while verifying that the correct content has been removed.
Let’s begin
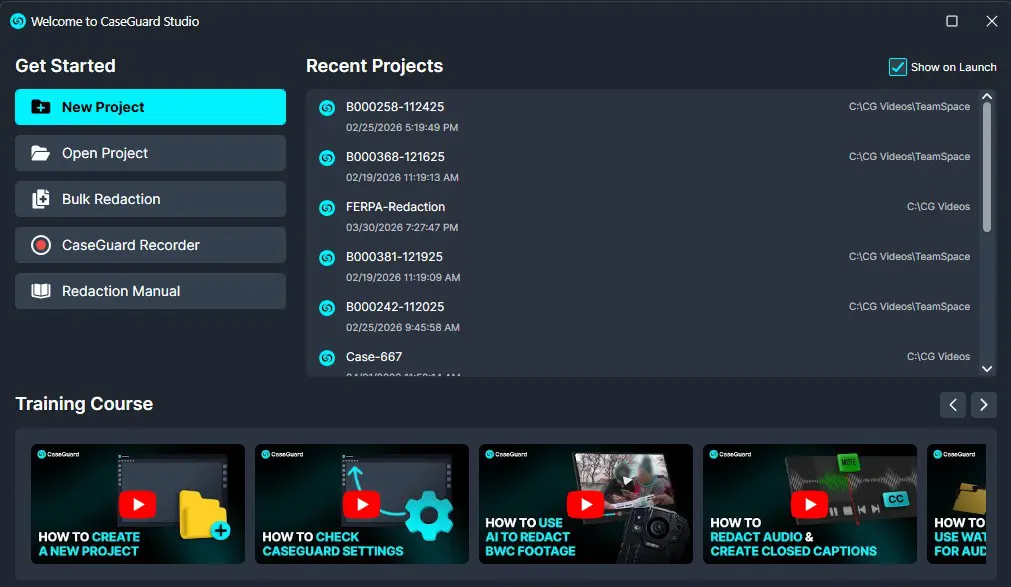
- Open CaseGuard Studio and select the “New Project” button.
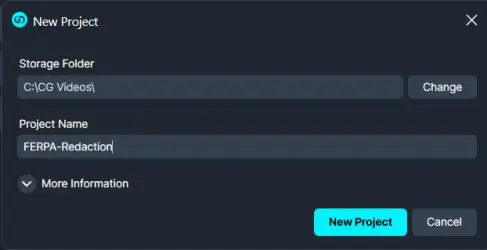
- In the New Project pop-up, select the Storage Folder for your project and give the project a Name.
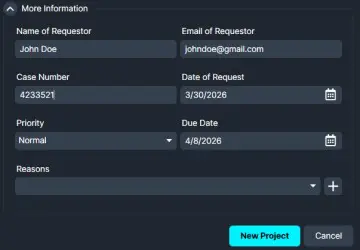
- Under the More Information dropdown, you can add information that will be included in the automatically generated reports.
- Best Practice: Use multiple redaction tools to ensure complete coverage. Combining AI-powered tools with manual review provides greater control over identifying and removing sensitive information.
- Click the “New Project” button to finish creating the project.
- The file explorer will open automatically, prompting you to add your document to the project.
- Add your document to CaseGuard Studio.
- Perform document redaction to remove all sensitive information.
- Best Practice: Use more than one redaction tool to ensure complete redaction. Mixing and matching AI and manual tools gives you the most control over what information is removed.
How to export a marked copy for review
- Click “Export” and the Export window will appear.
- Choose the “Marked Copy” option.
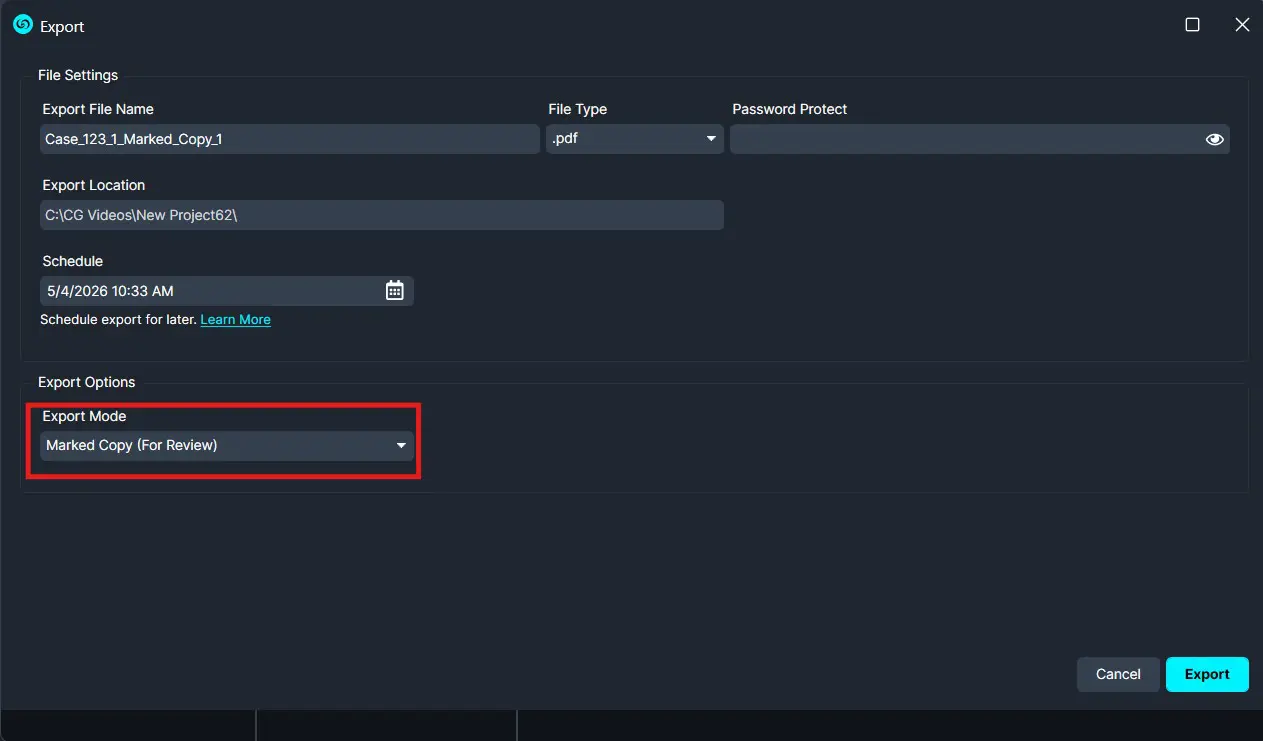
- Click “Export” and the Marked Copy will be available in the Project Files Panel.
- Inside of CaseGuard, the file will look like the example below.
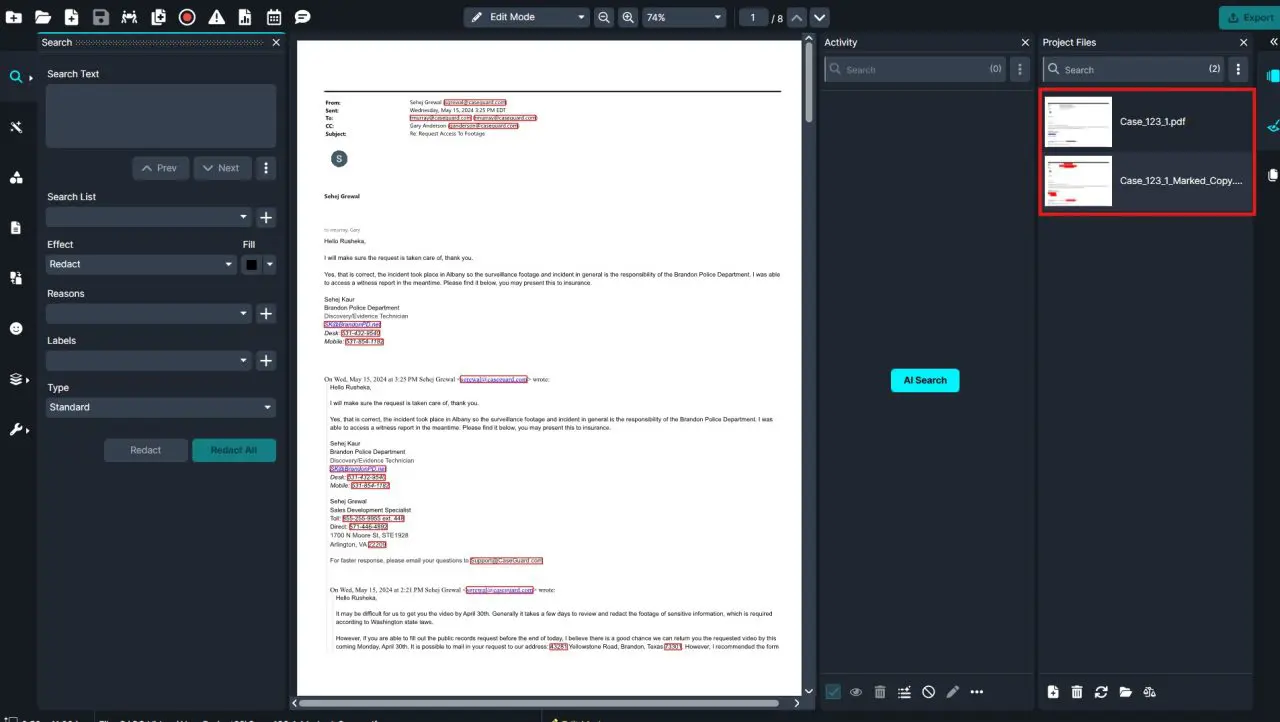
- To view the Marked Copy outside of CaseGuard and to send it to a colleague for review, click the “Open Project Folder”
 icon.
icon.
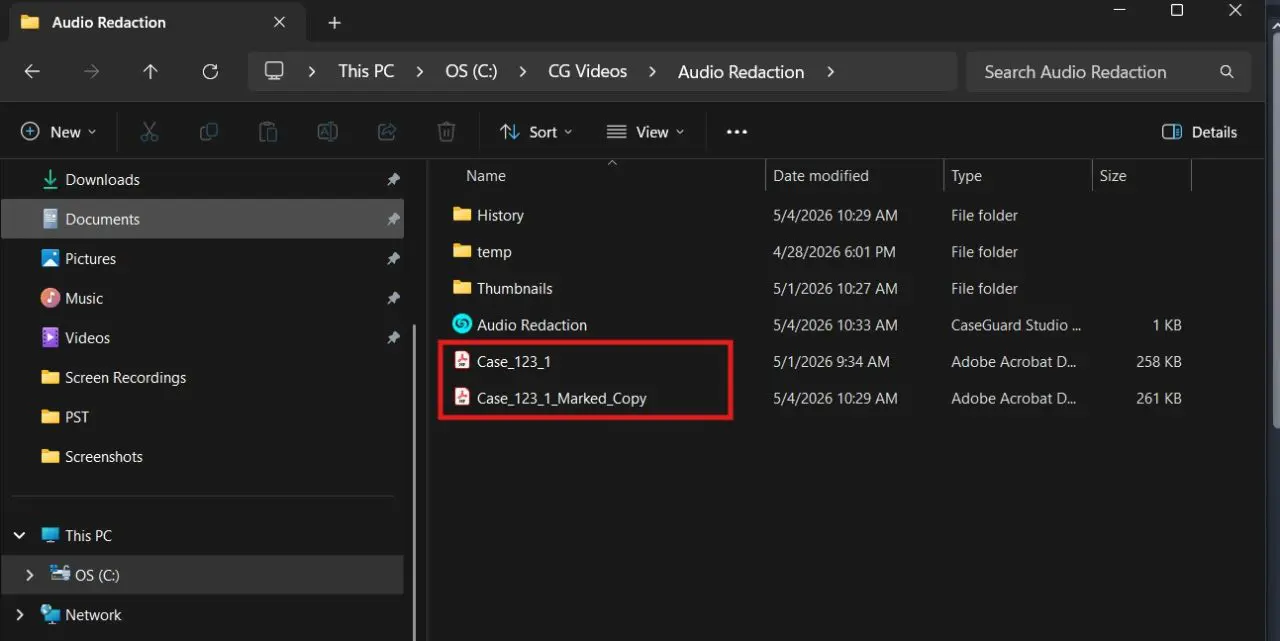
- This will open a file explorer window with the files related to the project.
- The file with the suffix _Marked_Copy is the document you will send for review.
If the marked copy looks good, you can go back to Export Options and Export the Redacted Copy! Now, you’ll have a fully redacted file that you can be sure is done correctly because of the review copy.
Conclusion
The Marked Copy feature in CaseGuard provides an additional layer of quality control by allowing reviewers to verify redactions before the final document is exported. By reviewing a marked version first, teams can catch mistakes, confirm that only necessary information is removed, and confidently export a final redacted document ready for release.
Was this article helpful to you?
No
Yes