In this article, we will cover the process of disabling and re-enabling redactions in CaseGuard Studio, a useful feature for adjusting redactions as project requirements evolve. For instance, if a redaction for an officer is removed but later needs to be reapplied due to changing requirements, the disable feature allows you to manage this flexibly. By disabling rather than deleting, you can remove redactions temporarily while retaining the option to re-enable them as needed.
The key distinction between deleting and disabling redactions is that disabled redactions can be restored at any time, creating a safety net for projects with variable redaction requirements.
How to Disable Redactions in CaseGuard Studio?
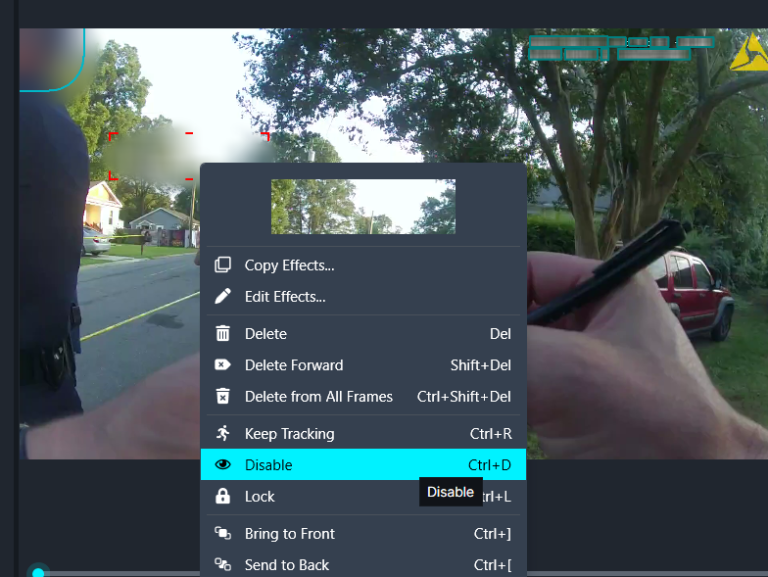
1- Using the Right-Click Menu:
Right-click on the redaction you wish to disable and select “Disable” from the dropdown menu.
2- Using the Activity Panel:
Locate the object you want to disable in the Activity panel, then click the eye icon next to it to disable it. 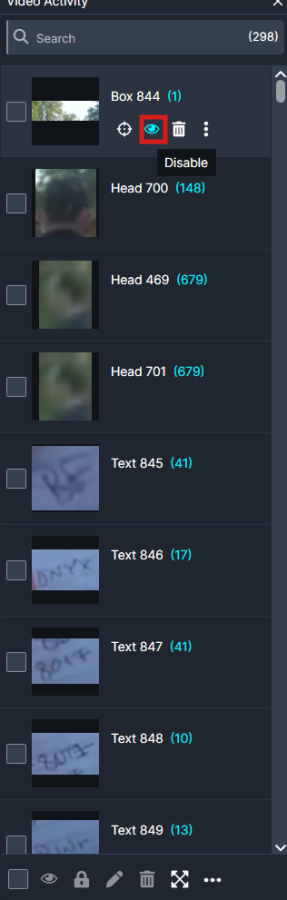
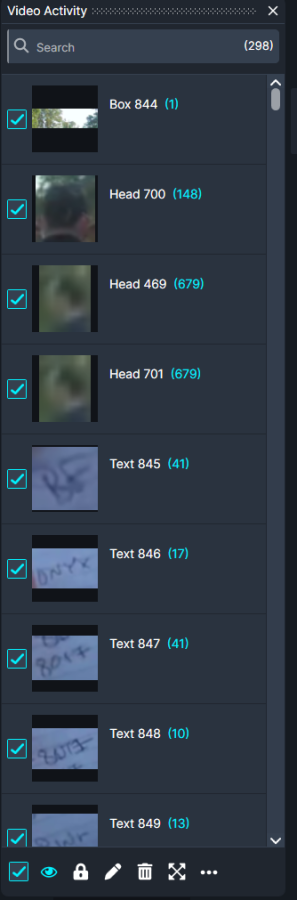
To disable multiple objects, select the checkboxes for each object, then click the eye icon in the bottom left corner of the panel.
How to Enable Disabled Redactions?
Filtering Disabled Redactions:
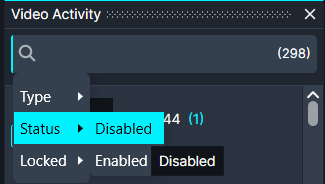
- Open the Activity panel and click the Search button at the top.
- Hover over Status > Disabled to filter for all disabled objects
Re-enabling Redactions:
- To re-enable all filtered redactions, click the checkbox at the bottom of the Activity Panel to select all, then click the eye icon.

- For individual objects, locate the desired object in the Activity panel, check its checkbox, and click the eye icon to enable it.
Conclusion
Using the disable and enable features in CaseGuard Studio allows for flexible and efficient management of redactions as project requirements change. By choosing to disable rather than delete, you create a built-in safeguard that lets you quickly reapply redactions when needed, saving time and preserving project consistency. Following these steps ensures that your redaction work remains adaptable, accurate, and in line with any updates or requests that may arise throughout the project.
Was this article helpful to you?
No
Yes