Overview
CaseGuard Studio makes managing your projects simple and organized, including the ability to quickly rename a project at any time. This ensures your workflow remains clear, structured, and easy to manage.
Step-by-Step Instructions
-
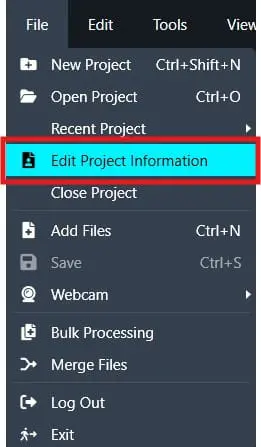
In CaseGuard Studio, navigate to the top left corner and click File.

-
From the dropdown menu, select Edit Project Information, this will open the Edit Project Information window.
-
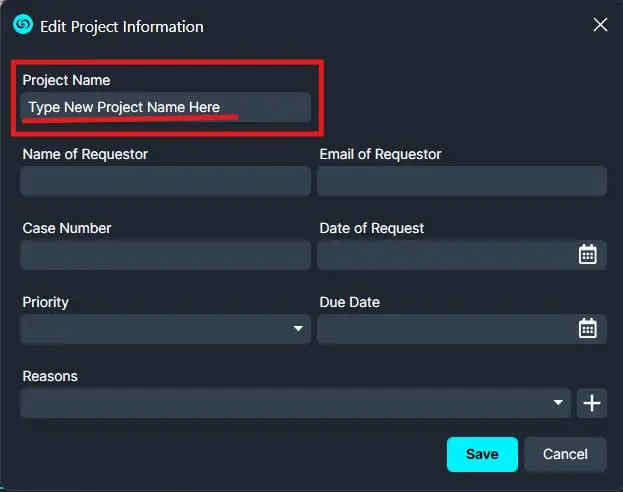
In the Project Name field, type in your new Project Name.
-
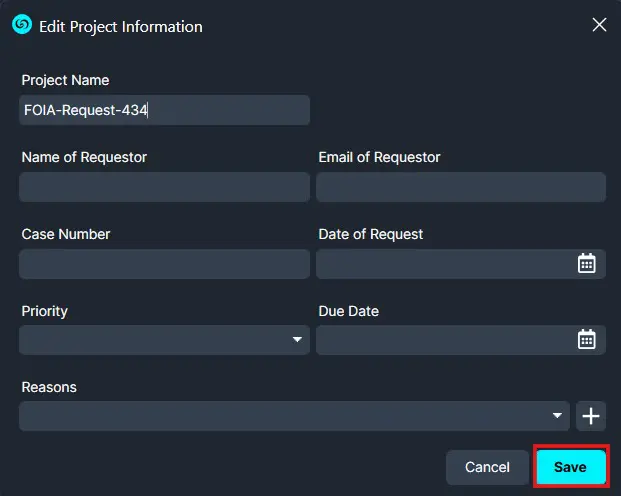
Once you’re done, click Save to apply the changes.
Conclusion
Renaming a project in CaseGuard Studio helps keep your files organized and properly labeled. With just a few simple steps, you can update your project name at any time, making it easier to manage multiple cases or video files within the software.
If you need any assistance, please contact CaseGuard Support at [email protected].
Was this article helpful to you?
No
Yes