CaseGuard Studio supports exporting files in a variety of formats to meet different workflow and compatibility requirements. Whether you need to share files with colleagues, meet organizational standards, or prepare evidence for review, you can easily change the export format before processing your file. This article walks you through changing the export settings in CaseGuard Studio.
Step-by-Step Instructions
Prepare the File for Export
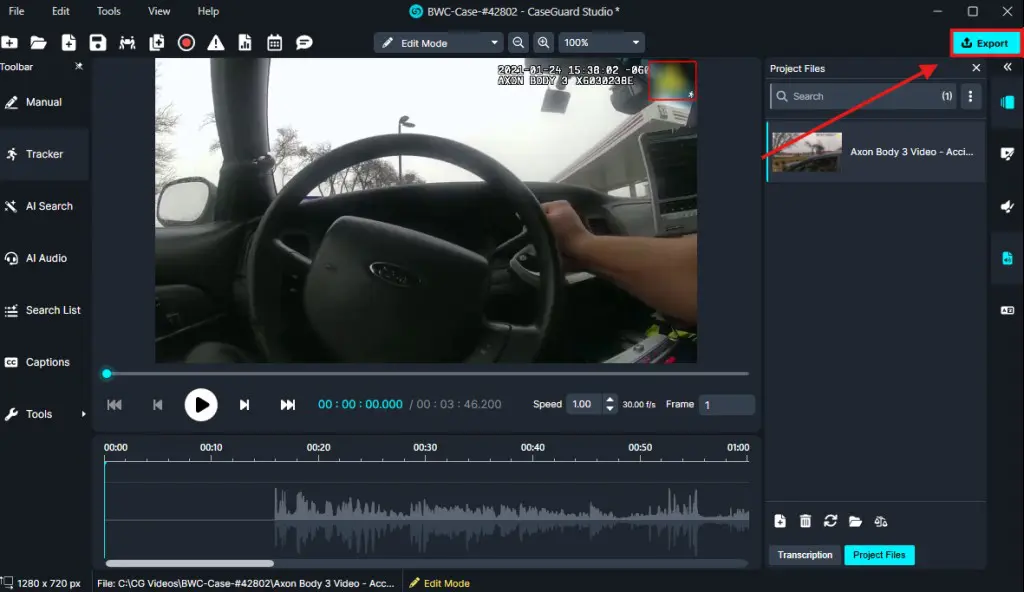
Locate the video file you want to export. Once the desired file is selected, navigate to the top-right corner and click the Export button.
Choose a File Format
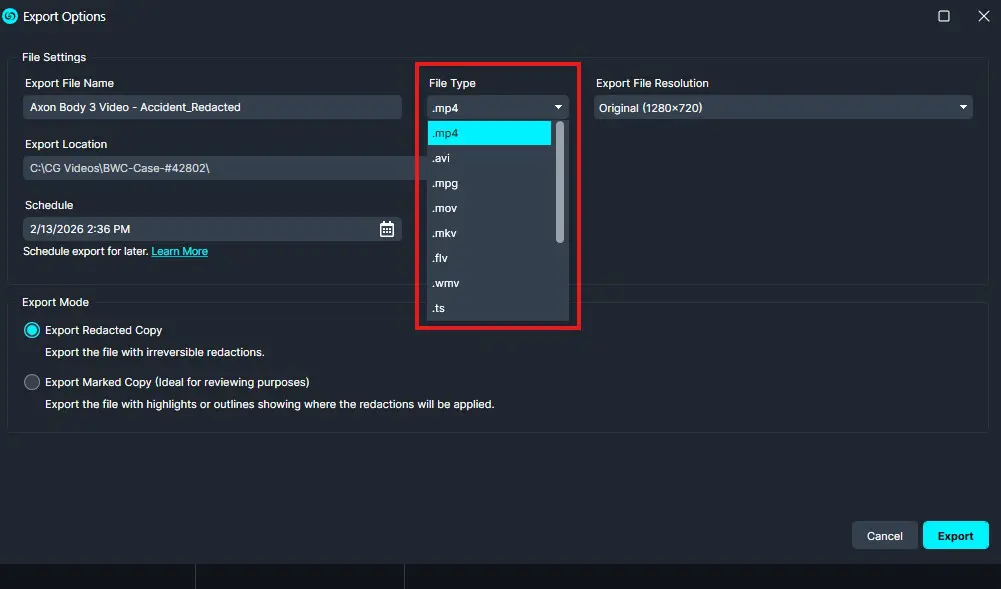
In the export menu, click the drop-down menu labeled File Type at the top-right corner of the window. Select your preferred format from the options supported by CaseGuard.
Export the File
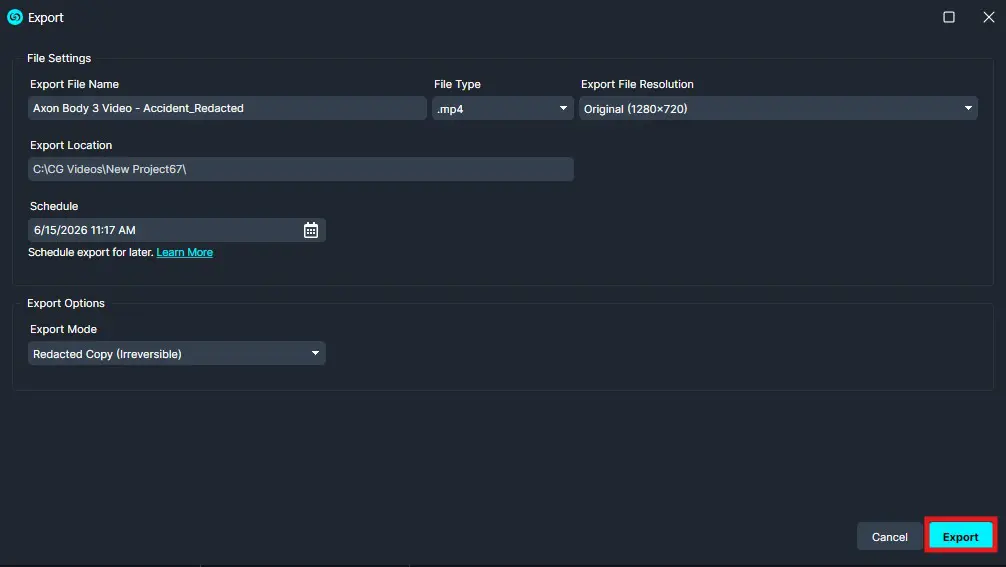
Once you’ve selected the desired format, click the Export button at the bottom-right corner of the menu to begin processing your video.
Access the Exported File
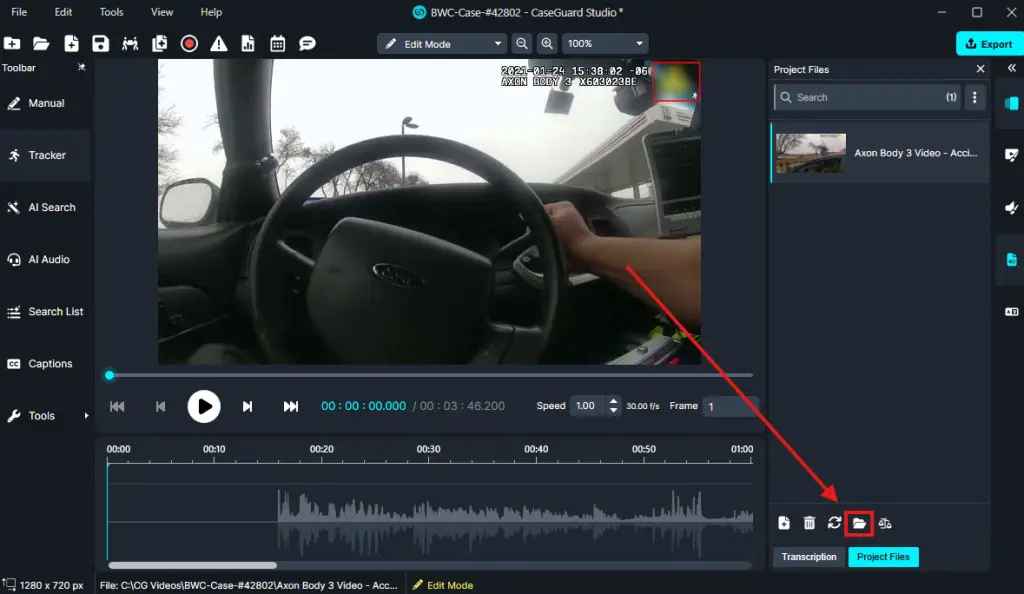
After processing is complete, navigate to the Project Files panel. At the bottom of the panel, click the folder icon to access the file’s location on your computer.
Common Use Cases
Changing the export format can help you:
- Meet organizational or court submission requirements.
- Share files in formats compatible with other applications.
- Reduce the need for third-party file conversion software.
- Standardize exported files across your organization.
Conclusion
Changing the export settings in CaseGuard Studio allows you to save files in the format that best suits your workflow. Whether you’re preparing files for review, sharing them with colleagues, or meeting specific submission requirements, selecting the appropriate export format helps ensure compatibility and reduces the need for additional file conversions.
If you have additional questions or need further assistance, CaseGuard’s support team is always here to help! Please feel free to reach out to [email protected] at any time.
Was this article helpful to you?
No
Yes