Overview
The Watcher’s Watermark operation enhances workflows by automatically applying pre-defined watermarks to unlimited documents instantly! To use the Watermark feature within the Watcher, it is important to create the watermark within CaseGuard and then apply it within the Watcher Operations to copy to all your other files instantly. Like all the other operations within the Watcher, you can use it in conjunction with any other operation.
For example, agencies can apply their own company logo through the Watermark operation on all their files while applying redactions through Watcher AI Text Analysis. This will expedite the redaction process in large documents as well as give your documents authenticity and brand consistency.
Follow the steps to add a Watermark in Watcher
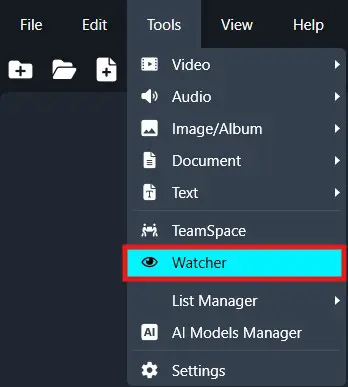
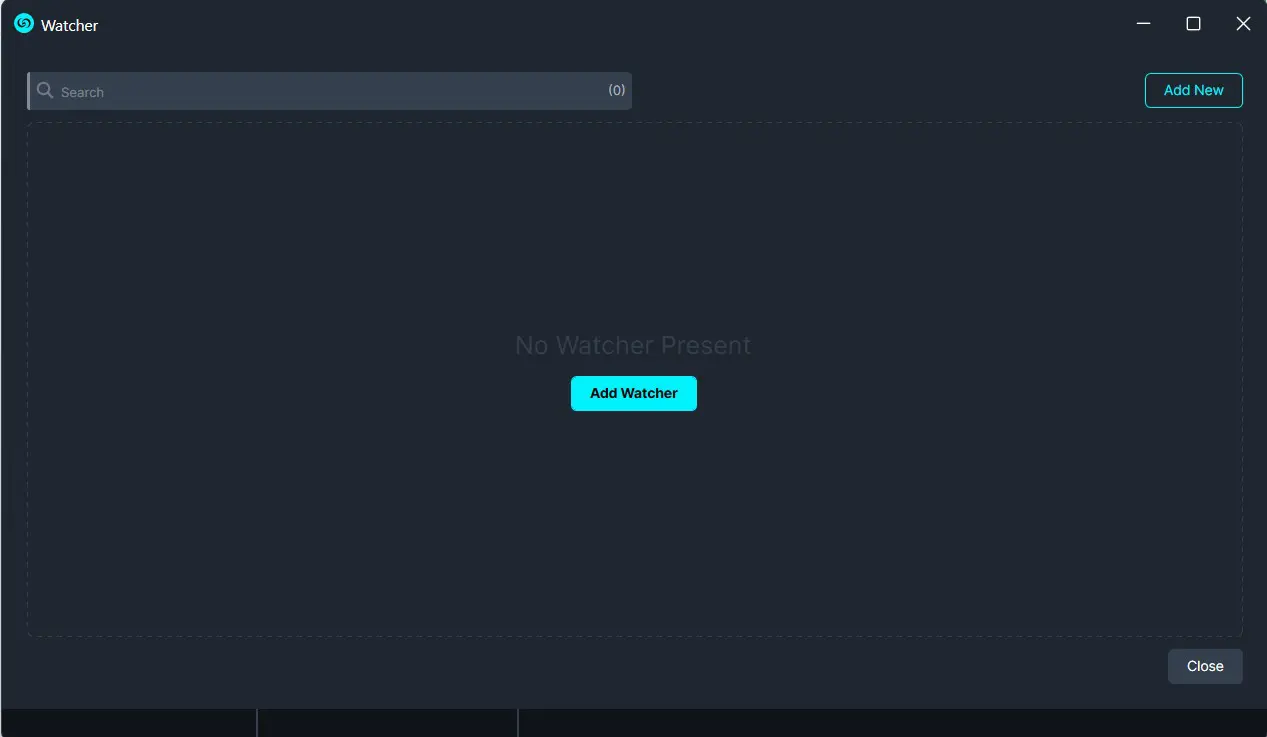
On the left-side menu, click the Tools tab. Then, open the drop-down menu and select Watcher. and then Click Add Watcher icon to set up the Watcher
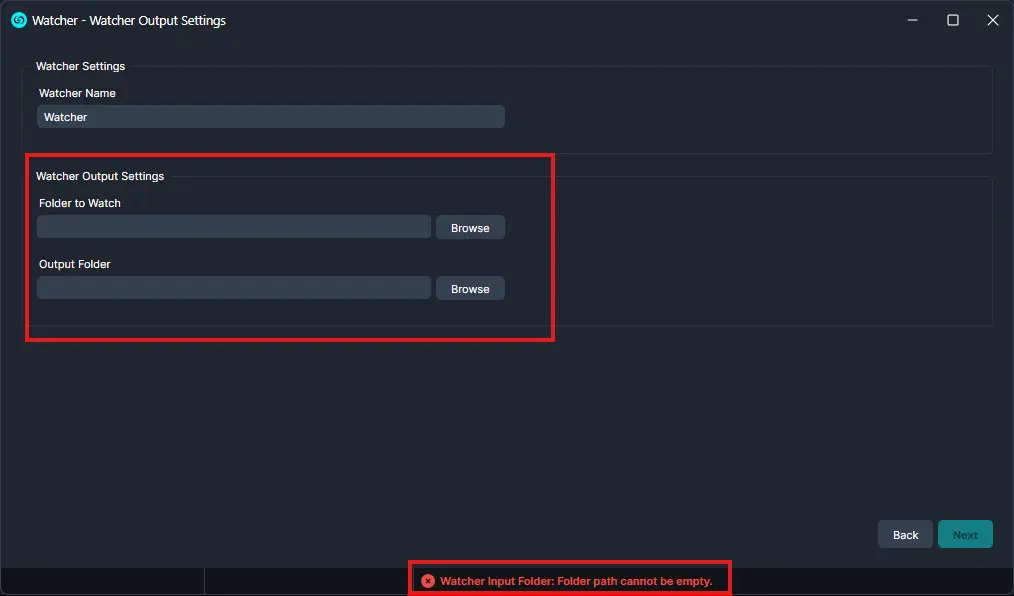
When the CaseGuard Watcher window appears, enter a Watcher name.
Click “Browse” to add a folder to watch. This is the folder where all documents that need to be redacted will be input.
Click “Browse” to add an Output folder. This folder will contain all exported files after the Watcher processes and redacts the documents from the Watch folder.
Click “Next.“
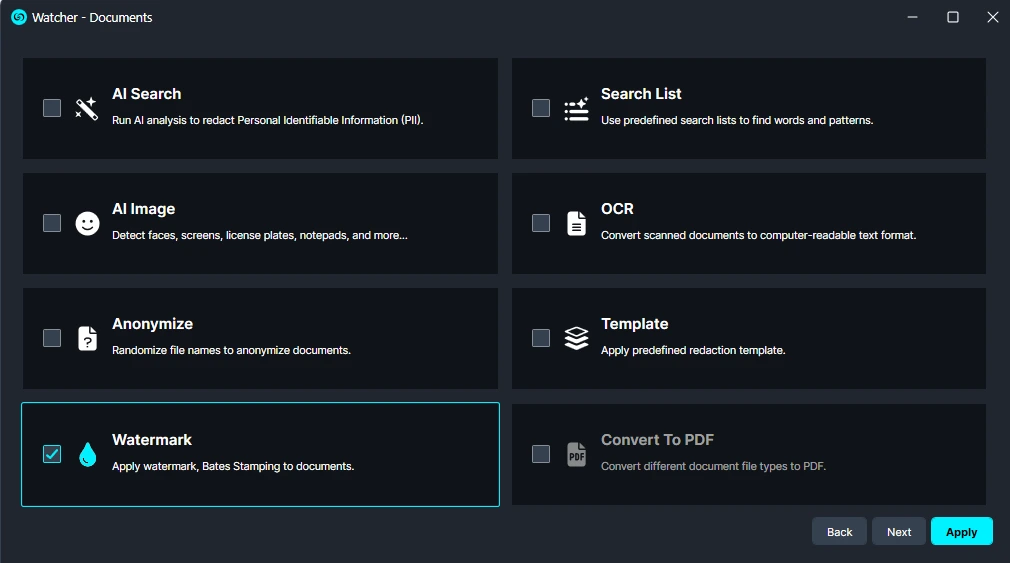
A Watcher window will appear, select Documents for the operation you would like your Watcher to perform.
- Select “Watermark” to apply to your Watcher and click “Next.”
Click on “Use an existing Watermark” if you have previously created one, then select the watermark you want to apply in this Watcher. Create a new watermark: If you don’t have a watermark yet, choose “Create New” from the dropdown and follow the steps in Add a Watermark to make one.
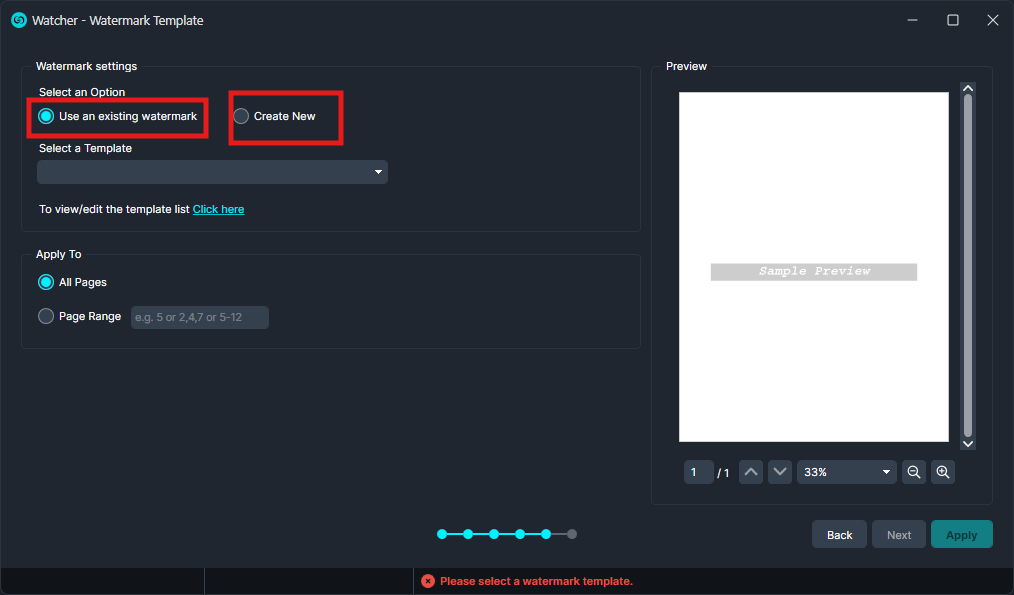
Click “Next” and a Summary window will appear. Here you can edit your selection.
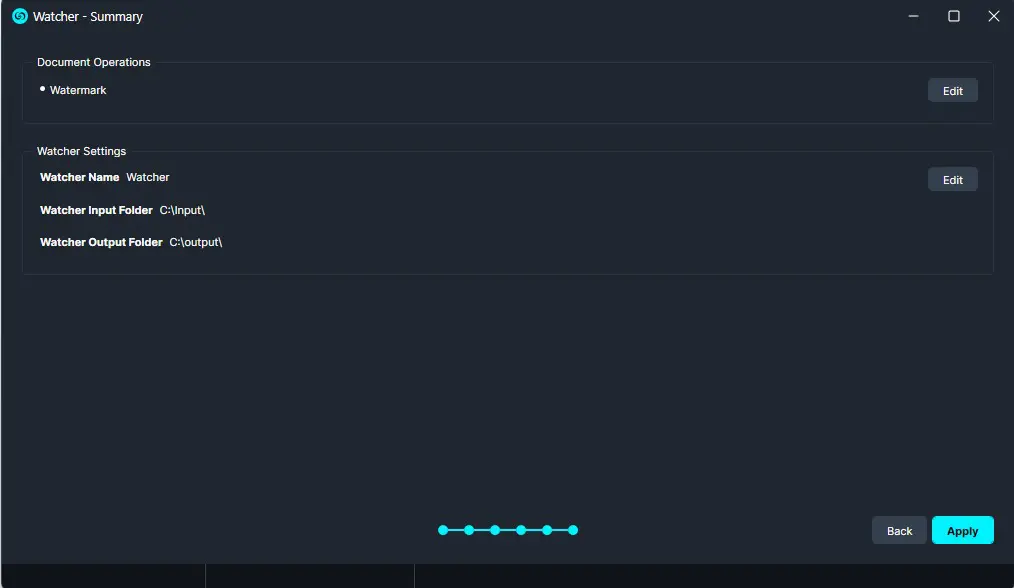
Once satisfied with your Watcher click “Apply” and your Watcher will appear in the Watcher Panel.
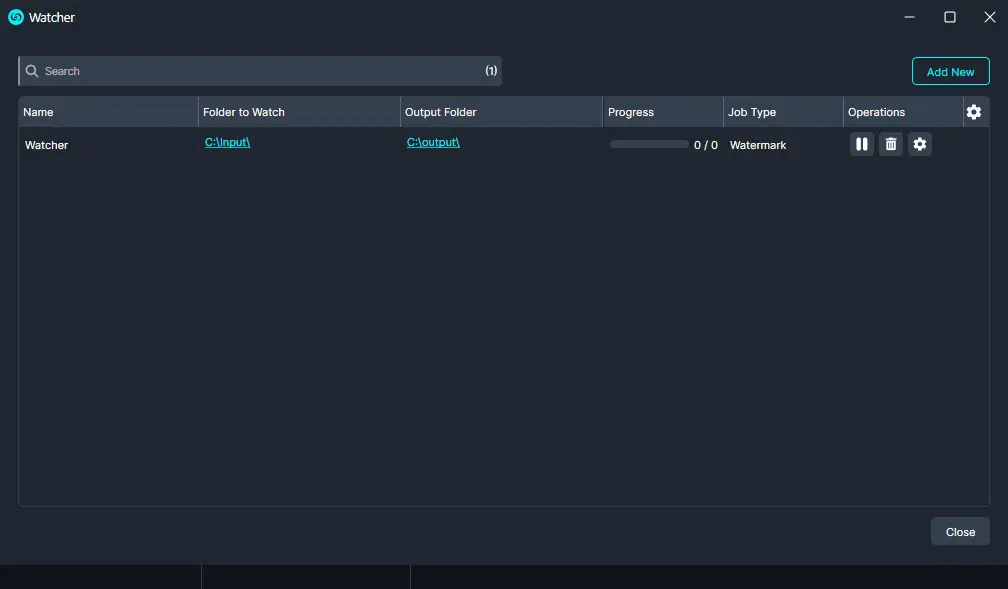
Under the Watcher progress bar, you have the option to open the settings, delete  , or pause
  the Watcher.
-
- The settings will open up the Watcher window.
- Delete will completely delete the selected Watcher.
- Pause will pause the Watcher operation.
Once complete, your files should have the selected watermark applied and exported to your output folder.
Conclusion
The Watcher’s Watermark operation allows you to apply consistent branding and authenticity across all your documents automatically, saving time and ensuring workflow efficiency. By combining Watermark with other Watcher operations, such as AI Text Analysis for redactions, you can streamline large-scale document processing while maintaining accuracy and consistency. For questions or additional assistance, contact CaseGuard Support at [email protected].
Was this article helpful to you?
No
Yes
2