Overview
The Blocklist feature in CaseGuard is a powerful tool for controlling which Personally Identifiable Information (PII) is redacted. For example, if you want to redact bank account numbers but exclude certain numbers from redaction, the blocklist allows you to safely protect specific entries without manually undoing redactions. This feature improves efficiency, reduces errors, and streamlines automated redaction workflows.
This guide covers how to access, create, and manage your blocklist, along with best practices to maximize its effectiveness.
Accessing the Blocklist
You can access your blocklist in CaseGuard using two methods:
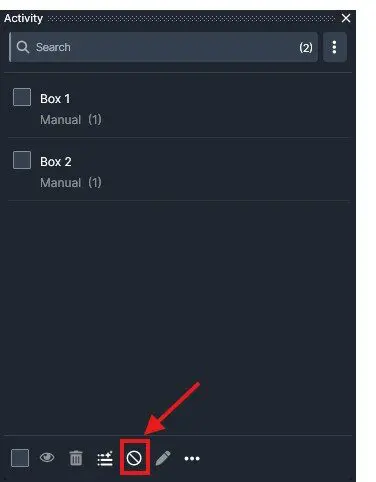
- Activity Tab: Open the Analytics tab and click the block icon at the bottom of the panel.
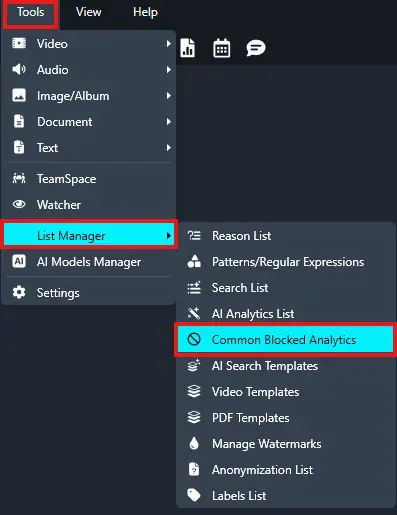
- Top Toolbar: Navigate to the top toolbar, select Tools → List Manager → Common Blocked Analytics.
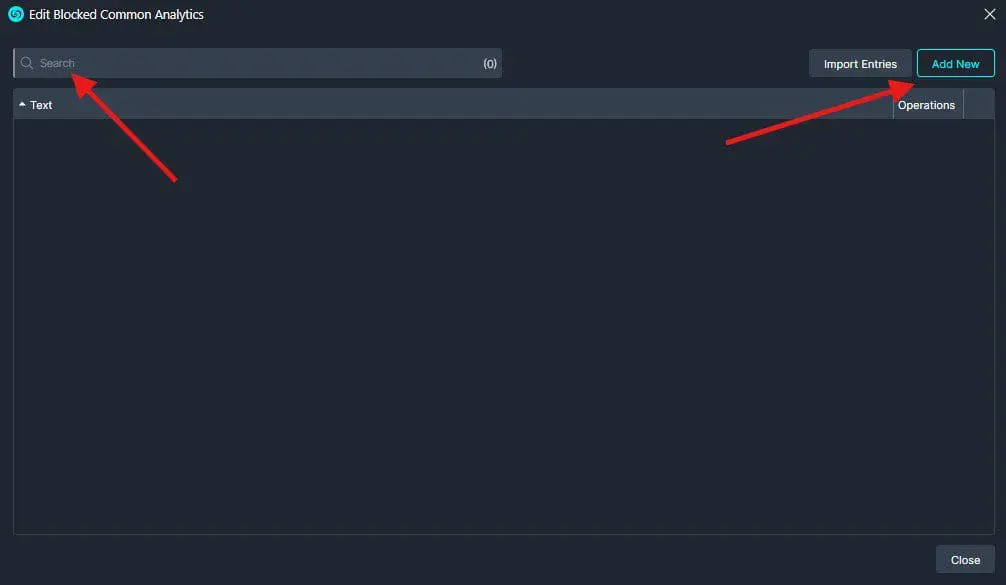
- Once the blocklist window opens, you can add new entries or search existing entries using the search bar at the top.
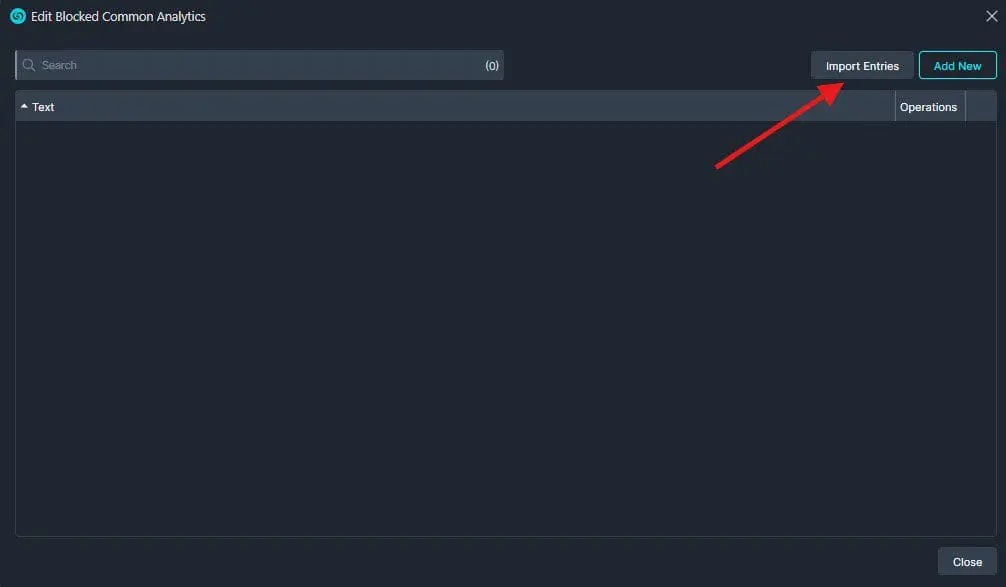
- Once you navigate to your blocklist, you will see the window below, where you can add a new entry or search within your list using the search bar at the top.
Adding Entries to the Blocklist
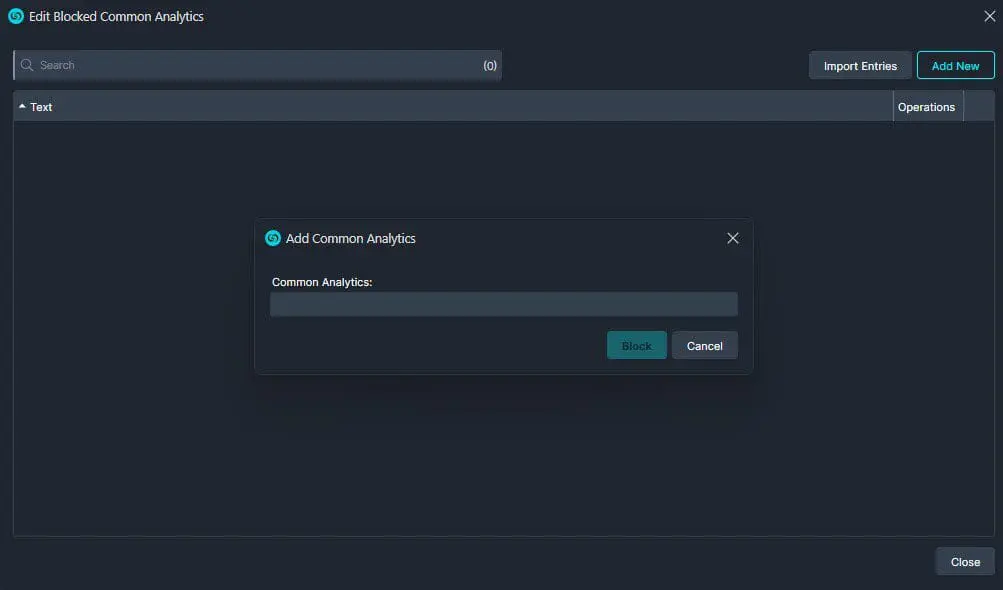
To add a new entry to your blocklist, click “Add New.” A window will appear, allowing you to manually enter the PII you want to block from redaction. Once added, the entry will appear in your list.
Alternatively, you can import a list of PII entries from a .txt file. Each entry in the file must be on a separate line to ensure proper import into CaseGuard. To import, click the “Import Entries” button at the top right of the blocklist window, then select your .txt file from the file explorer.
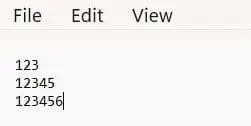
Once you have your list ready in a .txt file, within the blocked list locate the “Import Entries” button on the top right of the window. A Windows file explorer should appear and then you may select your .txt file.
Deleting Entries from the Blocklist
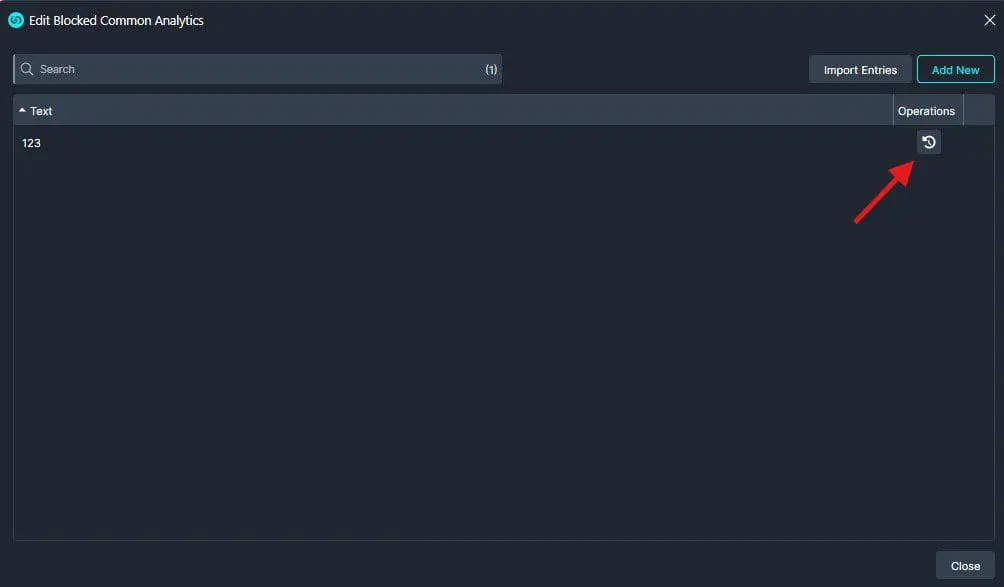
To delete an entry from your blocklist, navigate back to the blocklist window and click the reverse arrow button to the right of the entry you wish to remove. This will delete the entry from your list.
Conclusion
The blocklist feature in CaseGuard helps you efficiently manage exceptions in your redaction process, saving time and ensuring accuracy. By configuring and maintaining your blocklist, you can automate workflows while keeping sensitive data secure.
For additional support or questions about blocklists, contact [email protected].
Was this article helpful to you?
No
1
Yes