Use Case
When I try to scroll through my document file, my CaseGuard crashes. Some of the pages are also appearing blank, and I am not able to highlight some words.
To repair a document file in CaseGuard:
- Open the project with the document file that has issues.
- Select “OCR“

- In the OCR window check the “OCR all Pages” option and run OCR on “All Pages” option. Then click Apply.
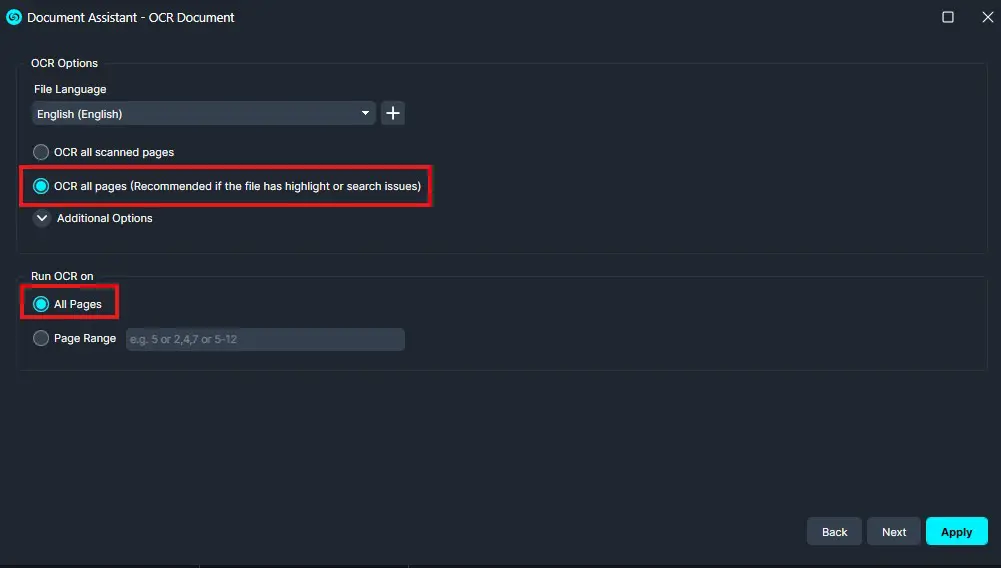
- When the OCR process completes, scroll through the document to make sure it doesn’t have issues.
Once you’ve confirmed the document is repaired, click ” Export” from the top right of CaseGuard to process the file.
If you frequently encounter issues with OCR in CaseGuard, you can enable the following setting that allows CaseGuard to automatically OCR files as soon as they are added into the software.
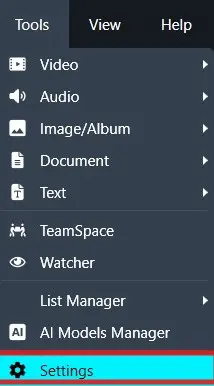
- Click “Tools” on the top toolbar -> Settings -> OCR
- Select “Automatically OCR new PDF files”, and
- Make sure “OCR all scanned pages” option is selected.
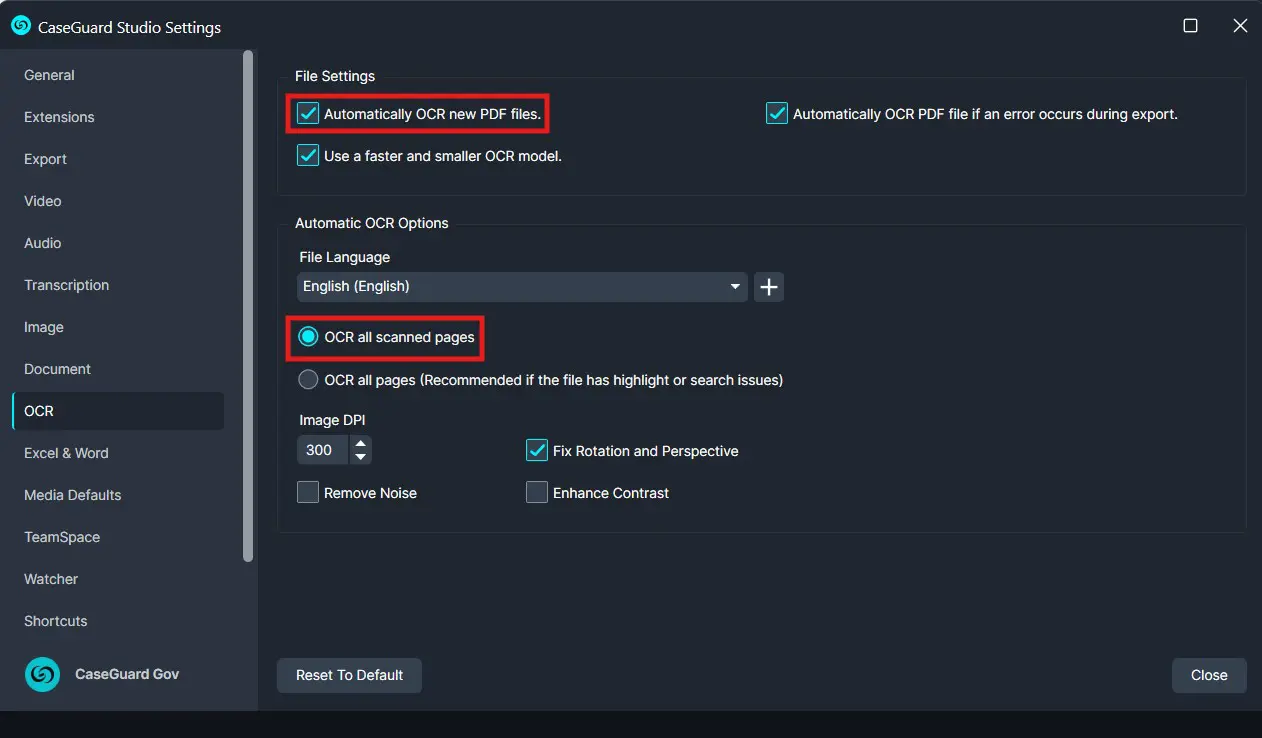
Activating this feature in CaseGuard will enable the software to automatically perform OCR on any new files added.
Conclusion
By following these steps, you can quickly repair documents and prevent common issues such as blank pages or un-highlightable text. Enabling automatic OCR further streamlines your workflow by ensuring all new files are processed immediately, reducing manual intervention and improving document readability.
If you need additional assistance, our Support Team is here to help at 📧 [email protected]
Was this article helpful to you?
No
Yes
3