Overview
In this guide, we’ll show you two ways to update your default storage location, one simple method you can do entirely within CaseGuard, and another that requires administrator privileges.
Follow these steps to quickly set your CaseGuard projects to save where you want, making organization and access easier than ever.
Follow these steps to change your default CaseGuard save location.
Method 1: Change Default Storage Inside CaseGuard (Quick & Easy)
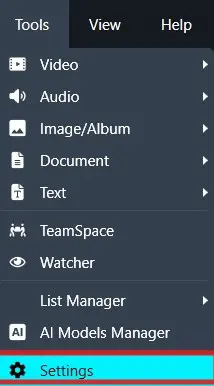
- Open CaseGuard and go to Tools → Settings.
- In the General tab there is a Storage Folder option, check your current location.
⚠️ If the folder doesn’t have a drive letter, either assign one or select a folder that does.
- Click Change beside the Storage Folder option.
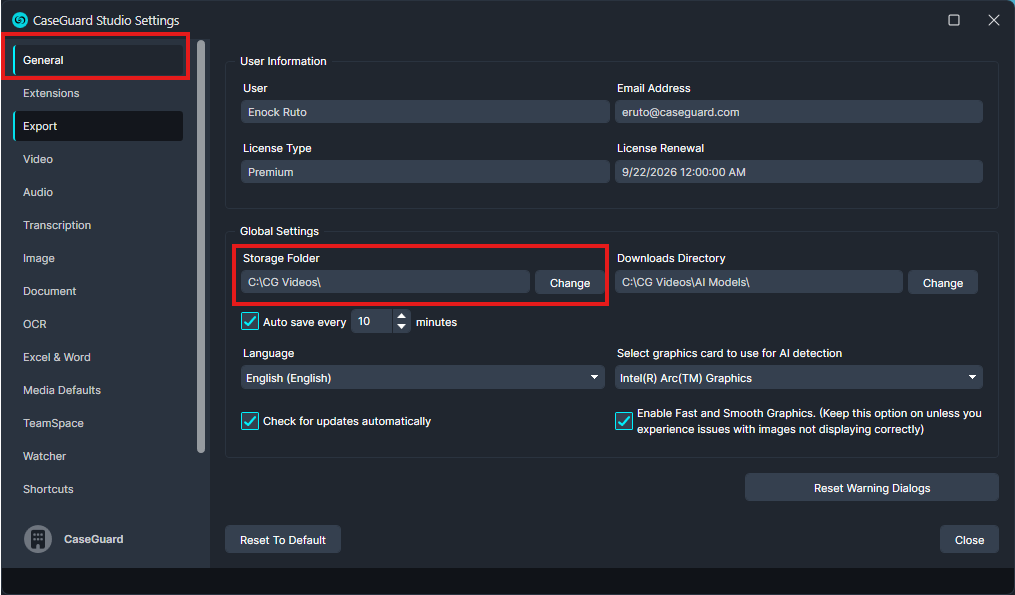
- In the File Explorer window that opens, navigate to your desired folder and select it.
- The Storage Folder field in CaseGuard will update automatically.
- All future projects will now save to this folder.
Method 2: Change Storage for Individual Projects
-
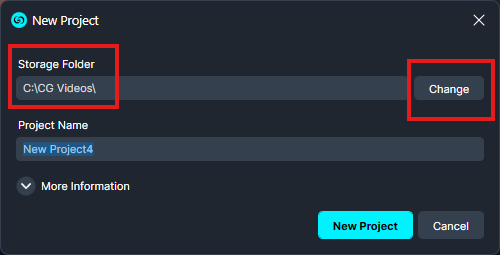
Click New Project in the top-left corner of CaseGuard.
-
In the New Project window, click Change beside the Storage Folder field.
-
Select the desired folder for this specific project.
Conclusion
You now know how to update your default storage location or set a folder per project, giving you full control over where your CaseGuard files are saved. If you run into any issues, our support team is ready to help, email [email protected] for a quick solution.
Was this article helpful to you?
No
Yes