Use Case
I received a file from a request and tried adding it to CaseGuard, but it won’t import. After checking the extensions list in the settings, I found that the format is not supported. How can I add this video to CaseGuard?
In this guide, we’ll walk you through a step-by-step process to easily add any unsupported video format into CaseGuard!
Follow these steps to add any unsupported video to CaseGuard:
Launch CaseGuard and open the project where you need to add the file.
Once the project is open, click the Screen Recorder option at the top. 
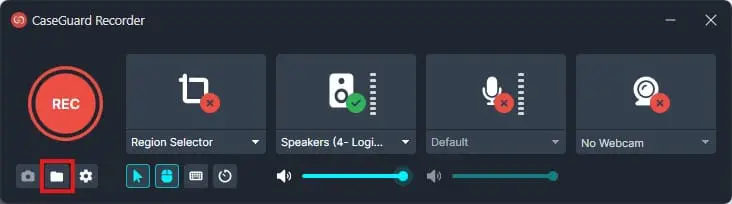
The Screen Recorder window will open, displaying several options.
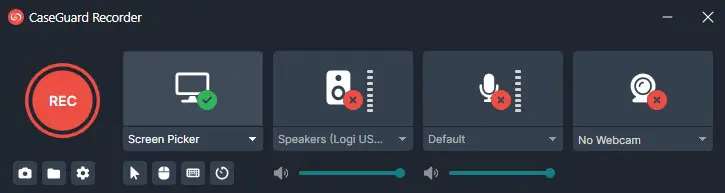
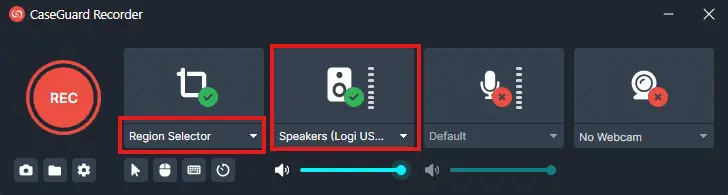
Click the first drop-down menu (with the screen icon) and select Region Selector from the list.
- A green dotted square, known as the Region Selector, will appear.
Click the second option (with the Speaker icon) to enable audio recording.
- If your audio is not being detected, try selecting different speakers from the drop-down menu.
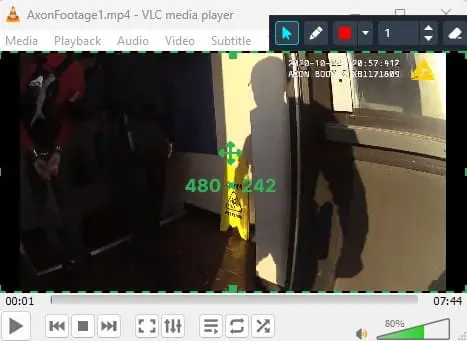
Now that the Screen Recorder settings are configured, open the unsupported video in its proprietary player or VLC Media Player.
Adjust the Region Selector green dotted square to ensure it fully captures the video within the player.
Once properly positioned, click REC inside the Screen Recorder to begin recording.
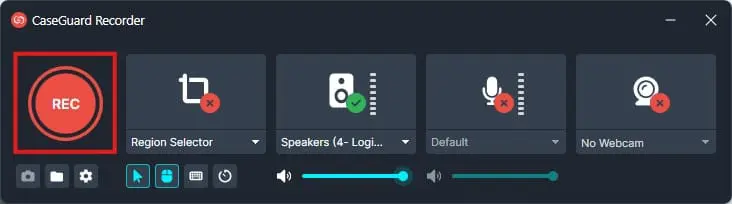
The Screen Recorder will initiate a countdown before the recording starts.
As soon as the countdown reaches 0, the recording will begin – start playing your video immediately.
Once the video has finished playing, click the red stop button in the Screen Recorder to end the recording.
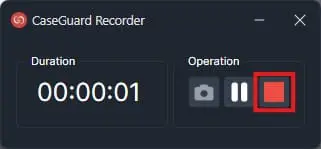
After stopping the recording, click the open folder icon in the Screen Recorder window. This will open Windows File Explorer to the CaseGuard Screen Recorder folder.
Locate your newly recorded video in this folder and import it into CaseGuard!
Conclusion
Your video has now been successfully added to CaseGuard, and you can proceed with your redactions! If you encounter any issues or need assistance using the CaseGuard Screen Recorder, don’t hesitate to reach out. Our support team is always ready to help ensure a smooth workflow. Simply email us at [email protected], and we’ll be happy to assist!
By following these steps, you’ll be able to add any video into CaseGuard ensuring your redaction work is never interrupted.
Was this article helpful to you?
No
Yes
1