CaseGuard Studio makes it simple to generate both translations and closed captions for your audio files. This feature is especially useful when you need to create accessible content in multiple languages, such as English and Spanish. However, CaseGuard Studio does support over 100+ languages and dialects. For this tutorial we will be covering how to do English and Spanish but feel free to choose a language of your choice.
Follow the steps below to add translations and closed captions to your audio project.
Steps to Translate and Add Closed Captions
- Open CaseGuard Studio.
- Launch the program and open a new or existing project.
- Navigate to AI Audio.
- On the left-hand toolbar, click AI Audio.
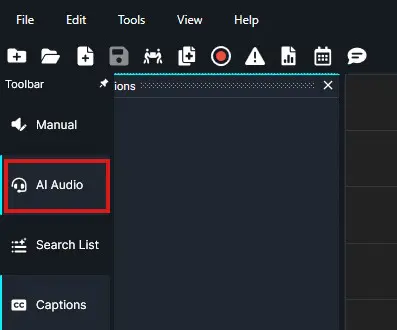
- Open the Translation and Closed Captioning Wizard.
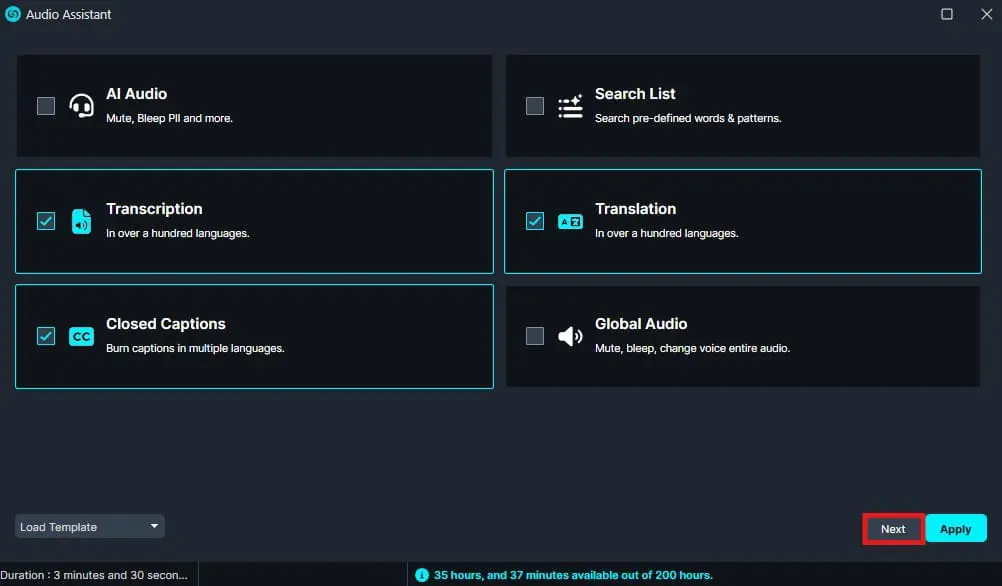
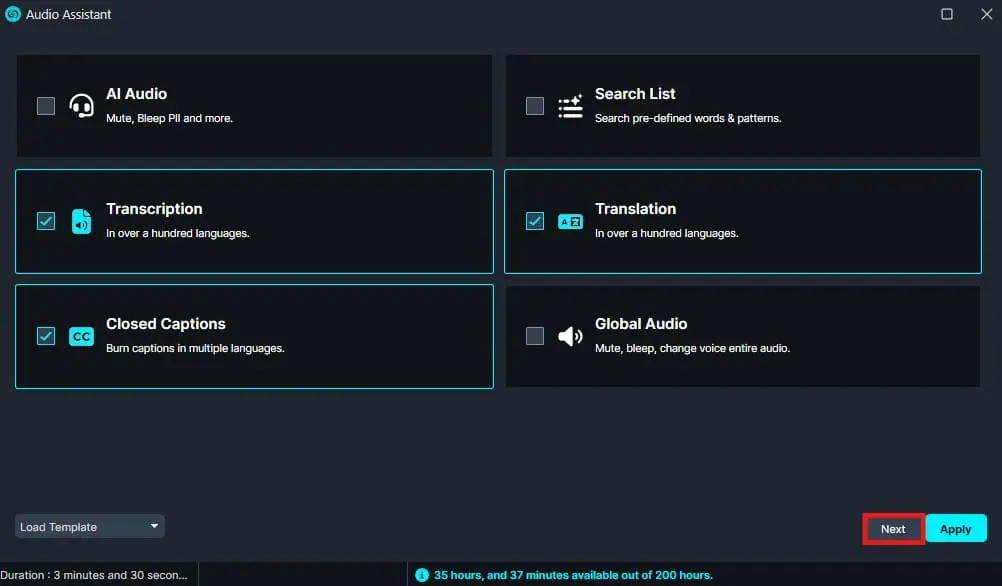
- Within the audio wizard, select Translation, Transcription and Closed Captioning, then click Next.
- Configure Transcription Settings.
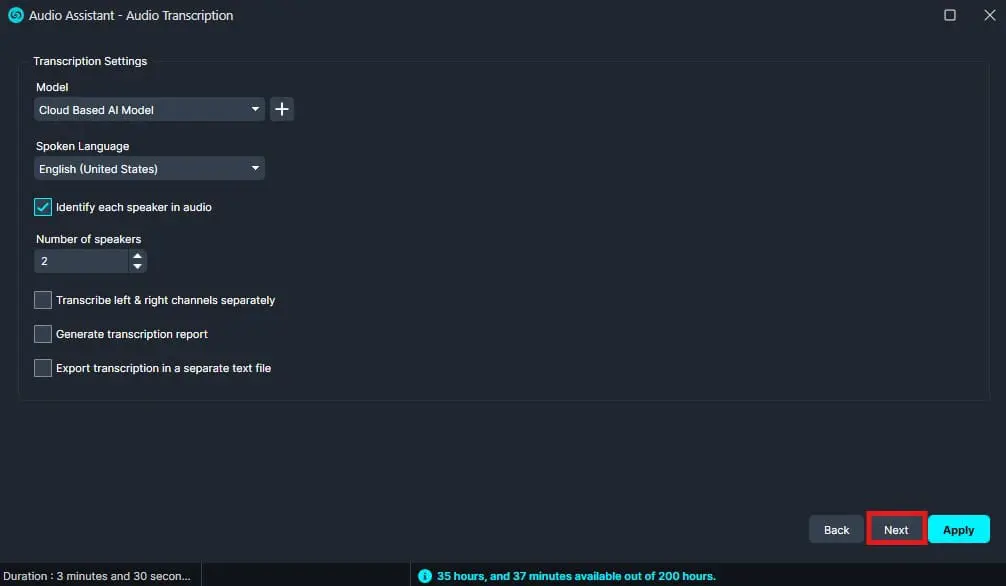
- Review the transcription settings. In most cases, the default options will be sufficient.
Click Next to continue.
- Set Translation Preferences.
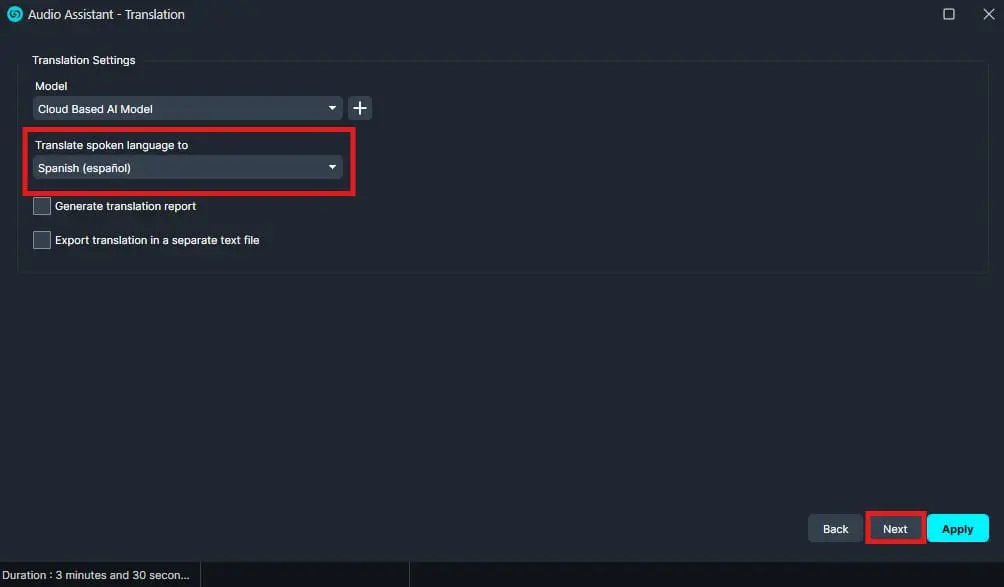
- On the next screen, choose the target language (e.g., Spanish) for translation and closed captioning. Once you’re done click Next.
- Adjust Caption Settings.
- Here, you can configure how your captions will appear on the video.
- For your first closed captioning track, select the caption type from the dropdown menu and customize the formatting (font style, size, color, etc.) as needed.
- Add a Second Closed Captioning Track.
Click the plus (+) icon in the top-right corner of the window to add another caption track.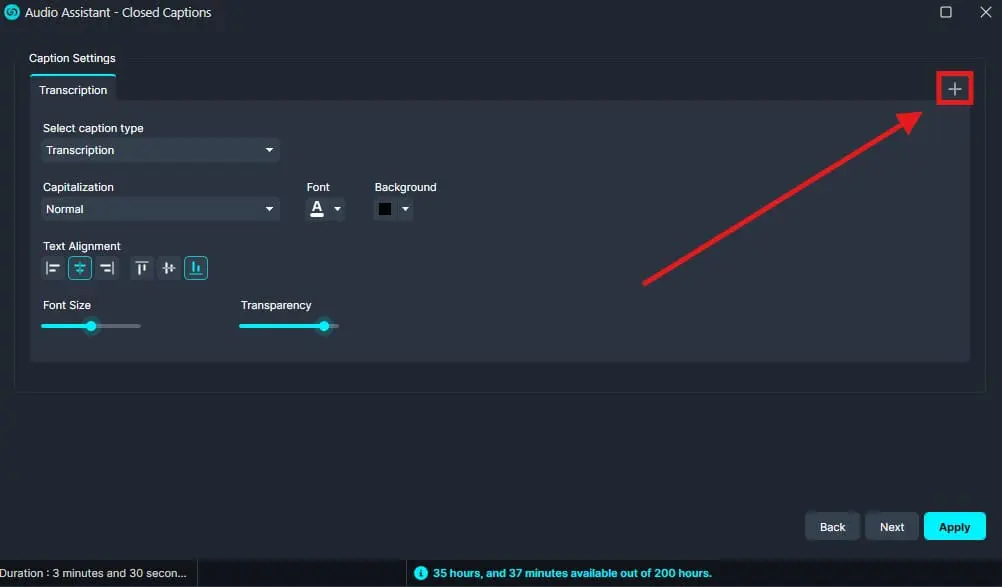
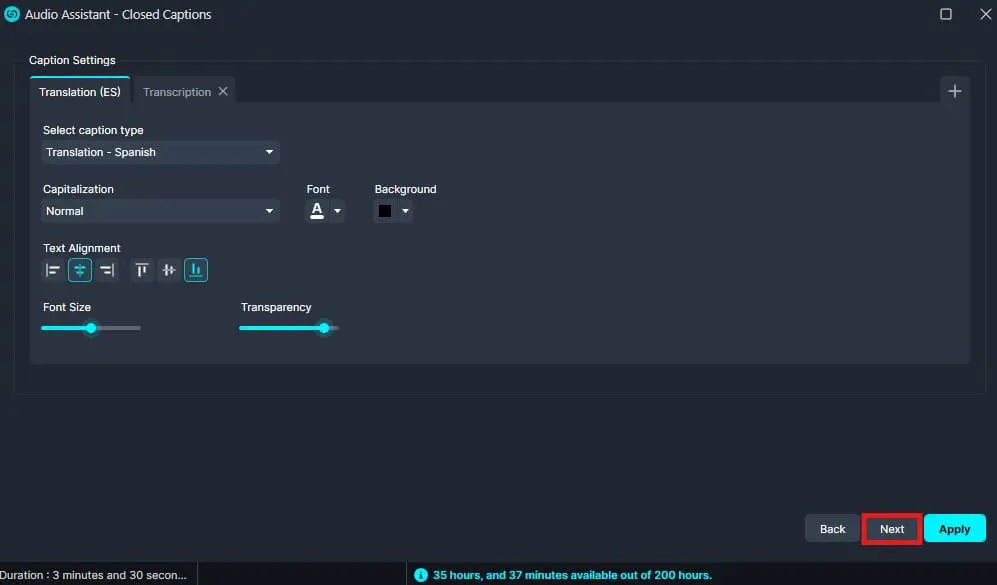
- For this second track, select the translation option from the dropdown menu.
-
- Configure the caption styling if needed.
- Finalize the Process.
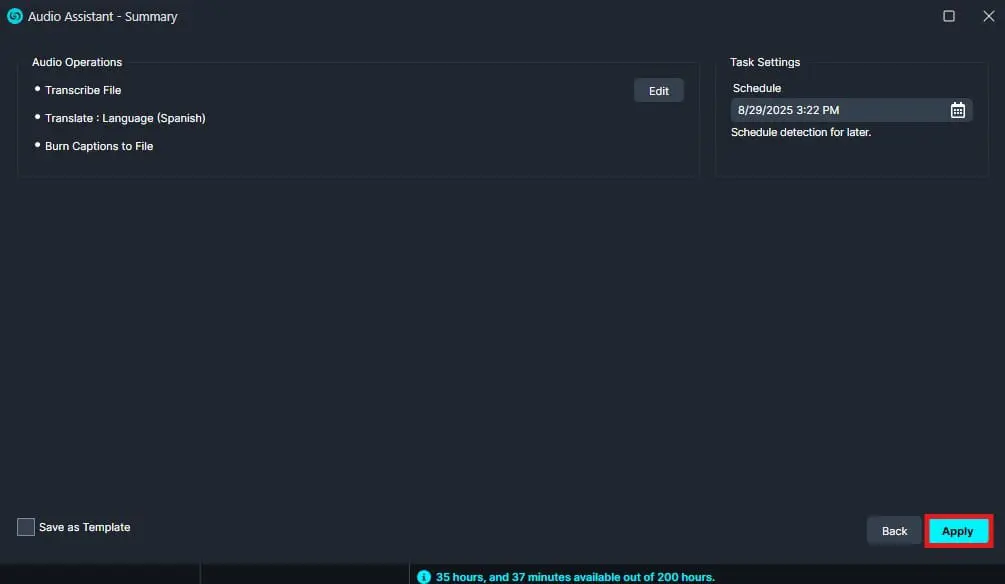
Click Next to review the summary window.
When ready, click Apply.
- Access the Final File.
- Once processing is complete, your project will include closed captions for both the original transcription and the translation.
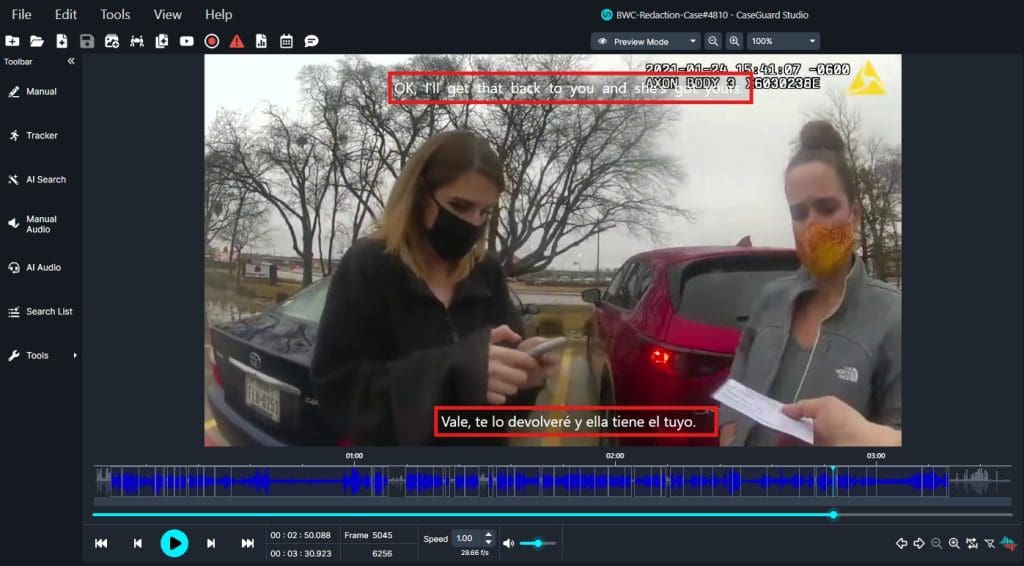
Conclusion
With CaseGuard Studio, adding bilingual closed captions is straightforward and efficient. Whether you are preparing legal evidence, educational material, or public-facing content, you can quickly generate accurate Multiple languages making your audio accessible to a wider audience.
Was this article helpful to you?
No
Yes