Overview
Redaction Studio has several default workspaces for video, audio, images, and documents.
When editing files within the software, the default workspace will appear with the panels needed for your media files. Some panels have tools that provide additional commands and options.
Panels can be added to your workspace based on your needs. You can easily add, remove, pin, or hide any panel, including default ones included with each workspace.
What is a panel?
A panel is a collection of specialized tools that can be pinned to your workspace to show you more information and give you more control over your files. In CaseGuard you can move and resize any panel to your liking.
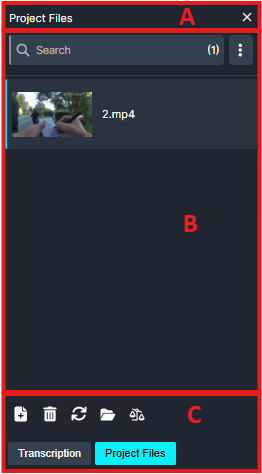
A: Panel caption
The panel caption has:
- The “Panel Name” on the top left
- On the right, you will find:
- The close button “x” will close the panel.
- Right-clicking the top of the panel gives you more options to control where the panel should land on your workspace.
- Floating: pops your panel out of the Workspace.
- Dockable: allows you to display the panel in a vertical orientation on the right side of the Workspace.
- Tabbed document: place your panel as a tabbed document at the top of the Workspace Viewer.
- Auto-hide: automatically hides the panel when you aren’t using it.
- Hide: Hide the panel when you aren’t using it.
- Resize any panel by left-clicking and dragging the edge of the panel.
- Move any panel by left-clicking the top of the panel and dragging it to where you need it.
B: Panel content
Every panel, based on its functionality, will show you the relevant content in this area.
C: Panel tools
Panels generally have tools available at the bottom and top of them. These tools are grouped to be suitable for whatever task you’re doing, making it easier for you to manage your workflow.
How to manage your panels
1- From the top of CaseGuard, click “View” -> “Panels” -> Click on any of the available panels you need to enable:
-
- Panels related to your file type will already be enabled.
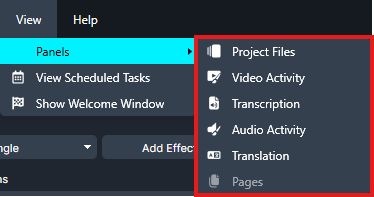
2- All panels related to your current file will be stacked on the right side of your window vertically:
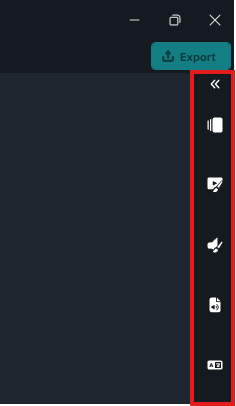
3- From the right side of your window, click on the panel you want to add to your workspace.
4- To expand the panel’s toolbar, click the  “Expand” icon. To collapse click the “Collapse”
  icon.
icon.
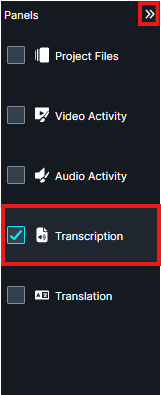
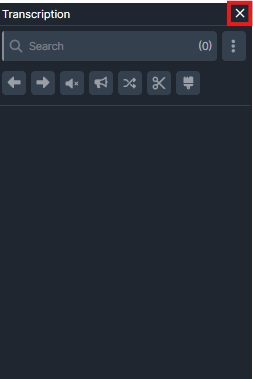
5- To unpin the panel, click on the “X” icon, and the panel will be sent back to the vertical tabs on your right side of the window:
Available panels
Redaction Studio has the following different panels that you can use to customize your workspace:
- Toolbar
- Project Files
- Video Activity
- Transcription
- Translation
- Audio Activity
- Processing Information
Was this article helpful to you?
No
Yes
3