After completing your work in CaseGuard Studio, you may need to locate the final exported copy of your file in order to send it to a requestor. This guide walks you through the process step by step.
Steps to Locate Exported Files
- Open CaseGuard Studio.
- Start a new project, or open an existing project that contains the file you want to export.
- Select the File.
- Within your project, choose the file you would like to export.
- Export the File.
- Click the Export button in the upper-right corner
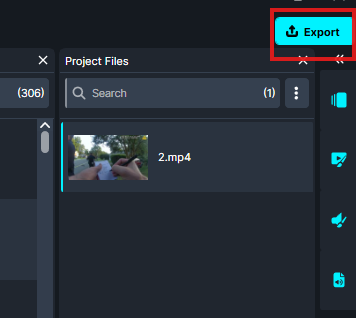
-
- Once the export is complete, a blue “New” icon will appear next to your exported file in the Project Files panel.
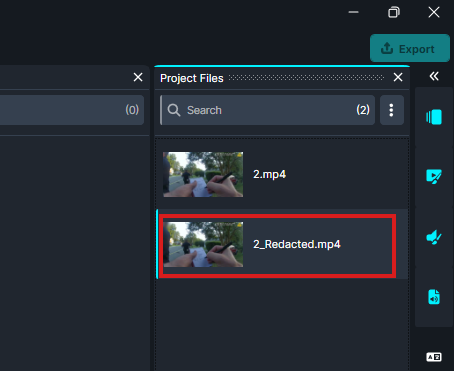
- Locate the File on Your Computer.
- In the Project Files panel (on the right-hand side), click the folder icon at the bottom.
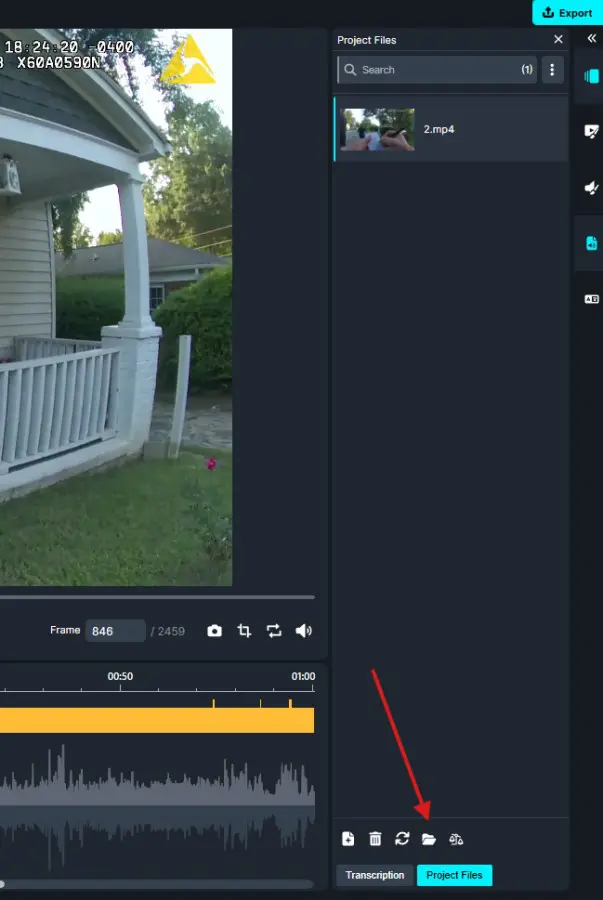
- This will open the folder on your computer where the exported file is stored.
- Identify the Exported Copy.
- Exported files are automatically labeled with “_Redacted” at the end of the file name.
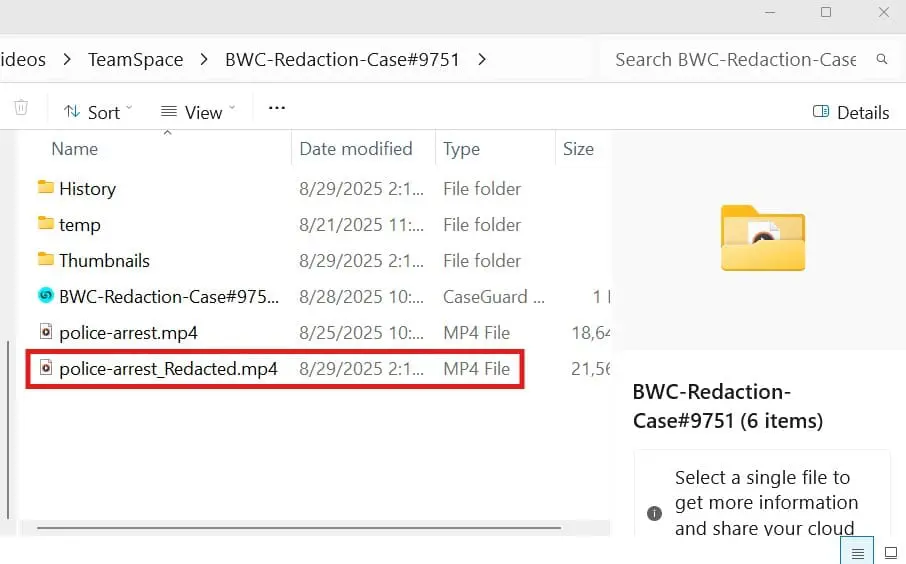
- You can use this file to send to your requestor, create additional copies, or store for future use.
Conclusion
Locating your exported files in CaseGuard Studio is quick and straightforward. With just a few clicks, you can export, access, and securely share redacted files in the correct format, ensuring your requestors receive exactly what they need.
Was this article helpful to you?
No
Yes
1