The TeamSpace tool in CaseGuard Studio allows you to work on the same project as the rest of your Team. This feature facilitates collaboration and ensures everyone on the team is working with the latest version of the project.
Follow these steps to rename a TeamSpace:
1. Open CaseGuard Hub
At the bottom left of your Windows screen, use the search bar to locate and open ‘CaseGuard Hub’.
2. Select ‘TeamSpace Server’
In the CaseGuard Hub application, select ‘TeamSpace Server’.
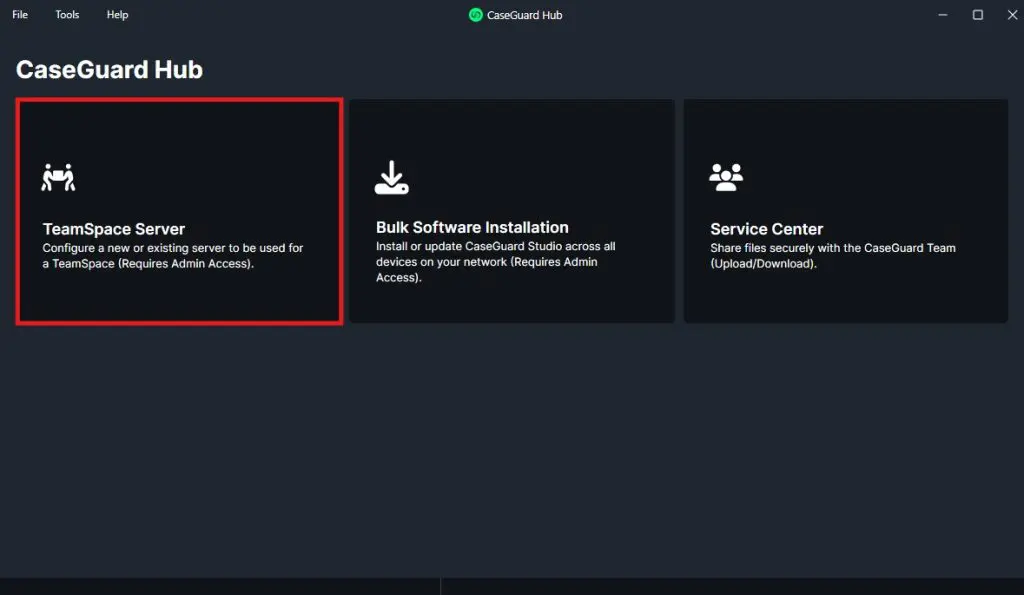
This opens the Manage Servers window, displaying all of your available TeamSpace servers.
3. Locate the TeamSpace Server
Find the server that contains the TeamSpace you want to rename.
Click on the folder icon next to that server.
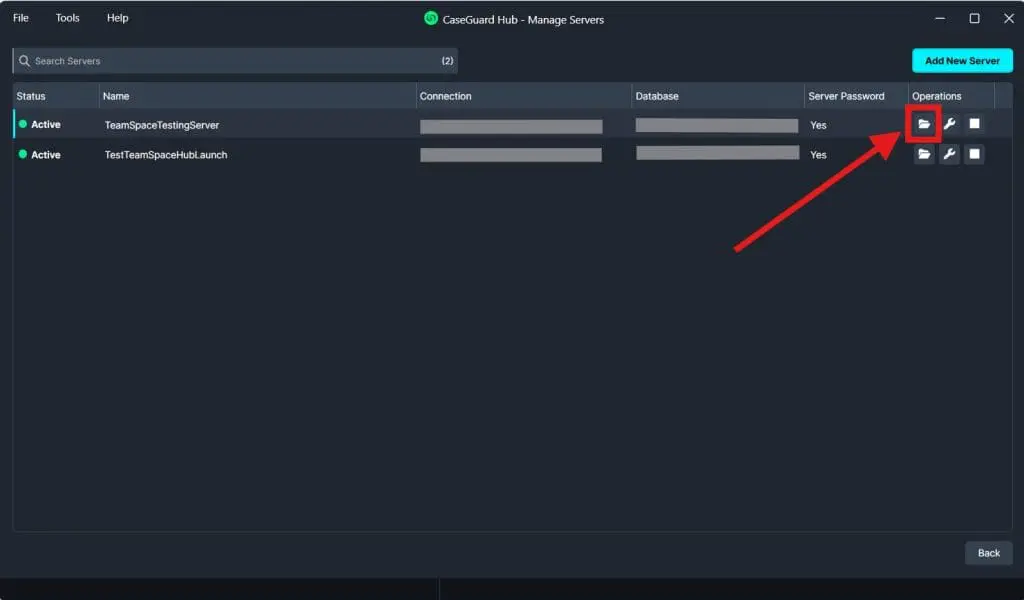
This will open the TeamSpaces Management window.
4. Rename the TeamSpace
In the TeamSpaces Management window, click the middle (Edit) icon next to the TeamSpace you wish to rename.
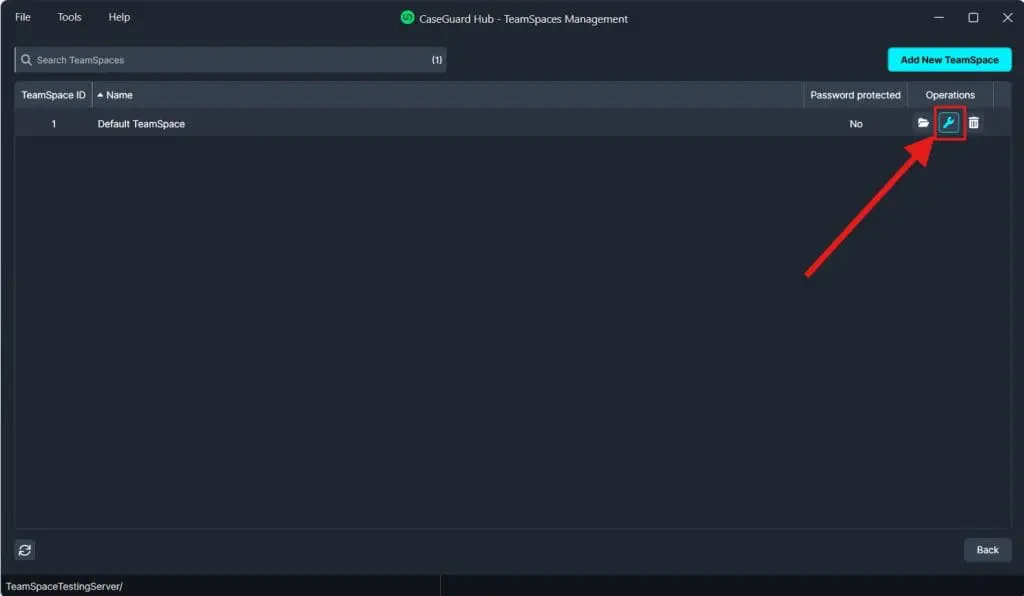
A new window will appear, allowing you to edit the TeamSpace name.
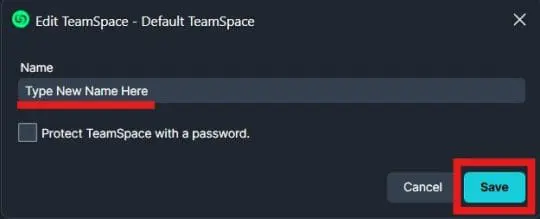
Enter the new name and click Save.
Conclusion
Renaming a TeamSpace in CaseGuard Studio is a simple but powerful way to maintain clarity and structure within collaborative projects.
Whether you’re managing multiple investigations, departments, or phases of a project, meaningful TeamSpace names make navigation easier and reduce the risk of miscommunication so your team can stay focused and productive.
Was this article helpful to you?
No
Yes