Bulk Software Installation with CaseGuard Hub
The Bulk Software Installation feature in CaseGuard Hub allows IT administrators to install, update, or uninstall CaseGuard Studio across multiple devices in a secure and efficient manner. This functionality significantly reduces the time and effort required to manage software deployments across your agency or organization.

Getting Started
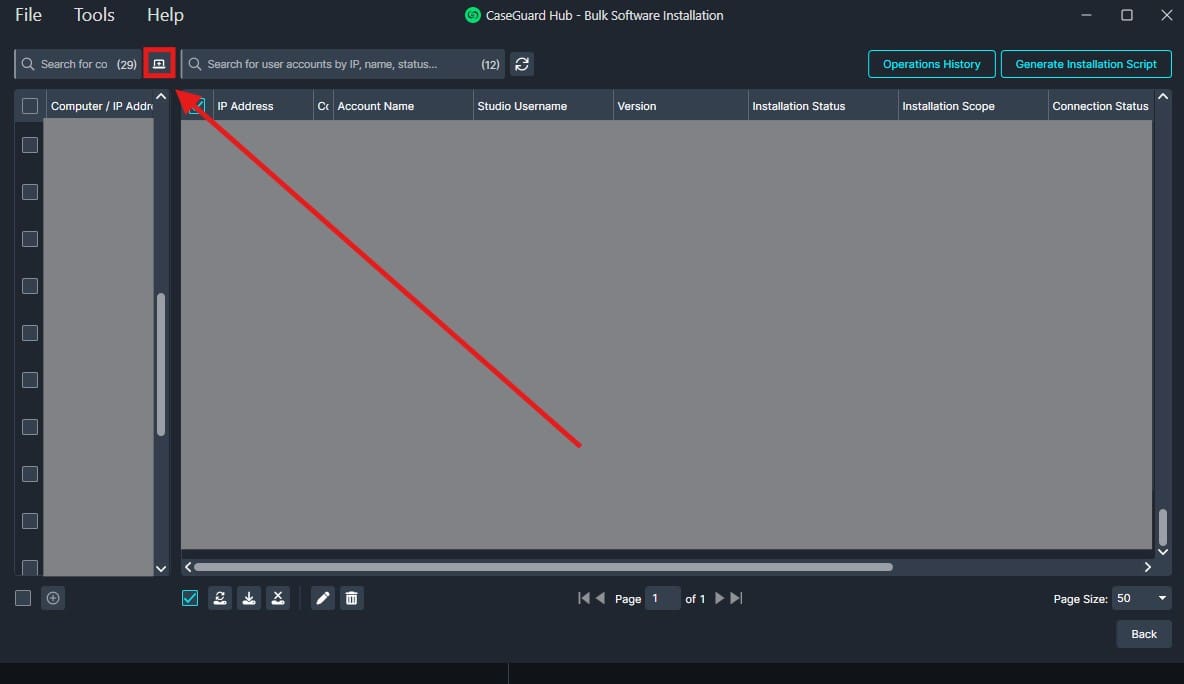
Upon opening the Bulk Software Installation tab, you’ll see a list of devices within your network.
To manually add a missing computer:
-
Click the plus (+) computer icon at the top left.
-
Enter the device’s IP address.
-
Test the connection and click Add.

Setting Up Your Deployment
Step 1: Enter Admin Credentials
-
Select the desired computers using the checkboxes on the left.
-
Click the plus (+) icon to input administrative credentials.
-
If all systems share the same login credentials, enter them once and apply them to all.

Step 2: Choose an Operation
Select one of the following operations from the three buttons at the bottom:

- Install CaseGuard Studio
- Update CaseGuard Studio
- Uninstall CaseGuard Studio
Installation Options
After selecting your operation, configure the deployment details:
- Select Installation File:
Click the folder icon to upload the CaseGuard Studio installer (e.g., version 9.5).

- Now select your CaseGuard Studio exe that you would like to deploy on your computers

Now that you have selected the exe you will need to configure the options below:

- Agree to the license terms and choose the installation scope:
- Install for all users or Install for a single user.
- Enable Perform Operation Automatically, or choose to generate a script for manual deployment.

Setup Type:
-
Typical Install
-
Custom Install
-
Complete Install
Select the desired features you’d like to include, then click Create Script (bottom right) to initiate the deployment.
Monitoring Progress
To track deployment status in real time:

- A summary window will open, displaying ongoing and past installations, along with their respective statuses and any error messages, if applicable.

Final Steps
After installation, verify with your end users that CaseGuard Studio has been installed successfully. If you have any questions or issues, please reach out to our support team at [email protected]. A representative will be happy to assist you.
Conclusion
The Bulk Software Installation feature in CaseGuard Hub is a vital tool for IT teams that need to efficiently manage CaseGuard Studio across multiple systems. Whether you’re rolling out updates, performing initial deployments, or uninstalling outdated versions, this tool ensures consistent and streamlined results. For questions, troubleshooting, or further guidance, contact our support team at [email protected]—we’re here to help.
Was this article helpful to you?
No
Yes