Overview
Redacting a large number of images can be a daunting and time-consuming task, but with CaseGuard Studio’s Album feature, you can simplify your workflow and save valuable time. Instead of manually adding and redacting each image individually in CaseGuard, you can add all of your images in one Album and apply redactions with just a few clicks.
This feature is catered towards users with the need to redact personally identifiable Information from a set of images, such as 10,000 images with faces/heads, license plates, screens, and more- all managed within a single album!
After applying all redactions, either manually or automatically, you can export the album. The exported file appears as a slideshow in the Project Files Panel. Additionally, you can locate images as individual files on your computer within the “Redacted Album” folder in your projects directory. This added convenience ensures a quick review and post-redaction process for the user.
Follow the Steps to Create an Album!
- Open or Create your project in CaseGuard Studio.
- From the Shortcut Bar, click the “Create Album” icon
 .
.
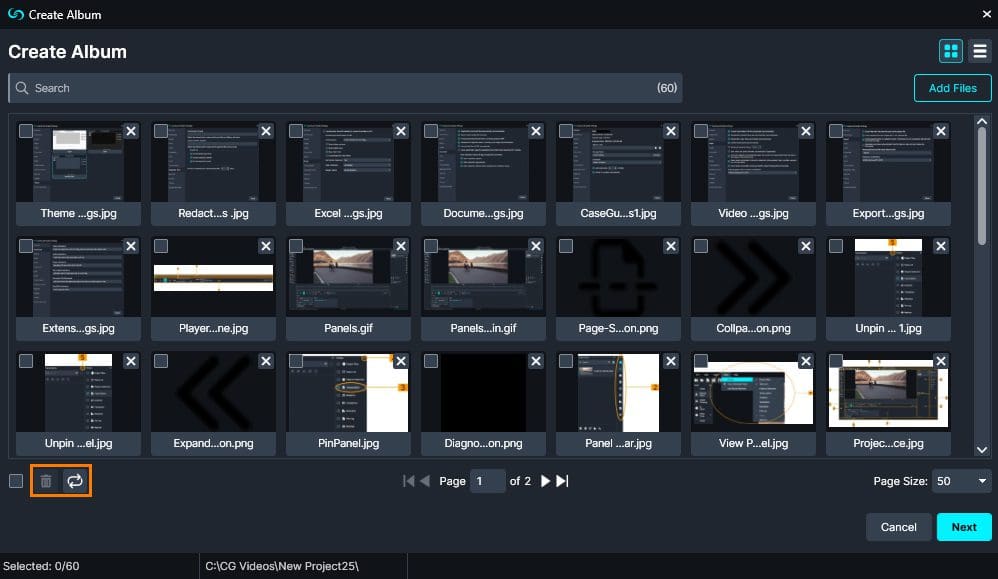
- Click “Add Files” to select images you would like to redact and then click “Open.” All the selected images will populate in the Create Album window.
- You can rearrange the order of the images by clicking and dragging the image.
- You can delete one or more images by selecting the checkbox on the images or the select all checkbox at the bottom of the window and then click the “Remove Selected” icon
 .
.
- You can also delete all the images by simply clicking the “Remove All” icon.

From the search bar of the Create Album window, you can search or filter by File Name and File Type to scan for a specific file as well as see the total number of images being added to the Album

- Click “Next.”
- Enter a name for your album in the “Album Name” field.
Optionally, under the Location Settings, you can choose to keep the album in the same project or change the location to a new project/folder on your machine. 
Click “Create Album” and your album will appear in your Project Files Panel as a slideshow. 
- To view individual images within the slideshow click “Next Frame”
 and “Previous Frame”
  from the player to go through the Album.
You can now begin Manually or Automatically redacting your images!
Let’s See it in Action!
![Video Thumbnail]()
Play Video