Navigating through multiple audio recordings of the same incident can be a tedious task, especially when there is significant overlap between them. The repetitive process of redaction can quickly become overwhelming as you find yourself listening to the same recordings repeatedly in search of identical segments to edit. Fortunately, CaseGuard offers a quick and straightforward solution to alleviate this frustration.
CaseGuard Studio gives you the ability to take your redactions and immediately import them into any other file that may need them. This can be useful for audio from multiple officers’ body cameras or for cases where CCTV footage or multiple cameras capture an incident and all need audio redacted. CaseGuard makes this process simple and fast so you don’t have to spend all day reviewing the same files over and over again.
Initial Writing
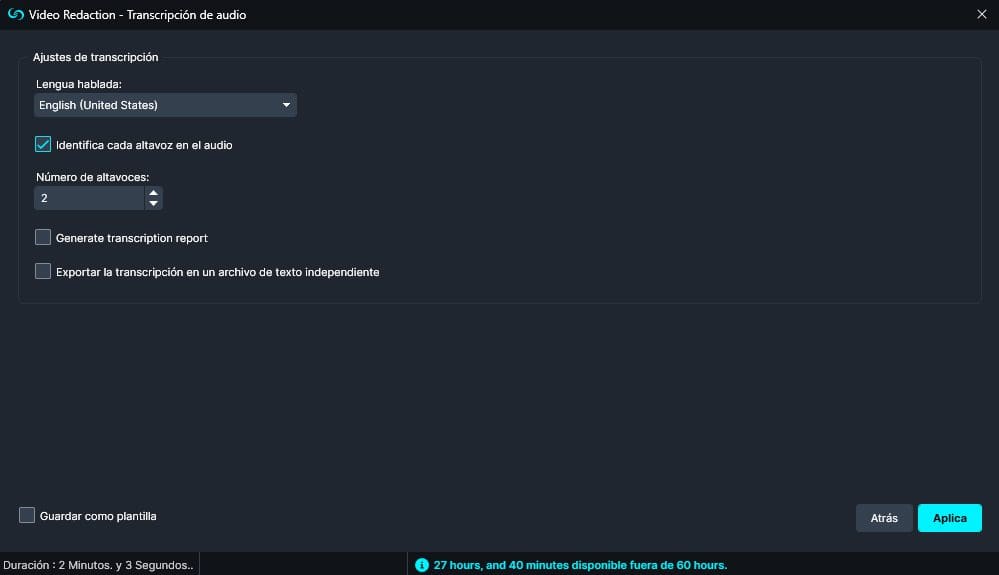
We can start by adding our files to CaseGuard Studio. Once done, we can select one of them in the Project Files Panel and start redacting it. To more easily identify any sensitive or personally identifiable information, we can click on AI Audio in the Tools Panel. In the Automatic Transcription Window, we can select which Language needs to be transcribed in our file and the Number of Speakers involved. This will provide us with a transcript of our audio to make it easier for us to scan and quickly find any sensitive information.

Another useful feature that CaseGuard offers is the Audio Tools Panel. Within this panel, we can Create Redactions , Change or Mute Voices , and Add Redaction Reasons .

While flipping through our video, we hear a name that needs to be redacted. If we already know when redactions occur, we can simply enter the times from the IIP into the Start and End Time boxes .
It’s also easy to redact while watching the video. Whenever you find something that needs redacting, you can click the Capture Start Time and Capture End Time buttons to mark its location, or click the Hold button for the duration of the redactable audio.
El Panel de Herramientas de Audio también ofrece la Lista de Operaciones de Tareas. Esta función nos muestra cada elemento que hemos redactado de nuestro archivo, facilitando la revisión de nuestras redacciones. Podemos Ir a la posición  , que reproduce nuestra redacción desde un segundo antes hasta un segundo después, Vista previa sin efecto
  , que nos permite escuchar nuestro audio sin la redacción, y Eliminar
  la redacción.

Copiar Efectos
Una vez que hemos revisado uno de nuestros archivos y encontrado nuestras redacciones, todo lo que tenemos que hacer es Copiar estas redacciones a cualquier otro archivo que podamos tener. Para ello, haga clic con el botón derecho del ratón en la Pista de Audio. Aparecerán varias opciones, una de las cuales es Copiar Efectos.

Cuando pasemos el ratón por encima de la opción Copiar efectos, aparecerán todos los demás archivos que hayamos cargado en nuestro archivo de CaseGuard Studio. Podemos hacer clic en los archivos a los que necesitamos transferir la redacción, lo que facilita y agiliza el proceso.
Después de seleccionar cualquier otro archivo que necesite las mismas redacciones, podemos inspeccionar y asegurarnos de que el proceso de Efectos de copia ha funcionado. Mirando ahora mis archivos, puedo ver que todas las redacciones que hice en mi primer vídeo se han trasladado al resto, asegurándome de que no tengo que revisar cada uno de ellos individualmente.
Ahora sólo queda Exportar  los archivos. Después de todo esto, ahora tenemos varios vídeos con las mismas redacciones, lo que nos ahorra tener que revisar y redactar cada uno de ellos individualmente.
Para ver esto en acción, echa un vistazo al siguiente vídeo. Para ver más vídeos y tutoriales, visita nuestro canal de YouTube o nuestro Centro de Ayuda.