How to Compare Video Recordings Using CaseGuard
July 14, 2022 | 4 minutes read
While CaseGuard Studio prides itself on providing users of the software with redaction features and tools that can be used to obscure personal information that is contained in virtually every format or file type, the software also contains a media player that can be used to edit video recordings and content. From cutting and cropping videos to adding a watermark to a video, there are a number of video editing tools available in the software that users can utilize to tailor their content to their specific needs. With all this in mind, users of CaseGuard Studio can upload and compare videos when using the software by following a few basic steps.
Creating a Project

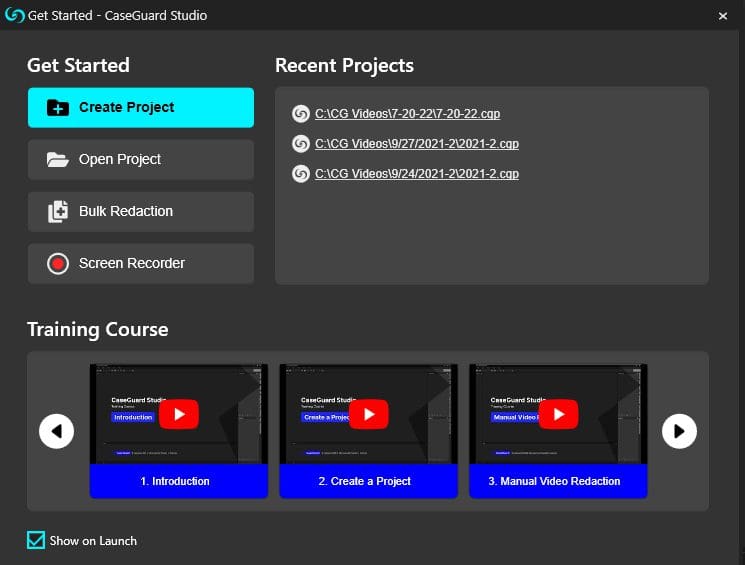
When a user first opens CaseGuard Studio, they will be taken to the Get Started pop-up window. When navigating this pop-up window, users can begin working on a new redaction, enhancements, or video editing project by clicking on the Create New Project button. Conversely, users can also access projects they have created and worked on previously by clicking the Open Project button. Moreover, there are also several training videos available within the Training Course section of this pop-up window that will provide users of the software with a greater level of understanding concerning the numerous features that are offered. To this point, a user looking to compare videos would click the Create a Project button, and then upload their video to the software.


When a user has successfully uploaded a video to CaseGuard Studio’s software, they will see a thumbnail for this video within the Project Files panel in the upper-right corner of the system. Likewise, if a user wants to add a second video to their project for the purpose of comparison, they must click the Add Files button within the lower left-hand corner of the project files panel, which will then take them to the file explorer on their respective machines. After a user has successfully uploaded their second video file to their project, they can then click the Compare button within the Project Files panel to begin the video comparison process.
Compare video


After clicking the Compare button, users will then see the Compare pop-up screen within their workspace. Within this pop-up window, users can compare this video using two separate media players with their own volume controls and play buttons. On top of this, there is a third play button at the bottom of the Compare pop-up window that allows users to play both videos they are looking to compare simultaneously. To illustrate this point further, consider a user that is looking to decide which video redaction effect would best serve their needs when looking to obscure the faces of people that have been captured without their consent could use the compare feature to save time.


To this end, a user could first use the Manual Detection feature within the software to place an Ellipse shape and a Blur visual effect over a face that has been picked up in a video recording. Alternatively, a user could also use the Ellipse shape to redact a person from the second video they are editing, but instead, use the Filled visual effect to redact said person as opposed to the Blur effect. When a user has finished applying their redaction effects, they can then click the Export button, right above the Project Files panel within the software. This will then take users to the Save as File Name pop-up window.

Export video

From within this pop-up window, users can choose to export their video immediately by clicking the Export button, or at a later date by selecting a time from the Schedule drop-down menu. After the video exportation process has been completed, users will be able to compare these videos by clicking the Compare button within the Project Files panel, in the same manner, that was done when they uploaded their initial video to their project. After the Compare pop-up window has been opened within the user’s workspace once more, they will see that they can now access their redacted files within the two media players in the window, as well as use the play button at the bottom of the window to watch both redacted videos at the same time.
As editing videos can be a strenuous and cumbersome process, the video editing tools within CaseGuard Studio are specifically designed to make the process as easy as possible for users of the software. While the Compare feature with CaseGuard Studio is just one of these video editing features, there are a wide variety of other features that users of the system can leverage to both redact and enhance video content according to the specifications of the particular business or industry in which they work. This being said, the team at CaseGuard Studio works tirelessly to ensure that users and prospective clients alike are able to redact, enhance, and edit any file type at their fingertips.